

Second, heat from below acts on adhesives and click-lock joints in ways that surface-level temperature changes do not. Glue-down installations can experience adhesive creep at sustained temperatures. Floating installations can see locking systems loosen as the material expands and contracts in the vertical plane — the direction radiant heat most directly influences.
Understanding this distinction is the foundation for making every other decision correctly.
The Two Types of Radiant Heat Systems and How They Differ for Vinyl
Hydronic Radiant Heat
Hydronic systems circulate heated water through tubing embedded in the subfloor or within a concrete slab. They are the older, more common form of in-floor heating in residential construction. These systems heat more slowly, retain heat longer, and do not cycle as aggressively as electric systems. From a vinyl flooring perspective, they tend to produce more stable, gradual temperature changes — which is generally preferable.
The primary concern with hydronic systems is slab installation. The tubing is embedded in concrete, and concrete acts as a massive thermal mass. It takes longer to heat and longer to cool. If the system malfunctions or is set too high, the floor surface temperature can reach damaging levels before the homeowner notices. This makes thermostat positioning and calibration particularly important.
Electric Radiant Heat
Electric systems use resistance heating mats or cables installed beneath the floor surface. They heat quickly, cool quickly, and cycle more frequently than hydronic systems. This rapid cycling is harder on vinyl products — the repeated expansion and contraction events accumulate over time.
Electric systems are also installed in a thinner profile, often directly beneath the floor covering with minimal buffer. This means the heat source is closer to the back of the vinyl plank, and the temperature at the plank surface can respond more immediately to changes in system output.
Both systems can work with vinyl flooring, but electric systems require more attentive thermostat management and leave less margin for error.
Surface Temperature Limits: What the Numbers Mean in Practice
Nearly every vinyl flooring manufacturer specifies a maximum subfloor surface temperature for their products. The most common threshold is 85°F (29°C), though some premium products allow up to 95°F (35°C). A small number of SPC-core products are engineered for up to 100°F (38°C).
These numbers are not conservative recommendations — they are engineering limits. Exceeding them consistently will cause dimensional changes that manifest as buckling, joint separation, or permanent surface deformation. In glue-down installations, sustained heat above the adhesive’s working temperature will cause the bond to soften and fail, producing bubbles and loose sections.
The critical thing most homeowners miss: the temperature limit refers to the subfloor surface temperature, not the thermostat setpoint, not the room air temperature. A thermostat set to heat the room to 72°F does not tell you what the floor surface temperature is. Floor surface temperatures can run 10 to 20 degrees higher than the room air temperature they are generating. This is why measuring actual subfloor temperature with a surface thermometer before and during installation is a non-negotiable step.
Some manufacturers also specify a maximum rate of temperature change — typically no more than 5°F change per hour. Rapid cycling stresses the material even if the peak temperature stays within limits.
Which Vinyl Flooring Formats Perform Best Over Radiant Heat
SPC (Stone Plastic Composite)
SPC is the strongest performer in radiant heat applications among all vinyl flooring formats. Its core is made from limestone powder, PVC, and stabilizers pressed into an extremely dense, rigid board. The stone component reduces the thermal expansion coefficient significantly compared to pure PVC products. SPC planks expand and contract less per degree of temperature change than WPC or standard LVP.
SPC also has lower thermal resistance, meaning heat passes through it more efficiently. This makes SPC the preferred format when the primary goal is floor heating performance in addition to durability. You can read more about the full pros and cons of SPC flooring to understand why its core composition makes it distinctly more stable in thermally active environments.
WPC (Wood Plastic Composite)
WPC cores contain a foamed composite layer that provides cushioning and warmth underfoot. This same foam layer insulates against heat transfer — which is precisely the opposite of what you want in a radiant heat application. The insulating core means more heat is trapped beneath the plank and less reaches the room surface. It also means the bottom of the plank runs hotter than the top, increasing the temperature differential stress.
WPC can be installed over radiant heat if the system’s surface temperatures remain well within the 85°F threshold, but its thermal efficiency is lower, and the cushioned core is more vulnerable to deformation under sustained heat. Comparing SPC and WPC flooring in detail reveals exactly why the core material matters so much once heat is introduced as a variable.
LVT (Luxury Vinyl Tile) and LVP (Luxury Vinyl Plank)
Standard LVT and LVP products without a rigid composite core depend entirely on the thickness and density of their PVC construction for dimensional stability. Thinner products in the 2mm to 4mm range are more vulnerable to heat-induced warping. Products in the 6mm and above range with higher-density wear layers perform better, but they still expand more per degree than SPC.
The wear layer thickness on LVP flooring is a relevant factor here — thicker wear layers tend to correlate with denser, more heat-stable overall construction. A 12mil wear layer product will generally be more dimensionally stable under radiant heat than a 6mil product, all else being equal.
Sheet Vinyl
Sheet vinyl installed as a glue-down product is particularly vulnerable to radiant heat. The large format means expansion forces accumulate across a wide surface area with no relief points. If adhesive softens in any zone, the sheet can ripple, bubble, or delaminate from the edges inward. Sheet vinyl can be used over radiant heat, but it requires a full-spread adhesive rated for thermal applications, precise temperature management, and subfloor preparation that leaves no moisture or contamination that could accelerate adhesive failure.
Installation Method: How Your Choice Changes the Risk Profile
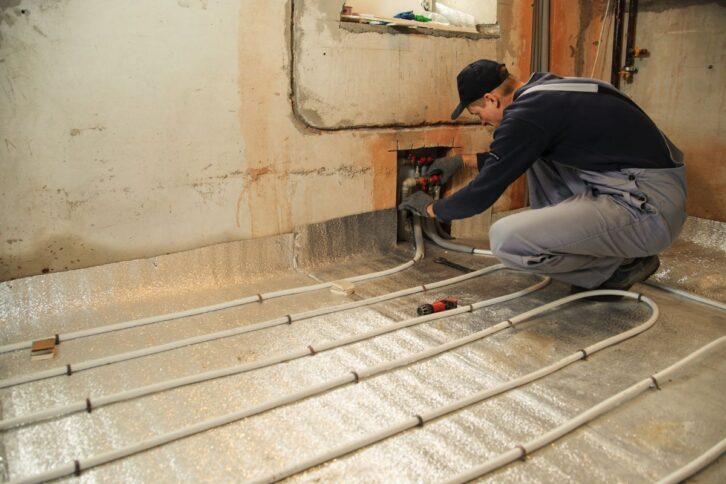
Floating Installation Over Radiant Heat
Floating installation, where planks lock together and the entire floor moves as a single unit without being adhered to the subfloor, is the most commonly recommended method for vinyl over radiant heat. It allows the floor to expand and contract as a collective assembly rather than fighting adhesive resistance. This reduces the risk of joint stress and surface deformation.
The critical requirements for floating installation over radiant heat are expansion gaps and underlayment selection. Expansion gaps must be maintained at all perimeter edges, doorways, and any fixed obstacle. Radiant heat systems will cause the floor to expand more consistently and more significantly than a passively heated room. If gaps are insufficient, the floor has nowhere to go and will buckle upward at the weakest point. Understanding click-lock versus glue-down installation for vinyl in detail helps clarify when each method is the stronger choice.
Glue-Down Installation Over Radiant Heat
Glue-down vinyl requires an adhesive that maintains its bond strength across the full operating temperature range of the heating system. Standard pressure-sensitive adhesives are often not rated for sustained elevated temperatures. Using the wrong adhesive is one of the most common failure modes in radiant heat installations.
For hydronic systems with stable, moderate temperatures, glue-down can work well with the correct adhesive. For electric systems that cycle frequently or run at the higher end of the temperature range, floating installation is the safer choice unless the product manufacturer specifically endorses glue-down on radiant heat with a tested adhesive product.
Choosing the right adhesive is not a minor detail. The best adhesive for vinyl flooring on different substrates varies by application, and a radiant heat subfloor is a distinct category that requires checking the adhesive manufacturer’s thermal rating, not just the flooring manufacturer’s approval.
Underlayment: The Component Most People Get Wrong
Underlayment under vinyl flooring over radiant heat requires a counterintuitive mindset. In most other flooring applications, thicker and denser underlayment is better — it provides cushioning, sound absorption, and thermal insulation. Over radiant heat, thermal insulation in the underlayment is the enemy of system performance and the enemy of floor stability.
An underlayment with a high TOG rating (thermal resistance) blocks heat from reaching the floor surface. This forces the heating system to run longer and at higher output to achieve the same room temperature — which means the subfloor surface temperature rises higher than it would if the underlayment had low thermal resistance. The floor and the heating system are working against each other.
The guidance for underlayment over radiant heat is: use the thinnest underlayment compatible with the subfloor condition, ensure it has a low TOG value (most manufacturers specify maximum TOG values in their radiant heat installation instructions), and never layer multiple underlayment products. Many SPC products come with a pre-attached underlayment that is already calibrated for radiant heat compatibility. Adding a second layer beneath those products immediately voids the thermal performance specifications.
The broader question of choosing the right underlayment for vinyl flooring involves multiple variables, but radiant heat application is the one where getting this decision wrong has the most direct consequences for both system efficiency and floor longevity.
Acclimation Before Installation
Acclimation requirements for vinyl over radiant heat are more demanding than standard installation. Standard vinyl acclimation typically calls for the product to sit in the installation environment at room temperature for 24 to 48 hours. Over radiant heat, proper acclimation means exposing the product to the actual operating conditions of the heating system before installation begins.
This means the heating system should be running at normal operating temperature for at least 48 to 72 hours before installation, and the vinyl should be stored in the heated space during that period. After installation, the heating system should be shut off or reduced to its lowest setting for the first 24 hours to allow adhesives to set (glue-down) or joints to stabilize (floating) before normal operation resumes. The system should then be gradually increased to operating temperature over several days rather than returned to full output immediately.
Skipping this step is common and produces predictable results: joints that gap as the floor expands after the heating system comes back to full operation, or buckling where the newly installed floor did not have the opportunity to establish dimensional equilibrium before being subjected to heat.
What Radiant Heat Does to Vinyl Over Time: The Long-Term Picture
Even within specified limits, radiant heat systems subject vinyl flooring to more cumulative thermal cycling than passively heated environments. Over years of operation, this produces measurable effects that owners should anticipate rather than be surprised by.
Joint performance is the most commonly observed long-term effect. Click-lock joints that were tight at installation may develop small gaps after several heating seasons, particularly in glue-free floating installations. This is not necessarily a failure — it is the expected behavior of a thermoplastic material that has been cycling through expansion and contraction repeatedly. Products with tighter joint tolerances and higher core density (SPC) resist this better than products with larger expansion coefficients (WPC, standard LVP).
Color and surface sheen changes are less common with modern vinyl but can occur if surface temperatures are consistently near the upper limit. UV-related fading is a separate issue — see how to keep luxury vinyl plank from fading for guidance on managing environmental factors that affect surface appearance over time.
Adhesive performance in glue-down installations will degrade faster than in non-radiant applications. Planning for eventual re-adhesion at edges and high-traffic zones after 10 to 15 years of service over a radiant system is realistic maintenance planning, not premature pessimism.
Manufacturer Warranty Compliance: What Voids Coverage
This is where the practical and the contractual intersect in ways that matter financially. Most major vinyl flooring manufacturers offer warranties that explicitly address radiant heat installation. Reading these sections carefully before purchase is not optional — it is the step that determines whether you have coverage if something goes wrong.
Common warranty conditions that apply to radiant heat installations include: maximum subfloor surface temperature (typically 85°F, sometimes 80°F for specific products), prohibition on installation directly over electric heating mats without a thermal break, requirement for specific adhesives when glue-down is specified, maximum underlayment TOG values, and prohibition on installation before the heating system has been tested and balanced.
Installing a vinyl product that is not explicitly approved for radiant heat over a radiant system voids the warranty regardless of whether the temperature limits are respected. The manufacturer’s engineering approval — or lack of it — is a separate question from temperature compliance. Both conditions must be met.
Some manufacturers additionally require that installation is performed by a certified installer for warranty coverage on radiant heat applications. This is less common but worth verifying for premium product lines.
The Concrete Subfloor Variable
Radiant heat is most common in concrete slab construction — either new builds with in-slab tubing or retrofitted electric mats over existing concrete. Concrete introduces moisture management requirements that layer on top of the thermal management requirements.
Concrete slabs with in-slab heating have been through thermal cycling since the home was built, which typically means any significant moisture migration has already occurred. However, slab moisture testing before vinyl installation is still mandatory. Heat accelerates moisture migration through concrete. A slab that passes a moisture test in an unheated state may fail the same test when the heating system is operational. Testing must be conducted with the heating system running at normal operating temperature to reflect real-world conditions.
The preparation required for a concrete subfloor before any vinyl installation, with the additional thermal considerations described above, makes slab flatness and moisture compliance the foundation of everything else. Understanding how to prepare a concrete subfloor for vinyl flooring properly covers the sequence that prevents moisture and flatness failures from becoming radiant heat failures.
Five Scenarios Where Vinyl Over Radiant Heat Fails — and Why
Understanding failure modes is the most efficient way to prevent them. These are the five most common scenarios where vinyl over radiant heat produces poor results.
The first is exceeding the surface temperature limit without knowing it. The homeowner sets the thermostat to a comfortable room temperature and never measures the floor surface. Over years of operation, the floor slowly deforms, joints gap, or edges lift. The cause is only identified retroactively when the damage is already distributed across the floor.
The second is using an insulating underlayment. A 3mm foam underlayment with high TOG value forces the system to compensate by running hotter. The floor surface eventually reaches temperatures that would have been safe with a thinner, less insulating underlayment. The installer made the decision thinking it would protect the floor; it did the opposite.
The third is skipping acclimation in a heated space. Planks are installed in a room where the heating system has been off for several days to accommodate the work. The system is returned to normal operation shortly after installation. The floor expands more than the expansion gaps can accommodate and buckles within weeks.
The fourth is using a standard pressure-sensitive adhesive in a glue-down installation. The adhesive performs normally at first, then softens as the heating season begins. Within one or two heating cycles, sections of the floor develop adhesive failure, producing bubbles and lifting edges.
The fifth is installing a WPC or cushion-backed LVP product without checking the manufacturer’s radiant heat approval. The product performs adequately at first but progressively develops joint separation as the foam core softens over repeated heating seasons. By the time the problem is visible, the warranty has been voided by the non-compliant installation.
Practical Checklist Before Installation
Before purchasing vinyl flooring for installation over radiant heat, work through each of these items:
Confirm that the specific product SKU — not just the product line — is approved for radiant heat installation. Approval at the line level does not always extend to every thickness and format within that line.
Verify the maximum subfloor surface temperature specified in the manufacturer’s installation guide, then measure your actual subfloor surface temperature at the heating system’s normal operating setpoint. Add a safety margin of at least 10°F below the published limit.
Identify the correct underlayment. If the product comes with pre-attached underlayment, confirm whether additional underlayment is prohibited. If it is not pre-attached, obtain the manufacturer’s maximum TOG value and select a product that complies.
For glue-down installations, identify the adhesive the manufacturer recommends for radiant heat applications specifically. Confirm that adhesive’s thermal working range matches your system’s operating temperature.
Plan the acclimation period. Schedule at least 48 to 72 hours with the heating system running at normal operating temperature before installation begins. Plan to reduce the system after installation and gradually ramp back up.
Confirm expansion gap requirements for radiant heat conditions — these are often larger than the standard recommendation for the same product installed over a passively heated subfloor.
Comparing Vinyl to Other Flooring Over Radiant Heat
Vinyl is not the only flooring option over radiant heat, and the context of how it compares to alternatives is useful for making an informed decision. Tile and stone are the optimal radiant heat floor coverings — they have essentially zero thermal expansion concerns and low thermal resistance, making the heating system maximally efficient. The tradeoff is hardness underfoot, cold initial touch in the seconds before the heating system maintains surface temperature, and installation cost.
Hardwood flooring over radiant heat is genuinely difficult. Solid hardwood is poorly suited — the dimensional movement across the width of boards is incompatible with the thermal cycling that radiant systems produce. Engineered hardwood performs better but still has significant constraints. For context, see how hardwood flooring performs over radiant heating systems — the comparison illustrates why vinyl’s thermoplastic nature, despite its temperature sensitivity, is actually an advantage over wood’s hygroscopic movement.
Laminate flooring over radiant heat is a middle-ground situation with its own set of constraints. The HDF core is susceptible to moisture and heat interactions that vinyl does not face.
Vinyl — particularly SPC — occupies a useful position in this comparison: it is not as thermally ideal as tile, but it is meaningfully more forgiving over radiant heat than wood or laminate when the correct product is selected and installation protocols are followed precisely.
What This Means for Your Decision
Vinyl flooring over radiant heat is a well-supported application when approached systematically. The products exist, the installation protocols are established, and the failure modes are well-documented and avoidable.
The combination requires more due diligence than standard vinyl installation. Product selection cannot be made on aesthetics and price alone — the specific thermal ratings of the product you purchase determine whether the installation is viable. Installation method, underlayment selection, adhesive selection, acclimation, and expansion gap management are all more consequential than in non-radiant applications.
If you are evaluating vinyl flooring for a room with radiant heat in San Diego, the local climate adds one mitigating factor: radiant systems in San Diego run far less aggressively than in cold climates, meaning the cumulative thermal cycling exposure over a year is significantly lower. This extends the practical service life of any vinyl-over-radiant-heat installation and reduces the likelihood of adhesive or joint stress failures. It does not, however, eliminate the requirement to select the right product and follow radiant heat installation protocols.
The investment in getting this decision right at the selection and installation stage is considerably smaller than the cost of addressing a floor that has buckled, gapped, or delaminated after one or two heating seasons.


