If there’s one thing I’ve learned in all my years working with floors, it’s that the little details make the biggest difference. You can lay down the most beautiful laminate, tile, or hardwood in the world — but if you skip the transition strips, it’s like wearing a tuxedo with sneakers. Sure, it technically works, but something just feels… unfinished.
Transition strips may not steal the spotlight, but they play a starring role in giving your flooring that smooth, polished look. Simply put, they’re the bridge between two different flooring types or between rooms. They cover gaps, help manage height differences, and make the space safer by preventing tripping hazards. Think of them as the peacemakers — keeping your floors looking harmonious, even when materials clash.
I remember the first time I installed laminate in my own living room and connected it to the kitchen tile without a strip. It looked okay at first, but after a few weeks, I noticed tiny chips on the edges and that unsightly gap starting to widen. That’s when I realized — a job half done is a job not done at all. Since then, I never leave a floor without a proper transition strip in place.
Why Transition Strips Are Important
You know the saying, “The devil’s in the details”? Well, that couldn’t be truer when it comes to flooring. Transition strips might look like a minor add-on, but they’re actually the unsung heroes that make a huge difference in both appearance and function. Without them, even the most skillfully installed floor can look rough around the edges — literally!
First off, transition strips are safety champions. They help eliminate tripping hazards by creating a smooth connection between two surfaces of different heights. Whether it’s from hardwood to tile or laminate to carpet, these little strips ensure your foot doesn’t catch on an uneven edge. In homes with kids or elderly family members, that’s not just a nice-to-have — it’s a must.
They also serve a practical purpose by covering expansion gaps. Most flooring types, especially laminate and hardwood, expand and contract with temperature and humidity changes. Those gaps you leave along the edges? They need breathing room — and a transition strip keeps them hidden while allowing movement underneath. Without it, your floor could buckle or separate over time, and trust me, that’s a headache you don’t want.
Aesthetically, transition strips act like the icing on the cake. They give your flooring a clean, finished look and help visually separate spaces without breaking the design flow. In open-concept homes, for example, using a matching or complementary strip between the kitchen tile and living room laminate helps maintain continuity while defining each area.
And let’s not forget durability. Floor edges are vulnerable to wear and tear, especially in high-traffic spots like doorways or hall transitions. A well-chosen transition strip protects those edges, saving you from costly repairs down the road.
So, while they might seem like small fry, transition strips are what keep your flooring looking sharp, safe, and seamless. In short, they’re the bridge between beauty and function — the finishing touch that makes your floors stand the test of time.
Common Materials Used for Transition Strips
When it comes to transition strips, the material you choose can make all the difference — not just in how it looks, but in how long it lasts. I’ve often said, “You can’t judge a book by its cover, but you sure can judge a floor by its transitions.” From sleek aluminum to classic wood, each material brings its own strengths to the table (or, should I say, the floor).
Let’s break down the most common materials and where they shine:
1. Aluminum or Metal Transition Strips
These are the tough guys of the flooring world — sturdy, durable, and ideal for high-traffic areas like entryways, kitchens, and commercial spaces. I like using aluminum strips when I want a modern, industrial finish that can take a beating without losing its shine. They’re resistant to moisture and corrosion, making them perfect for spots where spills or humidity are common.
2. Wood Transition Strips
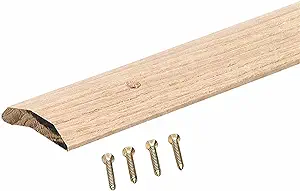
If you’re connecting hardwood to another hard surface (like tile or laminate), wooden strips are a no-brainer. They blend beautifully with the floor, especially if stained to match. I always say, “Wood on wood keeps the look good.” They offer a warm, natural touch and give a sense of continuity across rooms. The only downside? They’re more sensitive to moisture, so they’re not ideal for bathrooms or laundry areas.
3. Vinyl or PVC Transition Strips
When budget and flexibility matter most, vinyl or PVC strips step up to the plate. These are the chameleons of the flooring world — they can mimic the look of wood or metal at a fraction of the price. I often use them in homes where the subfloors are slightly uneven since vinyl has a bit of give. Plus, they’re water-resistant, easy to cut, and a breeze to install — a DIYer’s dream!
4. Rubber Transition Strips
Rubber strips are popular in commercial settings or high-traffic areas like gyms, hospitals, and offices. They’re slip-resistant, easy to clean, and provide excellent shock absorption. I like to think of them as the “silent protectors” — doing their job quietly while keeping things safe and durable.
When choosing a material, think beyond just color or finish. Consider how much traffic the area gets, how much moisture it’s exposed to, and what kind of look you’re going for. A shiny metal strip might look great in a modern kitchen, but a warm wooden one may suit your living room better.
Different Types of Transition Strips
Now we’re getting into the real nuts and bolts — the different types of transition strips. You might be surprised to learn that there’s a whole range of them, each serving a specific purpose. Choosing the right one isn’t just about aesthetics; it’s about practicality, too. I’ve often told homeowners, “Pick the wrong strip, and you’ll trip — pick the right one, and it’ll fit like a glove.”
Below are the most common types I’ve worked with, along with when and where to use them.
T-Molding Transition Strip
The T-molding is probably the most recognizable type. Shaped like the letter “T,” it’s used when connecting two floors of equal height — for example, laminate to laminate, or hardwood to hardwood. You’ll often see it in doorways or between open-concept spaces where the flooring changes but stays level.
What I love about T-moldings is how seamlessly they blend into the flooring, giving the illusion of one continuous surface. Installation is straightforward — leave a small expansion gap between the two floors, then snap or glue the molding into place. “A smooth transition keeps the peace,” as I like to say, and this one does exactly that.
Reducer Strip
Now, when two flooring types aren’t on the same level — say, hardwood meeting vinyl or tile — that’s where a reducer strip comes in handy. It gently slopes from the higher floor down to the lower one, eliminating abrupt edges.
There are two main types: flush reducers (for glued-down floors) and overlapping reducers (for floating floors). I once had a client who tried using a T-molding instead of a reducer between tile and vinyl — it looked off and wasn’t safe. Swapped it for a reducer, and voilà, problem solved. It’s the perfect example of “bridging the gap without missing a beat.”
Threshold or End Cap
Sometimes called a baby threshold, this type of transition strip is used where the floor meets a vertical surface — like sliding glass doors, fireplaces, or carpeted areas. Think of it as a neat “end cap” that finishes off the flooring edge beautifully.
I often use thresholds when a floating floor meets a transition that can’t move (like a fixed tile or door frame). It provides that crisp, professional look that says the job was done right — because it was.
Stair Nose (or Bullnose Trim)
If you’re installing new flooring on stairs, this is your best friend. A stair nose (or bullnose) creates a safe, rounded edge at the step’s lip, preventing wear and giving the stairs a finished appearance.
There are two main kinds — flush stair noses (which sit level with the flooring) and overlap stair noses (which slightly cover the edge). Aside from safety, they also enhance durability since stair edges take the most impact. As I like to say, “Better safe than sorry — especially when stairs are involved.”
Multi-Purpose Transition Strip
For homeowners who like flexibility, multi-purpose or “universal” strips are a lifesaver. They work with all kinds of flooring combinations — tile to vinyl, laminate to carpet, or even uneven surfaces.
Many come with adjustable bases or track systems, allowing you to tweak the height difference for a perfect fit. I’ve used these often in renovation projects where floor heights vary slightly between rooms. It’s the jack-of-all-trades of transition strips — and a handy one at that.
Carpet to Tile/Hard Surface Transition Strip
This one does exactly what the name says — it connects carpet to tile, laminate, or vinyl. The metal version has a small channel that clamps the carpet edge tightly, keeping it from fraying or pulling loose.
Vinyl versions, on the other hand, offer a softer, cleaner look for residential settings. I’ve seen too many carpets unravel where a transition strip was skipped — and let me tell you, that’s where the threads start to show. A good carpet-to-hard-surface transition keeps everything neat and tidy.
Vinyl-to-Vinyl or Tile-to-Vinyl Seam Binder
These are flat strips that connect two vinyl floors or a vinyl and tile surface of similar height. They’re simple, subtle, and perfect for low-traffic areas where you want a smooth, barely-there transition.
They also come in self-adhesive versions, which are super easy to install — just peel and stick. I often recommend these to DIYers who want to give their space a clean, continuous look without needing special tools.
When you think about it, transition strips are like the punctuation marks of your floor — they help the design pause, connect, and flow naturally. Each type has its own role, and once you know which one fits where, your floors will look like they were installed by a pro — even if you did it yourself.
Choosing the Right Transition Strip
Choosing the right transition strip isn’t just about picking the one that looks good — it’s about finding the one that works best for your specific floors. I’ve seen people spend hours picking flooring colors but only seconds choosing a transition strip, and believe me, that’s like putting ketchup on a fine steak. The wrong choice can ruin an otherwise beautiful floor.
Here’s how I approach it: I always start by looking at the height difference between the two floors. If they’re level — say, laminate to laminate or hardwood to hardwood — I’ll go with a T-molding for a smooth, even transition. But if one floor sits higher than the other, that’s where reducer strips or multi-purpose transitions come into play. They even out the slope and keep your step comfortable and safe.
Next up is traffic level. In high-traffic zones like hallways or entryways, durability is key. I usually lean toward metal or hard vinyl strips that can take daily wear and tear without showing scratches or dents. For quieter, cozy spaces like bedrooms, wooden or PVC trims add warmth and charm without needing industrial-level strength.
Then there’s moisture exposure — an often-overlooked factor. Bathrooms, laundry rooms, and kitchens demand water-resistant materials like aluminum or vinyl, while dry spaces are perfect for wood or laminate strips. It’s all about using the right tool for the job, or as I like to say, “Don’t bring a knife to a gunfight.”
Aesthetic appeal also plays a big part. You want your transition to blend in seamlessly with your floors, not stand out like a sore thumb. I usually match the color and finish of the strip with at least one of the floor materials — or choose a neutral tone like brushed nickel or beige that complements both sides. It’s the subtle touches that make a space feel professionally done.
And finally, before locking it in, I always test fit the strip. It’s a simple step that saves a lot of headaches later. You’ll want to measure twice, cut once — because once that adhesive or track is down, there’s no going back.
Transition strips play a crucial role in flooring, seamlessly connecting different materials and elevating the aesthetics of a space. In this comprehensive guide, we will delve into the various types of transition strips available in the market, their purposes, and essential tips for their installation.
Transition strips serve multiple purposes, making them an indispensable element in flooring projects. They smooth the transition between different flooring materials, enhance safety by preventing tripping hazards, and contribute to the overall aesthetic appeal of a space.
Common Types of Transition Strips
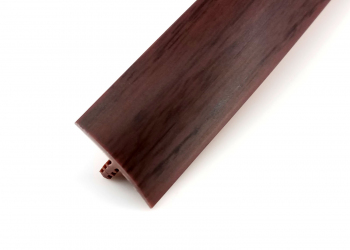
T-Molding
T-molding is a versatile transition strip that plays a crucial role in seamlessly connecting two floors of equal height. Its name is derived from its T-shaped profile, which effectively bridges the gap between different flooring materials. This type of transition strip is commonly used in doorways and entryways, providing a smooth and visually appealing transition. T-molding not only enhances the aesthetics of a space but also serves a practical purpose by preventing wear and damage to the edges of the flooring.
Installation of T-molding involves precision cutting and careful placement. It is crucial to ensure a snug fit to guarantee a secure connection between the two surfaces. The result is a polished and professional transition that not only looks good but also contributes to the longevity of the flooring.
Reducer Strips
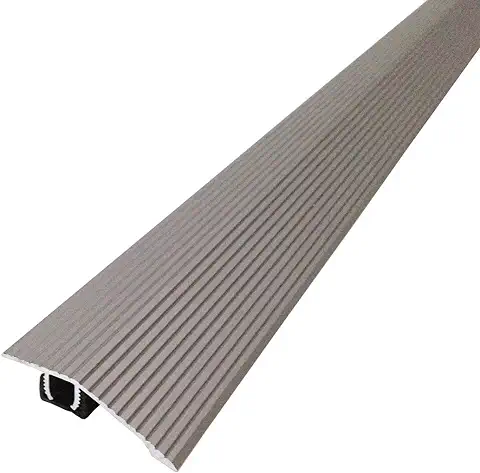
Reducer strips are designed to address the challenge of transitioning between flooring materials of unequal heights. When moving from a higher surface, such as hardwood, to a lower one, like carpet or tile, a reducer strip provides a gentle slope, creating a seamless and safe transition. This type of strip is particularly useful in spaces where the aesthetic continuity between different flooring types is desired.
Installing a reducer strip requires careful consideration of the height difference between the two surfaces. Proper measurements and precise cutting are essential for achieving a smooth and visually pleasing transition. Reducer strips not only add a finishing touch to the flooring project but also contribute to the overall safety and accessibility of the space.
Threshold Strips
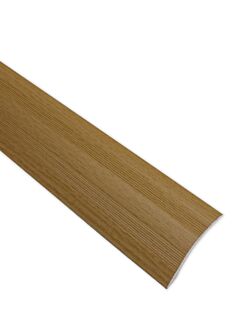
Threshold strips are indispensable in doorways and entry points where different flooring materials meet. These strips provide a clean and polished transition while preventing tripping hazards and protecting the edges of the flooring. Threshold strips are available in various materials and finishes, allowing for customization to match the overall design and style of the space.
Installing threshold strips involves securing them in place, ensuring a stable and level connection between the two surfaces. The result is a seamless transition that not only enhances safety but also adds a touch of elegance to the transition area. Threshold strips are a practical and aesthetic solution for creating cohesive flooring transitions in both residential and commercial settings.
End Cap Strips
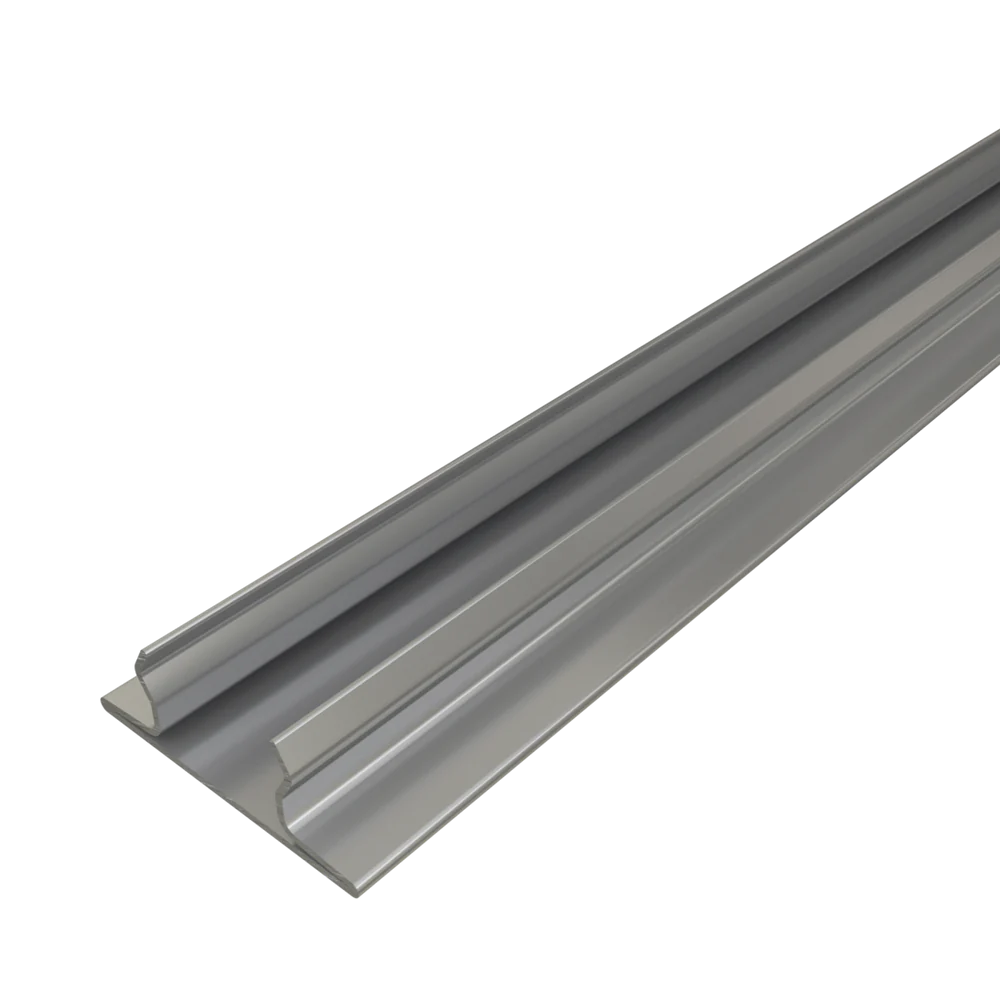
End cap strips, also known as square nose transitions, are designed to address the transition from flooring to a vertical surface, such as a staircase or a fireplace hearth. These strips provide a finished look to the edge of the flooring, creating a clean and visually appealing transition. End cap strips are often used in spaces where the flooring extends to a higher or lower level, requiring a transition that is both functional and aesthetically pleasing.
Installing end cap strips involves careful measurement and precise cutting to achieve a seamless connection. These strips not only serve a practical purpose by protecting the edges of the flooring but also contribute to the overall design cohesiveness of the space. End cap strips are a versatile solution for creating polished transitions in areas with varying floor levels.
Carpet Transition Strips
Carpet transition strips, also known as carpet bars or gripper strips, are specifically designed to address the transition between carpet and other flooring materials. These strips play a vital role in securing the edges of the carpet, preventing fraying and ensuring a clean transition between different surfaces. Carpet transition strips are available in various profiles, allowing for customization to match the style and design of the space.
Installing carpet transition strips involves securing them along the edge of the carpet and adjacent flooring material. The result is a tidy and secure transition that not only enhances the durability of the carpet but also contributes to the overall aesthetics of the space. Carpet transition strips are a practical and functional solution for creating seamless transitions between carpeted and non-carpeted areas.
DIY Installation Tips
For those embarking on a do-it-yourself flooring project, proper installation of transition strips is essential. Here are some tips to ensure a seamless and professional finish:
Tools and Materials Needed: Before commencing the installation, make sure you have all the necessary tools and materials on hand. This typically includes a saw appropriate for your flooring types, a measuring tape, an adhesive suitable for the specific transition strip, and any additional fasteners recommended by the manufacturer. Having the correct tools ensures a smoother installation process.
Step-by-Step Installation Guide: Each type of transition strip may have specific installation requirements, so it’s crucial to follow a detailed step-by-step guide. Begin by measuring the space accurately and cutting the strip to the appropriate length. Clean the area where the strip will be installed, removing any debris that might affect the adhesion. Apply the recommended adhesive, align the strip properly, and press it into place. If the manufacturer suggests additional fasteners, use them according to the provided instructions.
Common Mistakes to Avoid: Learning from common mistakes can save you time and frustration during the installation process. Some frequent errors include inaccurate measurements, using the wrong type of strip for the flooring materials, or neglecting to secure the strip adequately. Take the time to understand the unique characteristics of the transition strip you’re working with and follow the manufacturer’s guidelines closely.
Inaccurate Measurements: Measure twice, cut once. Ensure precise measurements to avoid issues with the fit and appearance of the transition strip.
Wrong Type of Strip: Each transition strip serves a specific purpose. Using the wrong type may lead to an unsatisfactory finish and compromise functionality.
Inadequate Securing: Whether using adhesive, nails, or screws, ensure the transition strip is securely fastened. Neglecting this step may result in instability and a less durable installation.
Ignoring Manufacturer Instructions: Manufacturers provide specific instructions for a reason. Ignoring these guidelines can lead to installation problems, so carefully follow the provided recommendations.
Final Thoughts
Transition strips are essential components in flooring projects, serving both functional and aesthetic purposes. By understanding the various types available and following proper installation and maintenance guidelines, you can achieve a seamless and visually pleasing transition between different flooring materials in any space.


