
Over the years, I’ve had countless homeowners ask me, “Can I lay laminate flooring right over my tiles?” And honestly, it’s a fair question — ripping out old ceramic or porcelain tile can feel like opening a can of worms. The dust, the noise, and the sheer effort can make anyone think twice before starting. So, if you’re wondering whether you can skip the demolition and float your new laminate floor right on top of the old tile — the good news is, you often can!
Installing laminate over tiles can be a real lifesaver, both in terms of time and money. But — and it’s a big but — only if the existing tiles are in good shape. You can’t just sweep the dirt under the rug, so to speak. The surface beneath your laminate has to be smooth, level, and sturdy, or you’ll be setting yourself up for trouble down the road.
Can You Really Install Laminate Flooring Over Tiles?
Absolutely — you can install laminate flooring over tiles, and in many cases, it’s a practical and efficient choice. The secret lies in the nature of laminate flooring itself. Since laminate is a floating floor system, it doesn’t need to be nailed or glued to the surface beneath. Instead, it simply rests on top of the existing floor, using interlocking planks that click together like puzzle pieces. That means as long as the tile floor underneath is stable, level, and free from major cracks or looseness, laminate can sit beautifully right over it.
I like to think of it this way: your tile floor becomes the foundation for your new flooring adventure. If that foundation is strong, you’re off to the races. But if it’s cracked, uneven, or sounds hollow when you tap it, you’re skating on thin ice. Laminate flooring may be forgiving, but it can’t perform magic over a damaged sub-surface — every bump, dip, or loose tile beneath will eventually show itself on the surface.
There are also a few special cases to keep in mind. For example, in high-moisture areas like bathrooms or laundry rooms, installing laminate over tile can be risky because moisture trapped underneath can cause warping or swelling. Similarly, if your tile floor is significantly uneven (more than 3mm difference per 1 meter), it’s better to level it first or consider removing it altogether.
So yes — laminate over tile is absolutely doable, but only if you play your cards right. The goal here is to ensure that your new floor not only looks good but lasts long. In the next section, I’ll break down why so many homeowners — myself included — see this method as a win-win, and the advantages that make it worth considering.
Advantages of Installing Laminate Over Tiles
Installing laminate flooring over existing tiles comes with more than a few feathers in its cap. For many homeowners, it’s a shortcut that doesn’t cut corners — if done right, you can save time, money, and a whole lot of hassle. I’ve seen plenty of clients breathe a sigh of relief when they realize they don’t have to jackhammer their old floors to get that fresh, modern look they’ve been dreaming of. Let’s break down the biggest perks.
No Demolition Mess
One of the best things about laying laminate over tile is skipping the demolition altogether. Anyone who’s ever removed ceramic or porcelain tiles knows it’s not for the faint-hearted — dust flying everywhere, heavy debris, and endless cleanup. By installing directly over the tiles, you sidestep all that chaos. It’s a bit like taking a shortcut through the woods and still ending up at the same beautiful destination.
Saves Time and Labor Costs
When you remove tiles, you’re not just paying for the removal — you’re also dealing with the cost of disposal and subfloor preparation afterward. By keeping the tiles in place, you can jump straight to the installation phase. I’ve found that this approach can shave days off a flooring project and trim down your overall budget significantly.
Adds Warmth and Comfort Underfoot
Tile floors, especially ceramic or porcelain, tend to feel cold and hard underfoot. Adding laminate over them introduces an extra layer — the underlayment plus the laminate planks — which provides better insulation and a bit of spring in your step. It’s like putting on a cozy pair of socks after walking barefoot on cold tiles all winter long.
A Fresh, Modern Look Without a Full Renovation
If your tiles are outdated or simply don’t match your decor anymore, laminate flooring offers an instant makeover. With today’s designs mimicking hardwood, stone, or even patterned finishes, you can transform your space without tearing it apart. It’s an upgrade that’s easy on the eyes and your wallet.
Great for Covering Minor Imperfections
Laminate flooring can smooth over small imperfections like light scratches, dull patches, or minor grout dips in your tiles — as long as the overall surface is level. Combined with a proper underlayment, you can achieve a seamless, polished finish without needing to grind or regrout anything.
All in all, installing laminate over tile can be a real “two birds with one stone” solution — you skip the mess, save money, and walk away with a beautiful new floor. But as with most things, there’s a flip side to the coin. Let’s take a look at some of the drawbacks and common issues before diving into the installation process.
Disadvantages and Common Issues
Now, while installing laminate over tiles can seem like a dream come true, it’s not always smooth sailing. Every shortcut comes with a few bumps in the road, and it’s best to know them before diving in headfirst. I always tell my clients — “measure twice, cut once,” and that goes for planning too. So before you roll out your underlayment and start clicking those planks together, here are the key disadvantages and common pitfalls to consider.
Raised Floor Height
This is one of the most common issues that catches homeowners off guard. By adding a layer of underlayment and laminate on top of the tile, your floor height can increase by half an inch or more. That might not sound like much, but it can cause headaches when it comes to door clearance, baseboards, and transitions to other rooms.
In some cases, doors may need trimming or hinges adjusted, especially in older homes where tolerances are tight. I’ve seen more than one project where the laminate went in beautifully — only to find out the closet door wouldn’t shut properly afterward.
Possible Hollow Sound or Flexing
If your tile floor isn’t perfectly level, you might notice a hollow or “clicky” sound when walking on the laminate. This happens when there are small air gaps between the underlayment and uneven tile surface. It can also cause certain spots to flex or feel spongy underfoot.
To prevent that, you’ll need to check your tiles with a long straightedge and fill any low areas before installing. Think of it like laying a foundation — even the smallest dips can come back to haunt you later.
Moisture Concerns
Tiles themselves are generally moisture-resistant, but the grout lines between them can trap moisture or allow it to seep upward, especially in kitchens or bathrooms. If water finds its way under the laminate, it can lead to swelling, warping, or even mold growth.
To play it safe, always use an underlayment with a built-in moisture barrier, and make sure the area is completely dry before installation. If there’s any sign of water damage or leaks, fix it before going further — it’s better to nip it in the bud than deal with costly repairs down the line.
Difficulty Hiding Deep Grout Lines
Deep or wide grout lines can make your laminate floor uneven if not addressed. Even though laminate is forgiving, it’s not designed to span over significant dips. Over time, this can lead to plank movement or joint separation.
You can smooth out the surface by applying a thin leveling compound or using a high-quality foam underlayment that compensates for slight variations. Skipping this step is like sweeping dirt under the rug — it’ll come back to bite you.
Limited Suitability for Some Areas
While laminate can go over tile in most rooms, I don’t recommend it for high-moisture areas like bathrooms, laundry rooms, or basements with a history of dampness. Even with a moisture barrier, humidity and water spills can cause the edges of laminate planks to swell and lose their crisp look.
At the end of the day, the success of installing laminate over tile boils down to one thing — preparation. Get the base right, and you’ll be walking on air; skip the essentials, and you might be walking on problems.
Now that we’ve covered both sides of the coin, let’s roll up our sleeves and talk about how to actually install laminate flooring over tiles — step by step.
Step-by-Step: How to Install Laminate Flooring Over Tiles
When it comes to installing laminate flooring over tiles, preparation is half the battle. You can’t just slap new flooring on top and hope for the best — every step counts if you want a finish that’s sturdy, level, and long-lasting. Over the years, I’ve learned that a careful approach pays off in spades. Here’s how to do it right, one step at a time.
Step 1 – Inspect and Repair the Tile Surface
Before anything else, take a close look at your existing tile floor. Are there any cracked or loose tiles? Does it sound hollow when you tap on it? If so, that’s your red flag. You’ll need to replace or firmly reattach any damaged tiles — otherwise, those weak spots will transfer through the laminate over time.
Also, clean the tiles thoroughly to remove dirt, grease, and grime. Even small debris can cause laminate planks to sit unevenly or make annoying creaks later on. Think of this stage as setting the stage — if your base isn’t solid, your performance won’t shine.
Step 2 – Check the Level of the Floor
Laminate flooring needs a smooth, even surface to float properly. Use a long straightedge or a 6-foot level to check for dips or humps across the tile floor. Any variation greater than 3mm per meter (or about 1/8 inch over 3 feet) should be corrected.
For small dips, a foam underlayment might be enough to even things out. But if you’ve got deeper low spots, use a self-leveling compound to fill them. Just pour, spread, and let it cure according to the manufacturer’s directions. Don’t rush this step — I always say, “If you build on a wobble, you’ll walk on one too.”
Step 3 – Add the Right Underlayment
This is where the magic happens. The underlayment serves as a sound barrier, moisture barrier, and cushioning layer — all in one. It not only makes your laminate feel more comfortable underfoot but also helps absorb minor imperfections in the tile.
There are a few underlayment types to choose from:
- Foam underlayment: Great for minor unevenness and everyday use.
- Cork underlayment: Provides superior sound absorption and a bit more insulation.
- Combination (foam + vapor barrier): Ideal for tiled areas like kitchens, offering moisture protection and comfort.
Roll out the underlayment in the same direction you’ll be laying the planks, tape the seams securely, and make sure it covers every inch. Avoid overlapping edges, as this can create ridges that telegraph through the laminate.
Step 4 – Lay the Laminate Flooring
Now comes the satisfying part — laying down your new floor. Start in a corner and work your way out, using spacers to maintain an expansion gap (usually 1/4 inch) between the laminate and the wall. This gap is crucial, as laminate expands and contracts with temperature changes.
Most modern laminate flooring uses a click-lock system, which makes installation a breeze. Just angle one plank into another, click it into place, and keep your seams staggered at least 12 inches apart for a natural, seamless look.
Keep checking alignment as you go — a small misstep early can turn into a big problem by the end of the room. It’s like hanging wallpaper; once it starts crooked, it stays crooked.
Step 5 – Finish the Edges and Transitions
After all the planks are in, remove your spacers and install baseboards or quarter-round trim to cover the expansion gap. If your laminate meets a different flooring type (like carpet or tile in another room), use transition strips to ensure a smooth, professional look.
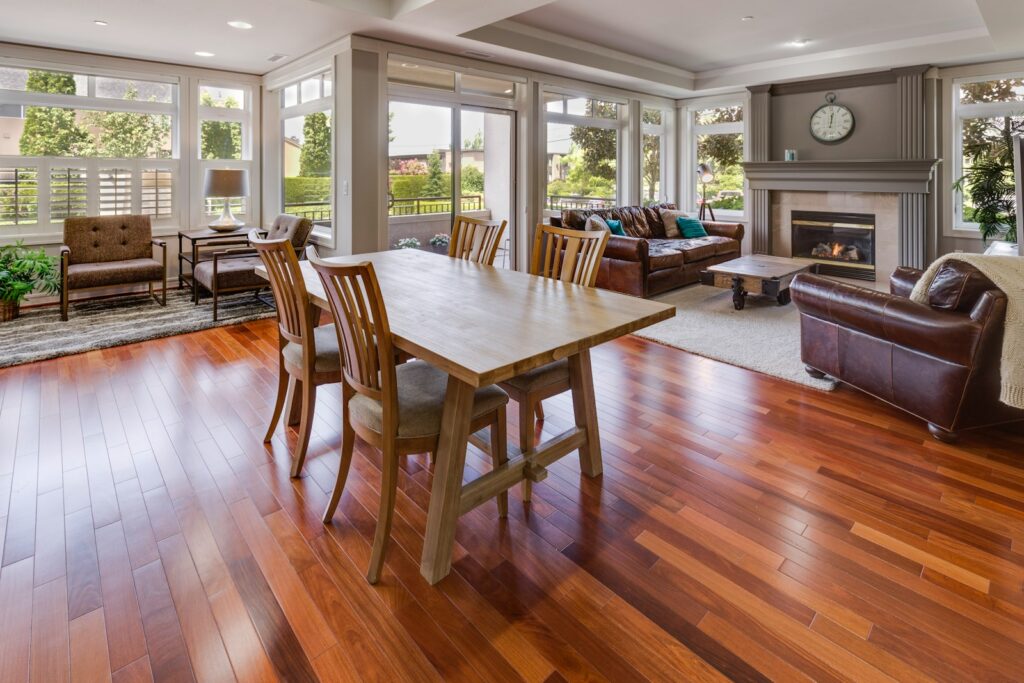
Once everything’s locked, trimmed, and cleaned — take a step back and admire your work. It’s always a good feeling seeing a dull, outdated tile floor transformed into something fresh and modern, all without a hammer and chisel in sight.
By following these steps carefully, you’ll not only save yourself a world of trouble but also ensure your new laminate floor feels as solid as if it were laid over a brand-new subfloor.
When You Shouldn’t Install Laminate Over Tiles
While installing laminate flooring over tile can be a great shortcut, it’s not a one-size-fits-all solution. There are times when it’s better to pull back the reins and rethink the plan. I’ve seen plenty of folks charge ahead thinking they’ll save time and money, only to end up spending more fixing problems later. As the saying goes, “an ounce of prevention is worth a pound of cure.” Here’s when you shouldn’t install laminate over tiles.
The Tile Floor Is Uneven or Damaged
If your tiles are cracked, loose, or uneven, that’s a big red flag. Laminate needs a stable, flat base to “float” properly. Any movement or unevenness below will eventually cause your laminate planks to separate, squeak, or even buckle.
A good rule of thumb: walk across your tile floor in a few directions. If you hear hollow sounds or feel dips underfoot, you’ll need to repair or replace those areas before laying laminate. Skipping that step is like building a house on shaky ground — it’ll come back to bite you.
There’s Too Much Height Buildup
If your tile floor is already thick and you add laminate plus underlayment, you might end up with a floor that’s noticeably higher than adjoining rooms. This can cause tripping hazards, uneven thresholds, or doors that won’t close properly.
Before you start, measure your floor height in relation to doorways, baseboards, and any connecting floors. If adding laminate would throw things out of balance, removing the tile or choosing a thinner flooring material might be your best bet.
You’re Installing in High-Moisture Areas
While laminate has come a long way, it still doesn’t love water. Even with a moisture barrier, humidity or standing water can seep through the seams and cause swelling or delamination. For bathrooms, laundry rooms, or damp basements, I always recommend sticking to vinyl plank or tile instead. Laminate looks great — until it gets wet.
The Existing Tile Has Deep Grout Lines
If your tile has wide, deep grout joints, those valleys can show through your laminate over time, creating a bumpy surface. Sure, underlayment can mask small imperfections, but if the grout lines are especially deep, you’ll need to level them with a compound first. Otherwise, you’ll end up with planks that click today but gap tomorrow.
Radiant Heating Compatibility Issues
If you’ve got radiant heat under your tile floor, make sure your laminate is specifically rated for that use. Not all laminate products can handle the heat — literally. Using the wrong type can lead to expansion, warping, or even void your warranty. Always check the manufacturer’s specifications before you start.
At the end of the day, knowing when not to install laminate over tiles is just as important as knowing when you can. Sometimes, taking the long road — like removing old tiles first — saves you from a rocky journey ahead.
Tips From Experience
After years in the flooring business, I’ve learned that the devil is in the details. Installing laminate flooring over tile might sound straightforward, but a few small tweaks can make a world of difference between a job that just looks good — and one that lasts. Here are some hard-earned tips from the field that can help you avoid rookie mistakes and get a flawless finish every time.
Use a Quality Underlayment — Don’t Skimp
If there’s one place not to cut corners, it’s the underlayment. It’s not just a cushion; it’s your first line of defense against noise, cold, and moisture. I always recommend using a combination foam underlayment with a vapor barrier, especially when going over tile. It absorbs minor unevenness and helps keep the laminate stable underfoot. Think of it as the unsung hero beneath your beautiful new floor.
Acclimate Your Laminate Before Installation
Laminate flooring needs to adjust to the temperature and humidity of your home before installation. I can’t tell you how many times I’ve seen floors buckle or gap because this step was skipped. Let the unopened boxes sit in the room for at least 48 hours, laid flat, so the material can settle in. It’s a simple step that saves big headaches later — kind of like stretching before a workout.
Mind the Expansion Gaps
Laminate expands and contracts with temperature and humidity changes. Always leave a ¼-inch expansion gap around all walls, pipes, and fixed objects. Skipping this step might seem harmless, but come summer, you’ll find your floor buckling like a wave at the beach. A simple spacer tool can help you keep the gap consistent all around.
Handle Height Differences Gracefully
If your new laminate floor ends up higher than adjoining floors (like carpet, vinyl, or wood), use transition strips to create a smooth threshold. They not only make your flooring look professional but also prevent tripping hazards. I’ve found that matching transition pieces can make even multi-floor transitions look seamless.
Check for Radiant Heating Compatibility
If your tiled floor has radiant heating, double-check that the laminate you’re using is rated for heated floors. Some laminates can withstand radiant heat, but others can warp or delaminate. Stick with brands that specifically mention compatibility, and keep your floor’s surface temperature below the recommended limit (usually around 80°F or 27°C).
Clean Thoroughly Before and After
Dust and debris can throw off your entire installation. Before laying underlayment, sweep and vacuum every corner. Once the floor is installed, use a damp microfiber mop to clean up any residue — never a soaking wet one. Remember, laminate hates water the way cats hate baths.
Take Your Time With the First Row
That first row of laminate sets the tone for your entire installation. If it’s crooked, every row after it will follow suit. Measure twice, snap once, and make sure your first row runs perfectly straight. I like to say, “Start right, and you’ll end bright.”


