
I’ve lost count of how many times I’ve seen folks shy away from redoing their stairs with laminate, thinking it’s a mountain too steep to climb. Truth be told, it’s a bit trickier than laying laminate across a flat floor, but once you get the hang of it, you’ll see it’s not rocket science—it just takes patience and precision. Stairs can make or break the look of a home, and with laminate, you can give them a facelift without breaking the bank.
Now, I won’t sugarcoat it: tackling stairs isn’t the same as tackling a living room. Every tread and riser is its own puzzle piece, and if you don’t measure twice and cut once, you’ll be up the creek without a paddle. But here’s the upside—once you’ve done it right, the finished look will knock your socks off. Sleek, durable, and easy to maintain, laminate is like the gift that keeps on giving for busy households.
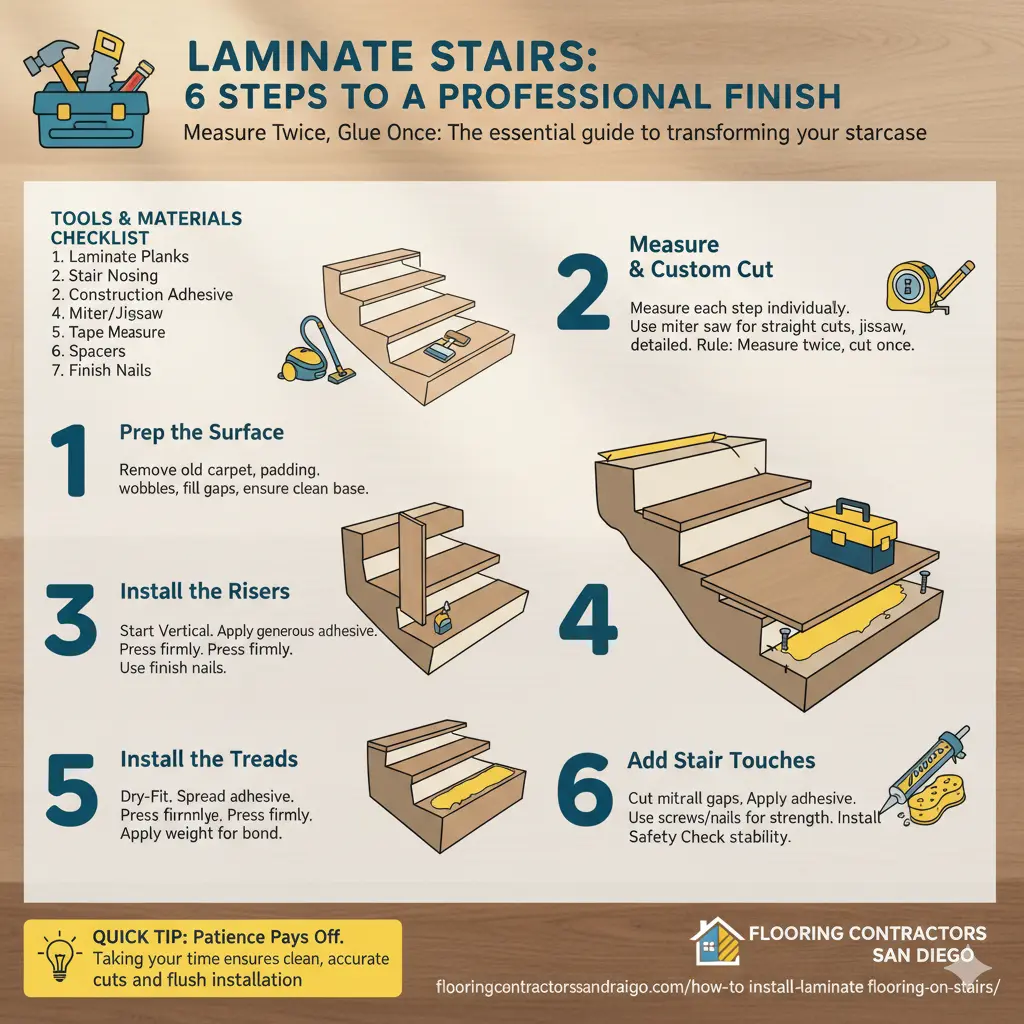
Tools & Materials You’ll Need
When it comes to stair work, the right tools are half the battle won. You don’t want to be caught flat-footed halfway through the job, so let me walk you through the essentials I always keep by my side.
Laminate planks – The stars of the show. Make sure you’ve got extra, because stairs often eat up more cuts than you’d expect.
Stair nosing – This little gem is the secret sauce. It gives each step a clean finish and, more importantly, keeps things safe underfoot.
Construction adhesive – Think of this as your “silent partner.” A strong adhesive will hold the planks and risers tight as a drum.
Saw (miter or jigsaw) – You’ll be cutting to fit, and trust me, no two stairs are ever alike. A sharp saw is worth its weight in gold.
Tape measure & chalk line – The old saying “measure twice, cut once” wasn’t made up for nothing. Accuracy is the name of the game here.
Spacers – They might look small, but they help keep your lines straight as an arrow.
Nails or screws – Depending on your stair nosing, you may need a few extra fasteners for good measure.
Gathering everything before you start keeps the project smooth sailing. There’s nothing worse than getting knee-deep into an install only to realize you’re missing a key piece of the puzzle. Preparation is the oil that keeps the whole machine running.
Preparing the Stairs
Before I even think about laying down a single plank, I make sure my stairs are prepped to perfection. It’s like painting a wall—you wouldn’t slap fresh paint over peeling old layers, and the same goes here. First things first, strip away any old carpet, padding, tack strips, or leftover nails. Don’t cut corners on this step; half-baked prep is a surefire way to end up with creaks and uneven finishes.
Are they level? Are there gaps or cracks that need filling? Any wobbly spots should be fixed before moving forward. A clean, dry, and level base is the bread and butter of a smooth installation. I also give the surface a good vacuum and wipe-down—dust and debris are like sand in the gears; they’ll mess up adhesion faster than you can say “slip hazard.”
At this stage, I always remind myself: preparation is where you win or lose the battle. If you take the time to get your stairs ready, the rest of the job will feel like a walk in the park.
Cutting the Laminate to Fit
When it comes to stairs, no two treads or risers are ever truly identical—it’s just the nature of the beast. That’s why I treat each step like its own custom project. I start by measuring carefully, using my tape measure like it’s my best friend. A trick I’ve learned over the years is to cut one piece at a time, dry fit it, then move on. Trying to batch-cut pieces is asking for trouble; you’ll end up with gaps that stick out like a sore thumb.
I use a miter saw for the longer, straight cuts and a jigsaw for the fiddly bits around edges or corners. Sharp blades are non-negotiable—nothing makes a job go south faster than ragged cuts. And here’s a golden rule I live by: measure twice, cut once. It might sound like an old chestnut, but believe me, it’s saved my bacon more times than I can count.
Patience pays off here. Taking the extra time to cut clean, accurate pieces will make installation smooth sailing later. I always remind folks: it’s better to spend five minutes measuring than five hours fixing a mistake.
Installing the Risers
I always begin with the risers—the vertical faces of the stairs—before I touch the treads. Think of it like putting on your socks before your shoes; it just makes sense. Starting here creates a neat backdrop for the tread to sit against, and it gives the whole staircase a cleaner, more professional look.
To fix the risers in place, I apply a generous bead of construction adhesive along the back, pressing each piece firmly against the stair face. A snug fit is the name of the game here—no wobbling, no shifting. If I want extra peace of mind, I’ll add a couple of finish nails to hold the riser tight while the adhesive cures. That way, it’s solid as a rock.
One thing I’ve learned the hard way: don’t rush riser installation. If your risers are crooked or uneven, the treads won’t sit properly, and you’ll be painting yourself into a corner. Take your time, make sure each riser is flush and level, and the rest of the job will go down smooth as silk.
Installing the Treads
Now comes the part everyone’s itching to see—the treads. These are the steps you’ll be walking on day in and day out, so they need to be rock-solid. I always dry-fit each tread before committing with adhesive. It’s a bit like trying on a pair of shoes—you want to make sure the fit is just right before you take them home.
Once I’m happy with the fit, I run a generous bead of construction adhesive across the stair base, spreading it evenly like butter on toast. I carefully set the tread in place, pressing down firmly to get that bond locked tight. A little extra weight—like a sandbag or toolbox—does wonders for keeping it snug while the adhesive cures.
The trick here is consistency. If one tread is off-kilter or sticks out like a sore thumb, it throws off the whole staircase. I double-check alignment as I go, because there’s no sense crying over spilled milk once the glue sets. Take it step by step—literally—and before you know it, the staircase will look like it belongs in a showroom.
Adding Stair Nosing
If laminate planks are the bread and butter of your stairs, stair nosing is the cherry on top. Not only does it give your steps a clean, professional edge, but it also makes them safer by adding grip and reducing wear on the front edge of each tread. Skipping stair nosing is like driving a car without bumpers—you can do it, but you’re asking for trouble down the road.
I always cut nosing pieces to size with a miter saw, making sure each one sits flush against the tread. A dab of construction adhesive keeps it in place, and depending on the type of nosing I’m working with, I’ll add screws or finish nails for extra strength. You don’t want these pieces going anywhere, since they’ll take the brunt of foot traffic.
Here’s a tip I’ve learned over the years: install the nosing as you go, tread by tread, rather than saving it all for the end. That way, each step is complete and secure before moving on. It keeps things neat as a pin and ensures you don’t end up tripping over unfinished edges while you’re still working.
Finishing Touches
With the risers, treads, and nosing in place, it’s time to dot the i’s and cross the t’s. I start by checking for any small gaps where the laminate meets the wall or the stair edges. A bead of color-matched caulk works wonders here—it blends everything together and makes the staircase look like it was born that way.
Next, I give the whole staircase a good clean. Sawdust, adhesive smudges, or stray pencil marks can take away from all your hard work. A damp cloth and a little elbow grease will make the laminate shine like a new penny.
Finally, I do a quick safety check. I step on each tread, test the nosing, and make sure nothing feels loose or wobbly. Better safe than sorry—it’s far easier to fix a hiccup now than after the family has already marched up and down a few times. Once everything passes the test, I can stand back and admire the view. There’s nothing quite like seeing a tired old staircase turned into a showpiece with a bit of sweat and skill.


