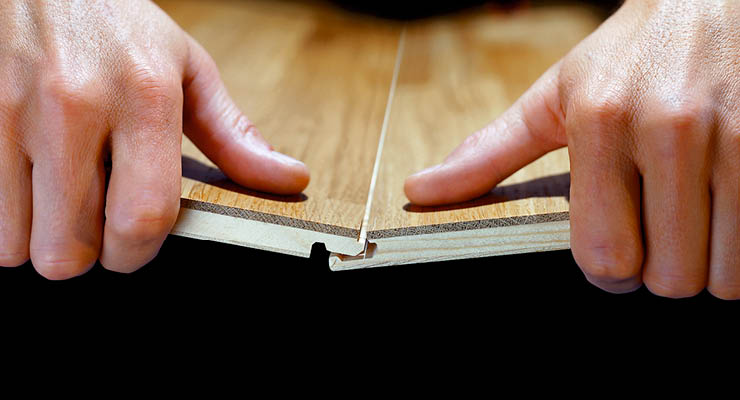
Click-lock products are made across several vinyl construction types. SPC (stone plastic composite) cores are denser and more dimensionally stable. WPC (wood plastic composite) cores are slightly softer underfoot and have better sound absorption. Standard LVP (luxury vinyl plank) products tend to be thinner and more flexible. All three can be produced in click-lock format, and the construction type matters as much as the locking system when evaluating performance.
What Is Glue-Down Vinyl Flooring?
Glue-down vinyl flooring is permanently adhered to the subfloor using a pressure-sensitive or hard-set adhesive spread across the subfloor surface before the vinyl is laid. The planks or tiles have no locking profile on their edges. Each piece is pressed flat into the adhesive bed, butted tightly against adjacent pieces, and rolled with a floor roller to ensure full contact and eliminate voids.
The adhesive creates a rigid mechanical bond between the vinyl and the substrate. Once cured, the floor cannot move independently of the subfloor. This is the critical structural difference from floating systems. A glued-down floor and its subfloor behave as one layer, not two separate layers that slide relative to each other.
Glue-down vinyl includes several product categories. Fully adhered LVT (luxury vinyl tile) and LVP products are the most common residential and commercial forms. Older sheet vinyl is almost always glue-down. Loose-lay vinyl, despite not using adhesive across the full field, sometimes uses perimeter adhesive or pressure-sensitive strips and sits in a different category between the two methods.
The adhesive selection is not a minor detail. Pressure-sensitive adhesives allow the vinyl to be repositioned briefly during installation and produce a slightly flexible bond. Hard-set adhesives cure chemically and produce a rigid, permanent bond that is much harder to remove. The right adhesive depends on the vinyl product specification, the subfloor material, and the moisture conditions in the space. Using the wrong adhesive causes the floor to fail adhesively rather than cohesively, meaning the bond fails at the glue-vinyl interface rather than within the adhesive layer itself — a distinction that matters enormously when troubleshooting failures.
Subfloor Requirements: Where the Methods Diverge Most Sharply
Both methods require a flat subfloor, but the tolerance for imperfection, the acceptable subfloor materials, and the moisture preparation differ significantly between them.
The standard flatness requirement for vinyl flooring is 3/16 inch over 10 feet, sometimes tightened to 1/8 inch over 6 feet for thinner products. A floating click-lock floor is slightly more forgiving of minor undulations because the planks can bridge small low spots as the system spans across the subfloor. A glue-down floor copies the subfloor precisely because every square inch of vinyl is pressed into direct contact with the adhesive beneath it. Any high spot, low spot, crack, or ridge telegraphs through to the surface, especially visible under raking light. This means glue-down installations typically require more aggressive subfloor preparation — more self-leveling compound, more grinding of high spots, more filling of cracks — before the vinyl goes down.
Moisture is where glue-down installations face their most serious challenge on concrete subfloors. Moisture vapor moving upward through a concrete slab attacks adhesive bonds. Many adhesive failures on concrete subfloors trace back to moisture vapor emission rates that exceed the adhesive’s tolerance. The standard test is ASTM F1869 calcium chloride testing, which measures moisture vapor emission rate (MVER) in pounds per 1,000 square feet per 24 hours, or ASTM F2170 relative humidity (RH) testing using in-situ probes. Most pressure-sensitive adhesives for LVT tolerate up to 5 lbs MVER or 85% RH. Exceeding those thresholds without a moisture mitigation primer or membrane creates a high probability of adhesive failure over time.
Click-lock floating floors handle moisture differently. The floor is not bonded to the slab, so moisture vapor moving upward does not attack an adhesive bond. However, moisture still matters because it can cause the vinyl planks themselves to expand or distort at the edges, particularly with WPC products whose wood-fiber cores absorb more vapor than SPC cores. A vapor barrier or underlayment with integrated moisture protection is still required under most click-lock installations on concrete. The difference is that the failure mode is different and generally less catastrophic — a floating floor with inadequate vapor protection tends to show edge swelling or buckling rather than the wholesale adhesive delamination you get with a poorly adhered glued floor on a wet slab.
If you are working on a wood subfloor — plywood or OSB — the moisture calculus changes. Wood subfloors move seasonally with humidity, and that movement transfers differently to each installation method. A click-lock floor floats over the moving wood subfloor and accommodates seasonal movement within its expansion gaps. A glued-down floor bonded to a moving wood subfloor can develop stress cracks or gapping between tiles over time as the wood cycles through wet and dry seasons, because the rigid bond transmits subfloor movement directly into the vinyl layer.
Installation Process: What Each Method Actually Demands
Click-lock installation is faster, requires fewer specialized tools, and is more forgiving of installer error during the process itself. The basic sequence is: acclimate the product, prepare the subfloor, install underlayment if required, snap together rows working from one wall, maintain expansion gaps at all fixed objects, and install transitions and moldings at the finish. A reasonably skilled DIY installer can complete a medium-sized room in a day. Mistakes during installation — a plank snapped in slightly out of alignment, a row that drifts — can usually be corrected by separating the planks and re-engaging them. The locking profiles tolerate a limited number of reconnections before the tongues start to wear.
Glue-down installation is slower, more exacting, and significantly less forgiving of errors. The sequence is: prepare the subfloor aggressively, test for moisture, apply the adhesive in working sections using the specified trowel notch size, allow the adhesive to flash off to the manufacturer’s specified open time, lay the vinyl into the adhesive with the correct weight distribution to avoid voids, roll the entire floor with a 100-pound floor roller, and maintain traffic restrictions while the adhesive cures. The open time window — the period between applying adhesive and laying vinyl — is critical. Lay too early and the adhesive grabs unevenly. Lay too late and the adhesive has skinned over and won’t bond properly. Temperature and humidity in the workspace directly affect open time, which means what works at 65°F in October may behave completely differently at 85°F in July with the HVAC off.
Mistakes during glue-down installation are expensive to correct. If you realize a tile is misaligned after the adhesive has begun to cure, removing it without damaging the tile or the subfloor is difficult. Adhesive that squeezes up between joints is hard to remove once it cures and leaves a visible residue that affects the grout-line appearance of tile-format products.
Performance Under Heavy Use and High Traffic
This is where glue-down systems hold a genuine structural advantage in commercial and high-traffic contexts. A fully adhered floor cannot shift, telescope, or develop peaking at seams under rolling loads like carts, dollies, or furniture with casters. The adhesive distributes point loads across the subfloor rather than concentrating them at the locking joints. In large open commercial spaces — retail floors, hospitality environments, healthcare corridors — glue-down LVT is standard practice because floating floors in those environments develop joint stress failures from the repetitive impact and rolling loads.
Residential high-traffic situations tell a more nuanced story. In a busy family home with normal foot traffic, click-lock SPC products in the 6mm to 8mm thickness range perform comparably to glued products for the life of the floor. The locking joints on quality SPC are engineered to handle residential loads without fatigue. Problems with floating floors in residential settings more often trace back to subfloor flatness issues, inadequate expansion gaps, or temperature extremes — not joint failure from foot traffic alone.
The exception in residential use is heavy furniture, particularly pianos, large appliances, and furniture on hard plastic casters. Concentrated point loads on click-lock floors can cause the locking profile to deform over time, creating micro-gaps at the seams that become visible and collect debris. Glued-down floors distribute those point loads into the subfloor more effectively.
Acoustic Performance and Underfoot Feel
Floating click-lock floors sound and feel different underfoot than glued-down floors, and the gap between them is not trivial in spaces where acoustic quality matters.
A floating floor has an air gap between the underside of the vinyl and the subfloor surface, even with underlayment present. That air gap produces the characteristic hollow sound — often described as a drum or tap sound — when walking on a floating floor. The sound is more pronounced in quieter spaces and on thinner products without integrated foam backing. Underlayment thickness and density reduce but do not eliminate this effect.
A glued-down floor is in full, rigid contact with the subfloor across its entire surface. There is no air gap, no hollow resonance. The floor sounds and feels solid underfoot in a way that floating floors cannot fully replicate regardless of underlayment quality. This is the acoustic argument for glue-down in high-end residential applications — bedrooms, home offices, living spaces where the floor quality is being compared directly to hardwood.
SPC products with high-density cork underlayment attached at the factory narrow this gap considerably. A quality SPC click-lock product with 1.5mm to 2mm attached cork backing produces significantly better acoustic performance than bare LVP click-lock products and approaches the feel of a glued-down floor in everyday use. The comparison only becomes stark when you move between a properly glued floor and a floating floor in the same building.
Repair and Replacement: The Long-Term Maintenance Difference
Ease of repair is the most compelling practical advantage of click-lock systems over glue-down, and it is often underweighted in the initial installation decision.
On a click-lock floating floor, replacing a damaged plank requires removing the transition moldings at the nearest wall, disassembling the rows plank by plank back to the damaged piece, swapping the plank, and reassembling. For a plank in the middle of a large room, this is labor-intensive but entirely doable without professional help and without damaging surrounding planks. The total material cost is one replacement plank plus whatever time the work takes.
On a glue-down floor, replacing a single damaged tile or plank requires cutting it out of the bonded assembly. For LVT format products, a utility knife along the grout lines and careful prying with a floor chisel can usually remove a single tile without damaging adjacent tiles if the adhesive is still flexible. For LVP planks glued in a staggered pattern, the cuts are more complex. After removal, the adhesive residue on the subfloor must be scraped clean and leveled before the replacement piece can be bonded down. If the adhesive has cured to a very hard set, the removal process risks damaging the subfloor, particularly on plywood substrates. And if the replacement piece is from a different production batch, the color match may be visibly different after years of UV exposure on the installed floor.
This repair asymmetry matters most in rental properties, commercial spaces with lease terms, and homes where a specific plank type may be discontinued before a repair is needed. Buying extra material and storing it protects against the discontinuation problem for both methods, but the labor and risk of the repair itself remain fundamentally different.
Temperature and Climate Sensitivity
Vinyl flooring expands and contracts with temperature. The movement is small in absolute terms — typically 0.1% to 0.3% dimensional change per 10°F — but across a large room those fractions of a percent add up to meaningful movement at the edges of the floor.
Click-lock floating floors are more vulnerable to temperature extremes than glued floors for a structural reason: all the thermal movement accumulates and must exit through the expansion gaps at the perimeter. A room that was installed at 68°F and then reaches 95°F during a summer with the HVAC off will see the floor attempt to expand outward. If expansion gaps have been filled with baseboard caulk, covered by moldings nailed too tightly, or simply sized at minimum spec, that expansion has nowhere to go and the floor buckles upward at the seams. Conversely, a room that drops to 40°F in a cold climate during a renovation with heat off will see the floor contract, potentially opening visible gaps at the joints.
Glued-down floors are mechanically restrained and cannot expand or contract freely. The adhesive holds each plank in position, so thermal movement either is absorbed within the vinyl material itself (which has some elastic flexibility) or creates internal stress in the bond. For most residential temperature ranges, a properly selected adhesive and properly acclimated vinyl handle this without visible failure. In spaces with extreme temperature swings — sunrooms, enclosed porches, garages — both methods have limitations, but glue-down floors in those spaces often develop adhesive stress failures as the adhesive fatigues over repeated thermal cycles.
The climate-appropriate choice by region is worth considering. In San Diego’s mild Mediterranean climate, temperature-related failures are much less common than in regions with true four-season swings. That local context affects how much weight you should give to thermal expansion concerns when choosing between the two methods.
Cost Comparison: Materials, Labor, and Total Project
Click-lock products and glue-down products occupy overlapping price ranges at the material level, but the total installed cost difference is driven more by labor than materials.
At the material level, equivalent quality click-lock and glue-down LVT products are priced similarly per square foot. Click-lock products require underlayment as a separate purchase unless the product has attached backing, typically adding $0.30 to $0.80 per square foot. Glue-down products require adhesive, typically adding $0.15 to $0.40 per square foot depending on coverage rate and adhesive type.
Labor cost is where the methods diverge. Professional installation of click-lock vinyl runs roughly $1.50 to $2.50 per square foot for labor in most markets, depending on room complexity and subfloor preparation needed. Professional installation of glue-down vinyl runs $2.00 to $3.50 per square foot for labor because the process is slower, more exacting, and requires additional subfloor preparation in most cases. The subfloor preparation differential is often the largest single line item — self-leveling compound, moisture mitigation primers, and floor grinding add to the project cost and are more commonly required for glue-down specifications.
For DIY installation, the labor cost equation inverts in an important way. Click-lock is genuinely accessible to a careful DIY installer with basic tools. Glue-down installation at a professional quality level is significantly harder to execute correctly without experience, particularly maintaining consistent adhesive coverage and open time in changing conditions. DIY glue-down jobs frequently develop bond failures or visible adhesive contamination between joints that a professional would have avoided.
Which Vinyl Construction Types Work Best with Each Method?
Not all vinyl flooring products are available in both installation formats, and some construction types are better suited to one method than the other.
SPC (stone plastic composite) performs well in both click-lock and glue-down formats. Its high density and dimensional stability make it resistant to the telegraphing problems that affect thinner vinyl on imperfect subfloors, whether floating or bonded. SPC click-lock is the dominant residential choice for new construction and renovations in the current market.
WPC (wood plastic composite) is almost exclusively produced in click-lock format. Its softer, more flexible core is not well-suited to glue-down applications because the core compresses slightly under the trowel notch ridges of adhesive, creating telegraphing at the adhesive contact points. The integrated foam underlayment in most WPC products also interferes with adhesive bonding.
Standard LVT (luxury vinyl tile) in the 2mm to 3mm thickness range is predominantly a glue-down product. Tiles this thin in a floating format would show subfloor irregularities severely and would not have sufficient mass to lie flat without adhesive restraint. Thicker LVT at 4mm and above is available in click-lock format but is less common than SPC alternatives at that thickness.
Sheet vinyl is almost always glue-down or loose-lay, never click-lock, because the sheet format provides no edge to engage a locking profile.
Specific Use Cases: Matching Method to Application
Rather than a universal recommendation, the choice between click-lock and glue-down depends on what the specific installation context actually demands.
Basements and below-grade spaces with known moisture concerns favor click-lock over glue-down. The floating format tolerates moisture vapor from the slab better than a bonded system, and if moisture does cause edge swelling or temporary distortion, the floor can be lifted, dried, and relaid without replacing the entire installation. Gluing vinyl to a basement slab that has active moisture issues is a reliable path to adhesive failure within two to five years.
Commercial spaces with rolling loads, heavy traffic, and large open floor plates favor glue-down. The structural rigidity of a fully bonded floor handles the mechanical demands that cause click-lock joint fatigue in those environments. Commercial-grade glue-down LVT products with 20-mil wear layers and appropriate adhesives are the industry standard for good reason in those applications.
Rental properties and owner-occupied homes where future repair ease matters favor click-lock. The ability to replace individual planks without professional intervention over a 10 to 15 year product lifespan represents real value that doesn’t show up in the initial cost comparison.
Rooms over radiant heat systems require careful consideration of both the vinyl product specification and the installation method. Glue-down vinyl on a radiant system requires an adhesive rated for use over radiant heat, and the maximum surface temperature must stay within the vinyl manufacturer’s specification — typically 85°F to 95°F depending on the product. Click-lock vinyl on radiant heat requires larger-than-standard expansion gaps to accommodate the additional thermal movement the heating system introduces.
Kitchens and bathrooms as living spaces benefit from the waterproof nature of both vinyl methods, but the transition handling and perimeter sealing differ. In bathrooms particularly, water infiltration at the perimeter between the vinyl and the wall is a consistent maintenance issue. A glued-down floor that is also caulked at the perimeter creates a more complete moisture barrier than a floating floor with transitions that allow water to migrate under the floor at the wall gap.
Common Failures and What Causes Them
Understanding how each method fails helps you recognize early warning signs and understand whether what you are seeing is a product defect, an installation error, or a subfloor problem.
Click-lock floor failures in order of frequency: buckling at the seams (insufficient expansion gap, usually combined with high temperature), peaking at joints (same cause, combined with inadequate subfloor flatness), hollow spots or movement underfoot (underlayment shifted or compressed, subfloor low spots bridged inadequately), locking joint separation (floor moved beyond expansion gap tolerance or joints damaged during installation), and edge swelling near exterior walls or in wet areas (moisture vapor infiltration from below or water entry from above).
Glue-down floor failures in order of frequency: tile or plank lifting at the edges (adhesive failed due to moisture, insufficient open time, or wrong adhesive type for the substrate), telegraphing of subfloor texture (inadequate subfloor preparation, wrong trowel notch size creating ridges), adhesive bleed-through at seams (over-application of adhesive, excessive rolling pressure), grout joint shifting in tile-format products (adhesive failure in high-movement zones), and surface damage from removal attempts when the floor eventually needs replacement.
Both methods share some failure modes rooted in the vinyl product itself rather than the installation method: wear layer damage from sharp impacts, edge chipping on LVT format products, color fading from UV exposure at south-facing windows, and dimensional distortion in products that were not properly acclimated before installation.
The Decision Framework
The choice between click-lock and glue-down comes down to six concrete variables: subfloor condition, moisture environment, traffic type and intensity, room temperature range, installation skill level, and how long the floor needs to last before any repair or replacement is acceptable.
Choose click-lock when: the subfloor is reasonably flat but not perfect, moisture is a concern (especially on concrete below grade), the room sees normal residential traffic, you want repair flexibility over the life of the floor, you are completing a DIY installation, or you are furnishing a rental property where the floor may need to be replaced by a tenant’s end of lease.
Choose glue-down when: the subfloor is professionally prepared to a high flat tolerance, moisture testing confirms the slab is within adhesive tolerance, the space sees commercial or heavy rolling traffic, acoustic quality comparable to hardwood is a priority, or the space has HVAC-controlled conditions that will not subject the floor to temperature extremes outside of the normal range. For more detail on the adhesive selection side of that decision, the guidance in best adhesive for vinyl flooring on wood, concrete, and walls covers the substrate-specific considerations in depth.
If neither method clearly fits your situation, understanding what goes under the vinyl before making the choice often clarifies the decision. The guide to what to put under vinyl flooring walks through underlayment, vapor barriers, and adhesive primers in relation to the installation method being used.
Click-Lock vs Glue-Down: Side-by-Side Summary
Factor
Click-Lock
Glue-Down
Subfloor prep tolerance
Moderate
High — must be flat
Moisture on concrete
More tolerant (floating)
Adhesive at risk above threshold
DIY suitability
High
Low to moderate
Repair ease
High
Difficult
Sound underfoot
Hollow without quality underlayment
Solid
Commercial suitability
Moderate (residential-grade)
High
Temperature sensitivity
Higher (needs expansion gap)
Lower (adhesive restrains movement)
Total installed cost
Lower (especially DIY)
Higher (subfloor prep and labor)
Best vinyl construction
SPC, WPC, thicker LVP
LVT, standard LVP, thin SPC
Frequently Asked Questions
Can you convert a glue-down vinyl floor to click-lock if you renovate?
Not directly. You would need to fully remove the glued-down floor, clean the subfloor of adhesive residue, assess whether the subfloor was damaged during removal, and then install the click-lock floor from scratch. The removal process for glued-down vinyl is the main obstacle — it is labor-intensive and often damages the subfloor surface to some degree. The guide to removing vinyl flooring from concrete, wood, and plywood subfloors covers the removal process and what you will encounter on each subfloor type.
Does click-lock vinyl need underlayment if the product has attached backing?
For most SPC and WPC products with factory-attached foam or cork backing, a separate underlayment is not required and in many cases is explicitly prohibited by the manufacturer. Adding additional underlayment under a product with attached backing compresses the total cushion layer beyond the specification the locking joints were designed for, creating instability at the joint connections. Check the manufacturer’s installation guide specifically — it will state whether additional underlayment is permitted, prohibited, or required based on the subfloor type.
Which method is better for vinyl flooring in a kitchen or bathroom?
Both work, but for different reasons depending on the specific concern. Glue-down provides a tighter perimeter seal against water infiltration at walls and a more solid feel underfoot in spaces where you stand for extended periods. Click-lock is more forgiving if the subfloor has minor moisture vapor and is easier to replace if a water event damages the floor. For a detailed breakdown of how vinyl behaves in wet residential environments, the article on vinyl flooring for bathrooms and kitchens covers the performance differences in those specific spaces.
What is the lifespan difference between click-lock and glue-down vinyl?
The vinyl product’s wear layer thickness determines its functional lifespan far more than the installation method. A 12-mil wear layer product in a residential click-lock installation and a 12-mil glue-down product will wear through their surfaces at roughly the same rate under equivalent traffic. The installation method affects failure modes — click-lock floors can develop joint separation or buckling before the wear layer is exhausted, while glue-down floors can develop adhesive failure before the surface wears through — but a properly installed product of either type with an appropriate wear layer for the traffic level should last 15 to 25 years in residential use. For more on wear layer specifications and how they translate to durability, the wear layer thickness guide for LVP flooring provides the specification context you need.
Can glue-down vinyl be installed over an existing tile floor?
In principle, yes, but the existing tile surface must be assessed for flatness, adhesion integrity, and grout joint depth before proceeding. Grout joints deeper than 1/16 inch will telegraph through thin glue-down vinyl and need to be filled with a skim coat of floor-leveling compound. If any tiles are loose, they must be re-bonded or replaced before installing vinyl over them, because a loose tile that moves under the vinyl will stress the adhesive bond above it and cause the vinyl to lift. The same preparation principles apply to click-lock installations over tile, which are addressed in detail in the article on installing vinyl flooring over existing tile.
Is loose-lay vinyl a third option worth considering?
Loose-lay vinyl occupies a middle position: it lies flat by its own weight and the friction of a textured backing without adhesive, but it is not a floating click-lock system either. Loose-lay products are typically heavier than standard LVT and have a high-grip rubber or felt backing that resists movement. They share some advantages of click-lock (easy removal and replacement) and some of glue-down (solid feel underfoot, no expansion gap movement). The trade-off is that large loose-lay installations in rooms with temperature swings can develop edge lifting over time without perimeter adhesive, and they are not suitable for areas with rolling loads. The pros and cons of loose-lay vinyl flooring covers where this method works well and where it falls short.
Conclusion
Click-lock and glue-down vinyl flooring are not interchangeable options representing different levels of effort to reach the same outcome. They are structurally distinct systems that produce different floors with different strengths, different failure modes, and different maintenance trajectories over time. Click-lock floating floors offer installation flexibility, genuine repair accessibility, and better tolerance for moisture vapor below the slab. Glue-down floors offer superior acoustic quality, commercial-grade durability under heavy loads, and a rigid bond that eliminates the thermal movement concerns that affect large floating installations. The right choice is the one that matches the specific mechanical demands of your space — not the one that is faster to install or cheaper on day one.
If you are working through a vinyl installation project and want professional guidance on which method and which product construction is appropriate for your specific subfloor conditions, the team at Flooring Contractors San Diego’s vinyl flooring services provides on-site assessments that account for the moisture, flatness, and use-case variables that make the difference between a floor that lasts and one that fails before its time.
James Miller is a seasoned flooring contractor with years of hands-on experience transforming homes and businesses with high-quality flooring solutions. As the owner of Flooring Contractors San Diego, James specializes in everything from hardwood and laminate to carpet and vinyl installations. Known for his craftsmanship and attention to detail, he takes pride in helping clients choose the right flooring that balances beauty, durability, and budget. When he’s not on the job, James enjoys sharing his expertise through articles and guides that make flooring projects easier for homeowners.
Yes, you can install laminate flooring over existing floorboards — but the result depends entirely on what condition those floorboards are in before the first plank goes down. The floorboards are not just a surface. They are a dynamic, organic subfloor that moves with humidity, develops gaps over time, and carries decades of structural behaviour….
Concrete floors emit moisture. This is not an opinion — it is a physical property of cementitious slabs. Even slabs poured decades ago continue to release vapor through a process called capillary rise, where groundwater moves upward through the microscopic pore network of hardened concrete and eventually reaches its surface as water vapor. When laminate…
Beveled edge laminate flooring is a type of laminate plank where the top edges are cut at a downward angle, forming a small V-shaped groove between planks once installed. The bevel typically sits between 30 and 45 degrees and runs 1 to 2 millimeters deep, depending on the manufacturer. This edge profile changes three things…
What Makes Engineered Hardwood Different to Clean Engineered hardwood is not the same surface you are cleaning when you mop solid hardwood. The construction matters here because it changes what cleaning methods are safe and what methods will quietly destroy the floor over months of use. An engineered hardwood plank is built from multiple layers…
Wide plank hardwood flooring has moved well beyond trend status. In 2025 and into 2026, it is the defining choice for homeowners and interior designers who want floors that feel genuinely luxurious rather than just functional. The difference between a standard 2¼-inch strip floor and a 7-inch wide plank is something you feel the moment…
Laminate flooring and PVC flooring are often placed in the same category in flooring guides. Both float over a subfloor. Both use click-lock joints. Both mimic the appearance of wood or stone. That surface-level similarity is exactly where the confusion starts — and it is also where most comparison articles fail. The real differences between…