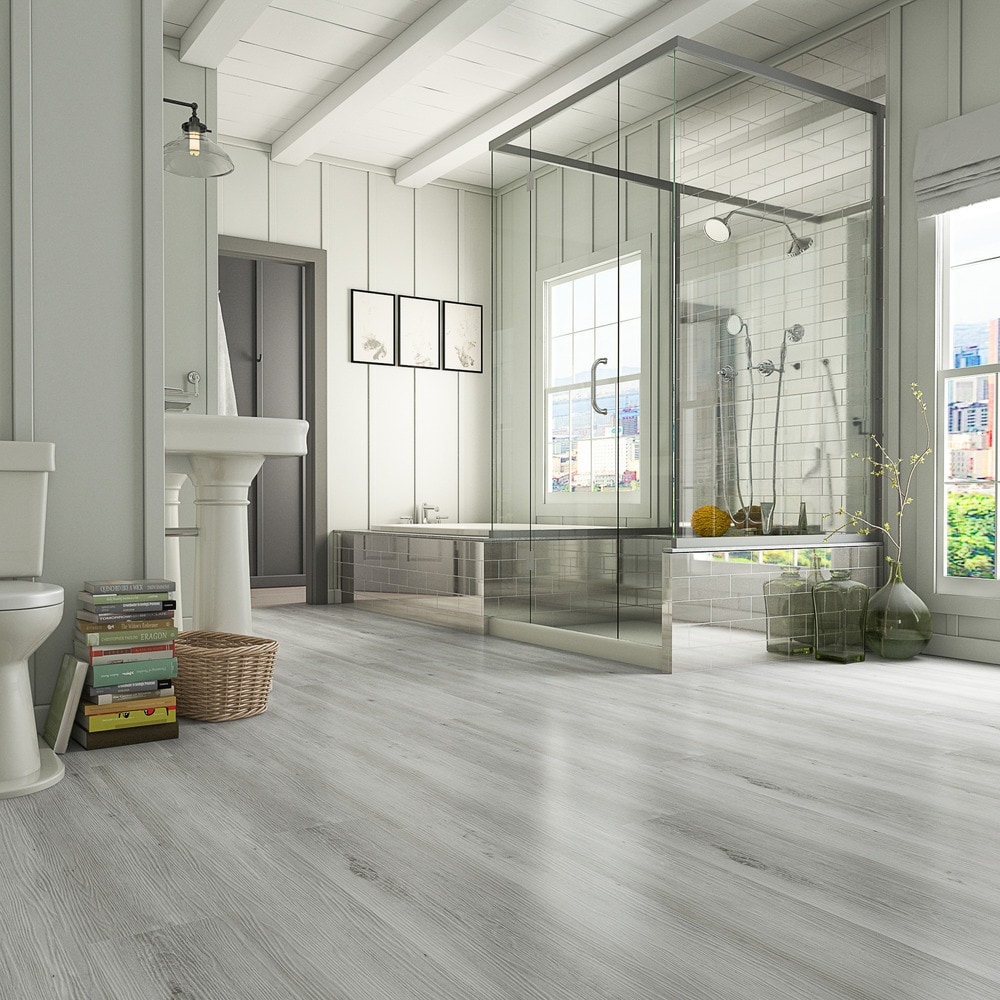
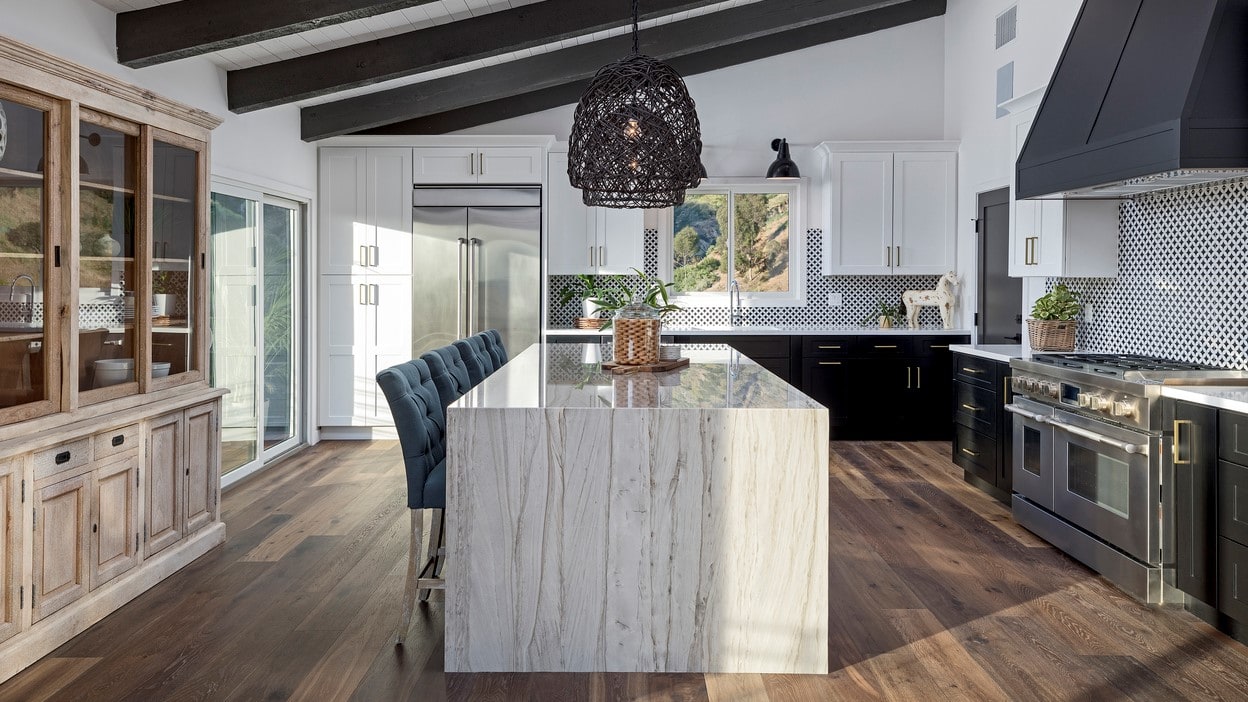
Beyond moisture resistance, vinyl offers something bathrooms and kitchens rarely get from hard flooring: underfoot comfort. The resilient layer in WPC and thicker LVP products has genuine give to it. Standing on it for forty minutes while cooking is a noticeably different experience than standing on ceramic tile or stone. For kitchens especially, this matters over the course of years.
The aesthetic range available in vinyl has also expanded dramatically. Realistic embossed-in-register wood and stone textures now align the surface texture directly to the printed pattern beneath, creating a visual depth that was not achievable in earlier generations of vinyl. You can install a bathroom floor that reads as marble or a kitchen that reads as wide-plank oak while getting none of the moisture liability those materials carry.
Vinyl Flooring Formats: What Each One Actually Means for Kitchens and Bathrooms
The format you choose determines installation method, moisture performance, acoustic behavior, subfloor requirements, and long-term durability. These are not cosmetic differences.
Luxury Vinyl Plank (LVP)
LVP is the most popular residential vinyl format for good reason. It installs as individual planks — typically 5 to 9 inches wide and 48 to 72 inches long — using click-lock joints that connect without adhesive. The floating installation method means the floor can be laid over most existing subfloors and removed relatively easily if needed.
In kitchens, LVP performs well because the plank format creates a wood-look aesthetic that integrates naturally with cabinetry and furniture. The click-lock system is fast to install and does not require curing time, which matters when you are temporarily without a functional kitchen.
In bathrooms, LVP is viable but requires more attention to installation detail. The joints between planks are not fully sealed. Water that sits at a joint seam for extended periods — around a toilet base, near a shower pan edge, or where the floor meets a leaking supply line — can eventually work its way under the planks and cause issues with the subfloor even if the vinyl itself is unaffected. Proper sealing of perimeter joints and immediate attention to plumbing leaks mitigates this, but it is a real consideration in full bathrooms with showers or tubs.
Luxury Vinyl Tile (LVT)
LVT uses the same layer construction as LVP but in a tile format — typically 12×12 or 18×18 inch squares. It installs with click-lock systems or as a glue-down product, and it is often chosen for bathrooms where a stone or large-format tile aesthetic is desired without the cold, hard, and crack-susceptible properties of actual ceramic or porcelain.
Glue-down LVT is arguably the best vinyl format for full bathrooms. When properly adhered, there are no joints for water to penetrate, the floor cannot shift or buckle from temperature changes, and the bond to the subfloor is continuous. The trade-off is that removal is significantly more difficult and installation requires precise subfloor preparation — adhesive transfers any subfloor imperfection directly to the tile surface.
For more on how LVT compares to standard vinyl products in terms of construction and performance, see our breakdown of LVT vs standard vinyl flooring.
Sheet Vinyl
Sheet vinyl is a single continuous piece installed without seams — and in wet rooms, that is its defining advantage. There are no joints, no edges for water to infiltrate, and no individual planks that can lift or separate. A properly installed sheet vinyl floor is as close to a seamless waterproof surface as you can achieve at a budget price point.
The category has improved substantially. Modern sheet vinyl uses fiberglass reinforcement layers that prevent the tearing and dimensional instability that plagued older products. Cushioned sheet vinyl also provides meaningful underfoot comfort — arguably more than most click-lock LVP products because the foam backing layer is thicker and more uniform.
The limitation of sheet vinyl is aesthetic flexibility. Large-format patterns are harder to fit precisely in complex bathroom layouts, and the material cannot achieve the plank-specific visual of LVP. In kitchens with irregular shapes, cutouts, and islands, managing a single large sheet without waste or fitting errors requires skill. For bathrooms, sheet vinyl remains one of the most underrated choices at every price tier.
If you want a full analysis of how sheet vinyl stacks up against the alternatives, our article on pros and cons of sheet vinyl flooring covers the complete picture.
SPC (Stone Polymer Composite)
SPC flooring uses a core made from calcium carbonate (limestone powder) and PVC rather than the wood-fiber composite used in most LVP. The result is a denser, heavier, dimensionally stable plank that does not expand or contract with temperature and humidity changes the way wood-core or WPC vinyl does.
In kitchens, SPC’s thermal stability is significant. Kitchen floors experience temperature swings from oven use, refrigerator heat cycling, and the general warmth of cooking activity. An SPC floor installed in a kitchen that receives direct afternoon sun through patio doors will behave substantially better than an LVP product with a wood-composite core, which can gap or buckle under the same conditions.
In bathrooms, SPC’s waterproof core means that even if water does penetrate a joint, the plank itself will not swell or distort. This is a meaningful difference from WPC products, which use a foam-reinforced core that can absorb moisture over time if the protective layers are compromised.
The trade-off with SPC is acoustic hardness. The dense core transmits foot impact sound more readily than WPC, and the floor can feel noticeably harder underfoot. An attached acoustic underlayment partially compensates for this, but SPC will never match the cushioned feel of a WPC product or a sheet vinyl with a thick foam backing.
WPC uses a foamed polymer core that is softer and lighter than SPC. It has better underfoot comfort, better acoustic performance, and can tolerate minor subfloor imperfections more gracefully because the softer core flexes slightly rather than telegraphing every surface irregularity.
In kitchens, WPC is a strong performer where comfort is a priority. The foam core provides meaningful fatigue reduction for anyone who spends significant time standing at a counter or stove. It also has better thermal insulation than SPC — the floor feels warmer underfoot in the morning.
WPC is somewhat less suited to full bathrooms than SPC because the foamed core is more susceptible to moisture infiltration if the top layers are compromised. In half-bathrooms or powder rooms with low moisture exposure, WPC is entirely appropriate. For a shower-adjacent floor or a room with a known history of plumbing issues, SPC provides better long-term assurance.
The Wear Layer: The Specification That Actually Determines Longevity
Every vinyl flooring product has a wear layer — the clear protective coating that sits between the printed design layer and the surface of the floor. The wear layer is measured in mils (thousandths of an inch), and this single specification predicts durability more reliably than any other number in the product description.
For residential bathrooms with normal use, a 12 mil wear layer is the practical minimum. Below 12 mil, the surface protection will show scratching and wear within a few years in any room that sees daily use. A bathroom with a family of four — people walking in with damp bare feet, children, pets — will exhaust a 6 or 8 mil wear layer faster than most manufacturers acknowledge.
For kitchens, the standard should be higher. Kitchen floors deal with dropped utensils, dragged chairs, tracked-in grit, and cleaning chemicals at a frequency that bathrooms rarely match. A 20 mil wear layer is the correct starting point for a kitchen floor you expect to last fifteen or more years. Products at 12 mil will last in a kitchen, but they will show wear in front of the refrigerator, along the path from the stove to the sink, and at the primary entry point from the rest of the house.
Commercial-grade products at 28 mil or higher are available for residential use and are worth considering in high-traffic kitchens, open-plan areas where the kitchen floor runs into a dining room, or any household with dogs whose nails create consistent abrasion. The cost premium over 20 mil residential products is usually 15 to 25 percent — a reasonable investment given that the wear layer is the single component most likely to determine when a floor needs replacement.
For a full breakdown of how wear layer thickness affects LVP specifically, our guide on wear layer thickness for LVP flooring has the detailed specifications.
Moisture and Waterproofing: What “Waterproof” Actually Means on a Product Label
The word “waterproof” on a vinyl flooring package refers to the plank or tile itself — not the installation system and not the subfloor beneath it. This distinction matters enormously in bathrooms and kitchens, and it is one of the most consistently misunderstood aspects of vinyl flooring selection.
A 100% waterproof vinyl plank still has joints between planks. Water that sits at those joints — whether from a spill that is not wiped up, condensation around a toilet, or a slow leak from a supply line — will eventually find its way through. Once water reaches the subfloor, you can have a mold problem under a perfectly intact vinyl floor. The vinyl itself shows no damage, which actually makes subfloor moisture problems harder to detect until they have progressed significantly.
In kitchens, this risk is primarily around the dishwasher (door seal failures are common), under the refrigerator (ice maker lines), and around the sink base. These are the areas where vigilance matters and where glue-down installation provides a meaningful advantage over floating click-lock systems.
In bathrooms, the perimeter of the floor where it meets the shower pan or tub surround is the highest-risk zone. The transition between the waterproofed shower area and the vinyl floor should always be caulked rather than left open or covered with a molding that creates a gap. Expansion gaps around the perimeter — which floating vinyl requires — should be filled with a flexible silicone caulk in bathrooms rather than simply covered by baseboard.
The three primary installation methods — floating click-lock, glue-down, and loose-lay — have meaningfully different implications for wet-room performance, and the right choice depends on the room, the subfloor, and how long you intend to stay in the house.
Floating Click-Lock Installation
Floating installation is the most popular method for residential LVP and LVT because it is fast, does not require adhesive curing time, and allows relatively easy removal if the floor needs to be replaced. The planks click together at their edges and float as a unified assembly over the subfloor, separated from it by an underlayment layer.
In kitchens, floating installation works well as long as the room is not excessively large. Floating floors need expansion gaps at all perimeters to accommodate dimensional movement, and in kitchens larger than approximately 30 feet in any direction, additional expansion breaks (T-moldings in doorways or at transitions) are needed to prevent buckling. Most standard kitchens fall well within these limits.
In bathrooms, floating installation is suitable for half-baths and powder rooms. In full bathrooms with showers, the joint exposure risk discussed above means that a glue-down LVT or sheet vinyl is a more conservative choice for the long term.
Glue-Down Installation
Glue-down installation bonds the vinyl directly to the subfloor using a pressure-sensitive adhesive. The result is a floor with no joint gaps at the perimeter, no movement under traffic, and no ability for individual planks to lift or shift. It performs better in wet rooms, handles heavy appliances and kitchen islands without the risk of local deformation, and transmits less hollow sound underfoot than floating products.
The disadvantages are that subfloor preparation requirements are stricter (any imperfection telegraphs through the adhesive to the surface), installation is more labor-intensive, and removal is significantly more difficult if the floor ever needs to come up. For kitchens where you have an older home with an uneven subfloor, the prep cost can be substantial.
Choosing the right adhesive for glue-down vinyl involves more nuance than most manufacturers’ instructions convey. Our guide on how to choose the right adhesive for vinyl flooring walks through the options, open times, and subfloor compatibility factors.
Loose Lay
Loose-lay vinyl uses a heavy fiberglass backing and friction-grip underside to stay in place without adhesive or locking joints. It is relatively fast to install, easy to remove, and tolerant of subfloor imperfections. In bathrooms and kitchens, it is a reasonable option for rental situations or temporary installations, but it is not the first choice for permanent residential use in high-moisture environments where the edges can lift over time.
Subfloor Requirements for Bathrooms and Kitchens
No vinyl flooring performs better than the subfloor beneath it allows. Bathrooms and kitchens are two of the most demanding subfloor environments in a house: bathrooms because of moisture cycling and point loads from fixtures, kitchens because of heavy appliances and concentrated traffic patterns.
The fundamental subfloor requirement for any vinyl installation is flatness. Vinyl flooring standards typically specify a maximum variation of 3/16 inch over 10 feet for click-lock products and 1/8 inch over 10 feet for glue-down products. In bathrooms, high spots under LVT will concentrate foot traffic stress at the edges of tiles and accelerate joint failure. In kitchens, low spots under LVP will cause bounce and hollow sound underfoot that amplifies over time.
In bathrooms, moisture-resistant cement board is the preferred underlayment under glue-down vinyl when the existing subfloor is compromised or when installing over an older wood subfloor that shows moisture staining. Standard OSB or particleboard subfloors in bathrooms should be evaluated carefully — if there is existing moisture damage, replacing the affected sections before installing new vinyl is always the right decision, regardless of cost.
In kitchens, the main subfloor issue is typically an existing resilient floor that has been laid over and creates a height transition problem at doorways or appliance recesses. In many cases, the existing floor can remain and the new vinyl installs over it, but this requires the combined height to be compatible with appliance clearances and door swings.
Underlayment in Wet Rooms: When You Need It and When You Don’t
Underlayment decisions in bathrooms and kitchens are more constrained than in other rooms because moisture management takes priority over acoustic or thermal performance.
Most SPC and WPC products sold for residential use come with an attached underlayment — typically a thin closed-cell foam layer laminated to the underside of each plank. This attached underlayment is usually sufficient for kitchens over a clean, flat subfloor. Adding a second underlayment layer beneath a product with an attached layer compresses the click joints and can cause locking failures — this is a manufacturer-prohibited practice that voids most warranties.
In bathrooms over concrete subfloors, a separate underlayment with a moisture barrier function becomes relevant. Even SPC and WPC vinyl is waterproof as a product, but a concrete slab can emit moisture vapor that creates condensation between the slab and the floating floor over time. A 6 mil polyethylene vapor barrier, or an underlayment that incorporates a moisture barrier, addresses this without conflicting with the click-lock system as long as the total thickness is within the product’s specified tolerance.
For click-lock products without an attached underlayment — which are less common but still exist at budget price points — a 1 to 2 mm foam underlayment with a moisture barrier film is appropriate for both bathrooms and kitchens over concrete.
Bathroom-Specific Considerations
Bathrooms present a unique combination of stressors that differs from kitchens in important ways. The moisture is more localized and extreme — a shower produces steam that saturates the air, a toilet seal can fail slowly without obvious signs, and cleaning routines often involve significantly more water than any kitchen cleaning task.
Small bathroom format also changes the calculation. In a typical 5×8 bathroom, the floor area is small enough that sheet vinyl or glue-down LVT is not significantly more expensive to install than click-lock LVP, and both offer better moisture performance. The cost savings of click-lock installation — primarily labor time — are less significant at small square footages.
Color and pattern selection in bathrooms also matters in a practical sense. Light-colored vinyl in full bathrooms shows water spots from showers and foot traffic far more clearly than medium or patterned options. Textured surfaces — particularly products with embossed stone or slate textures — do a better job of disguising the minor water spotting and soap residue that accumulates between cleaning sessions.
Slip resistance in wet bathrooms is a specification that deserves attention and rarely receives it. DCOF (Dynamic Coefficient of Friction) is the relevant measurement — products rated 0.42 or above meet the ANSI A137.1 standard for wet surfaces. Not all vinyl flooring products publish their DCOF rating, but in bathrooms where older family members or young children are present, verifying this specification is worthwhile.
Kitchen-Specific Considerations
Kitchens demand a different performance profile than bathrooms. Moisture is still relevant, but the dominant stressors are mechanical: heavy appliances on casters, dropped items, chair leg movement, and the continuous abrasive effect of tracked-in grit from exterior entries.
Refrigerators create a specific problem for vinyl kitchens. Full-size refrigerators weigh 200 to 400 pounds, and when concentrated on four small casters, the point load is high enough to permanently indent most vinyl flooring over time. SPC flooring handles this better than WPC because the dense core resists compression more effectively. If indentation is a concern, a furniture pad under each refrigerator foot spreads the load — though this is difficult to manage with built-in refrigerators integrated into cabinetry.
Open-plan kitchens that connect to living or dining areas present a continuity question: should the vinyl run through the entire space or stop at the kitchen boundary? From a moisture management standpoint, vinyl that runs continuously across both spaces means any liquid spill in the kitchen area cannot run under a transition strip into an adjacent material. From a design standpoint, continuous flooring makes open-plan spaces read as larger and more unified. The practical answer in most cases is to run the vinyl through the full open-plan space and use transitions only at doorways and room boundaries.
Kitchen vinyl also takes more cleaning chemical exposure than any other room in the house. Most vinyl products have reasonable resistance to household cleaning products, but certain chemicals — solvent-based cleaners, highly concentrated bleach, and some commercial degreasers — can strip the wear layer finish over time. The practical instruction is to clean with pH-neutral floor cleaners and reserve stronger products for isolated stain removal rather than routine maintenance.
Comparing Vinyl to Competing Materials in Bathrooms and Kitchens
Vinyl does not exist in isolation. In both bathrooms and kitchens, it competes primarily with ceramic tile, porcelain tile, and — at the budget end — laminate. Understanding where vinyl wins and where it loses to each competitor clarifies where it belongs in your decision.
Versus ceramic and porcelain tile: Tile wins on absolute durability and heat resistance. A tile floor installed correctly will outlast any vinyl product by decades, is unaffected by hot pans or appliance heat, and maintains its surface indefinitely. Vinyl wins on underfoot comfort, warmth, acoustic performance, DIY installability, and cost. Tile also requires far more careful subfloor preparation — cracks in the substrate telegraph through grout joints — and grout lines in bathrooms require ongoing maintenance to prevent staining and mold growth.
Versus laminate: In both bathrooms and kitchens, vinyl is the clear choice over standard laminate. Even products marketed as “waterproof laminate” use HDF cores that absorb moisture when joints are compromised, and the failure mode — swelling, delamination, irreversible edge damage — is more expensive to repair than most vinyl failures. The only scenario where laminate makes sense over vinyl in these rooms is aesthetic preference for a specific laminate visual that does not have a vinyl equivalent, which becomes increasingly uncommon as vinyl print technology improves.
For a direct side-by-side comparison of how vinyl and laminate perform specifically in wet environments, our article on waterproof laminate or waterproof vinyl examines the actual differences behind both categories’ “waterproof” claims.
How to Choose Between LVP and LVT for Your Specific Room
Given the format options, the practical decision most homeowners face is choosing between LVP (plank format, typically click-lock) and LVT (tile format, click-lock or glue-down). The choice is not purely aesthetic.
In bathrooms, LVT in a glue-down application is the most technically sound choice for full baths with showers. The tile format and direct adhesive bond minimize joint exposure and eliminate the movement-related stress that click-lock plank formats experience. In half-baths and powder rooms, LVP in click-lock format is entirely appropriate and offers faster installation at typically lower product cost.
In kitchens, LVP click-lock is the dominant choice and performs well for most residential applications. The plank format aligns naturally with kitchen aesthetics and the typical 20+ mil wear layer available in residential LVP handles kitchen traffic adequately. Glue-down LVT in kitchens makes more sense in commercial or semi-commercial applications where foot traffic is exceptionally high or where large, heavy equipment creates subfloor stress that floating products cannot accommodate.
The vinyl plank flooring vs vinyl sheet flooring comparison covers the format decision from a different angle — particularly useful if sheet vinyl is still in consideration for your bathroom.
Cost Expectations for Vinyl in Bathrooms and Kitchens
Vinyl flooring for bathrooms and kitchens spans a wide cost range, and understanding what drives price differences prevents both overspending on unnecessary features and underspending on specifications that matter.
At the product level, budget vinyl (typically sheet vinyl or entry-level LVP at 6 to 8 mil wear layer) runs $1.50 to $3.00 per square foot. Mid-range residential LVP or LVT at 12 to 20 mil wear layer runs $3.00 to $6.00 per square foot. Premium products — SPC at 20+ mil, wide-plank formats, commercial-rated wear layers — range from $6.00 to $10.00+ per square foot.
Installation cost adds $2.00 to $5.00 per square foot for standard floating click-lock in straightforward rooms. Glue-down installation is typically $1.00 to $2.00 more per square foot due to additional labor and adhesive material costs. Subfloor preparation — leveling compound, moisture barrier application, removal of existing flooring — is an additional cost that varies widely depending on existing conditions but can easily equal or exceed the material cost in older homes with problematic substrates.
For bathrooms and kitchens specifically, the practical advice is to prioritize wear layer thickness over visual upgrades. A 20 mil SPC product with a simpler pattern will outlast a 12 mil WPC product with premium embossing by a substantial margin in a kitchen environment. The floor’s longevity ultimately determines its actual cost per year, and durability specifications matter more than aesthetics when calculating that number.
Maintenance and Long-Term Care
Vinyl flooring in bathrooms and kitchens requires less maintenance than almost any other flooring category, but the few things that do matter are worth establishing as routine habits from installation day.
Daily maintenance is sweeping or vacuuming to remove abrasive grit before it can work into the wear layer under foot traffic. In kitchens, the area in front of exterior doors and the path from the cooking area to the dining table are the two highest-wear zones where grit accumulates fastest. A mat at the exterior entry point captures the majority of tracked-in particles before they reach the vinyl surface.
Wet mopping with a damp — not soaked — mop and a pH-neutral cleaner is the correct routine cleaning method. Standing water on vinyl floors, even genuinely waterproof products, creates unnecessary joint stress over time and can seep under baseboards into wall cavities. The goal is to clean with moisture rather than flood with it.
In bathrooms, the toilet base deserves specific attention. Condensation and minor splashing around the toilet base creates a consistently wet zone that is easy to overlook during routine cleaning. Silicone caulking the toilet base perimeter — rather than leaving a gap between the toilet and the floor — prevents moisture from wicking under the vinyl at this vulnerable point.
Furniture and appliance point loads should be managed with felt pads on all chair and table legs and with appliance feet pads under refrigerators and heavy freestanding ranges. These small additions extend wear layer life by preventing the localized compression that creates permanent indentations over years of use.
Common Installation Mistakes That Cause Premature Failure
The majority of vinyl flooring failures in bathrooms and kitchens trace to installation errors rather than product deficiencies. The most consequential mistakes are consistent across product types and formats.
Insufficient expansion gap installation is the leading cause of buckling in floating vinyl floors. Click-lock LVP and LVT need a minimum 1/4 inch gap at all vertical surfaces — walls, cabinet bases, door frames, pipes, and fixed islands. In kitchens, built-in cabinet bases and dishwasher openings are the most frequently overlooked locations. A floor that looks perfect on installation day can buckle dramatically in its first summer if expansion gaps are missing at these points.
Skipping acclimation is the second most common error. Vinyl flooring needs to acclimate to the room’s temperature and humidity before installation — typically 24 to 48 hours in the installation environment. In new construction or freshly renovated spaces, HVAC systems must be operational during acclimation for the acclimation to be meaningful. Vinyl installed cold from a delivery truck into a warm kitchen will expand after installation and can create joint pressure that causes locking failure.
Improper subfloor prep — installing over a floor with height variation that exceeds the product’s tolerance — creates a floor that creaks, has hollow spots, and in glue-down applications, shows telegraphed surface imperfections that worsen over time as adhesive compresses unevenly under traffic.
In bathrooms specifically, failing to caulk the perimeter rather than relying on baseboard alone to cover the expansion gap is an error that creates moisture infiltration risk. Baseboard is a cosmetic element, not a moisture barrier. Flexible silicone caulk at the floor-to-wall joint in bathrooms closes the gap that water will inevitably find.
The Bottom Line on Vinyl for Bathrooms and Kitchens
Vinyl flooring earns its place as the most practical choice for bathrooms and kitchens not because of any single property but because of how its entire performance profile maps onto what these rooms actually need. Water resistance, durability, underfoot comfort, acoustic management, aesthetic range, and cost-effectiveness combine in a way that no competing material matches across all categories simultaneously.
The decision within the vinyl category matters, though. For kitchens, SPC at 20 mil or higher in a click-lock format is the most defensible general recommendation — dimensionally stable, wear-resistant, and straightforward to install. For full bathrooms with showers, glue-down LVT or sheet vinyl eliminates the joint-exposure vulnerability that click-lock formats carry in consistently wet environments. For powder rooms and half-baths, click-lock LVP is entirely appropriate and offers the fastest, most cost-effective path to a durable, attractive floor.
If you are evaluating flooring for a bathroom or kitchen and want to discuss specific product recommendations for your subfloor conditions and usage requirements, our vinyl flooring services team works through these decisions regularly and can provide site-specific guidance that generic product descriptions cannot.
James Miller is a seasoned flooring contractor with years of hands-on experience transforming homes and businesses with high-quality flooring solutions. As the owner of Flooring Contractors San Diego, James specializes in everything from hardwood and laminate to carpet and vinyl installations. Known for his craftsmanship and attention to detail, he takes pride in helping clients choose the right flooring that balances beauty, durability, and budget. When he’s not on the job, James enjoys sharing his expertise through articles and guides that make flooring projects easier for homeowners.
What Is Birch Flooring? Birch is a domestic hardwood native to North America and parts of Northern Europe, and it has a long history in residential flooring. When people talk about birch as a flooring material, they are almost always referring to one of two commercially relevant species: yellow birch (Betula alleghaniensis) or sweet birch…
Carpet installation looks straightforward until it isn’t. You order the carpet, pull up the old floor, roll out the pad, and then somewhere between the first tack strip and the last trimmed edge, something goes wrong. A ripple shows up two weeks later. A seam opens. The edges start lifting. The floor sounds hollow underfoot…
Installing laminate flooring over a plank subfloor is possible when the plank subfloor is at least 3/4 inch thick, structurally sound, flat within 3/16 inch over a 10-foot radius, and dry. The laminate flooring must be installed using the floating method, the planks must run perpendicular to the direction of the subfloor planks, and a…
Before you look at a single brand name, you need to understand what you are actually evaluating. Most people walk into a showroom, pick a color they like, check the price per square foot, and call it a decision. That approach works fine until you are three years in and your floor is cupping, your…
Most flooring comparisons waste your time. They list bullet points, dodge the hard trade-offs, and leave you exactly where you started. This one won’t do that. Laminate and vinyl plank flooring look almost identical in a showroom. They both click together. They both run $2 to $6 per square foot at the entry level. They…
Sunlight does not ask permission before it starts destroying your carpet. It enters through south- and west-facing windows every single afternoon, and the damage it delivers is cumulative, invisible at first, and entirely irreversible once it sets in. By the time you see a faded band of color running across your living room floor, the…