

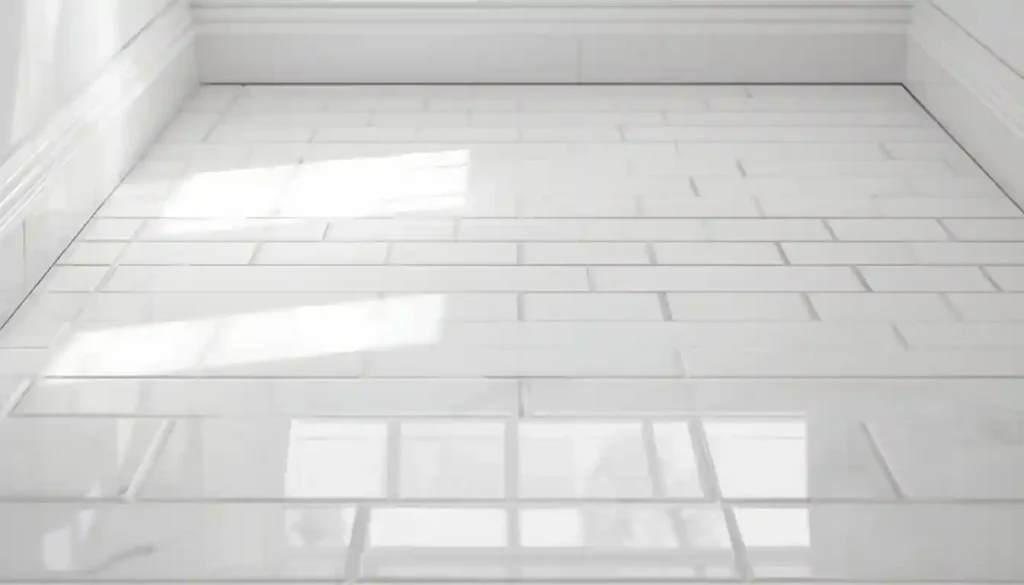
The pattern you choose dramatically affects how expensive the floor looks. A standard horizontal running bond is the cheapest to install because it requires the fewest cuts and minimal alignment skill. If your installer charges by the square foot, sticking with running bond or a simple vertical stack keeps labor predictable. Upgrading to a herringbone or diagonal offset layout with the same inexpensive tile immediately elevates the visual result without changing the material cost, though it will add roughly 15 to 20 percent to labor because of the additional cutting required.
White subway tile works hardest in small bathrooms, laundry rooms, and mudroom entries. Its reflectivity bounces light around tight spaces in a way that makes them feel larger. Grout color has an outsized effect on the final look: bright white grout reads clean and spa-like, charcoal or dark grout makes the pattern pop graphic and bold, and a warm cream grout softens the tile toward something more vintage and relaxed.
One practical note: subway tile floors require more grout than larger tiles because of the higher number of joints. Budget for grout sealer in your first-year maintenance plan. Unsealed grout in a kitchen or bathroom will absorb grease and moisture and discolor within months.
If you want to understand how different tile materials compare for wet areas before committing, the breakdown of pros and cons of tile flooring covers durability, moisture behavior, and long-term maintenance in more detail.
2. Concrete-Look Porcelain Tile
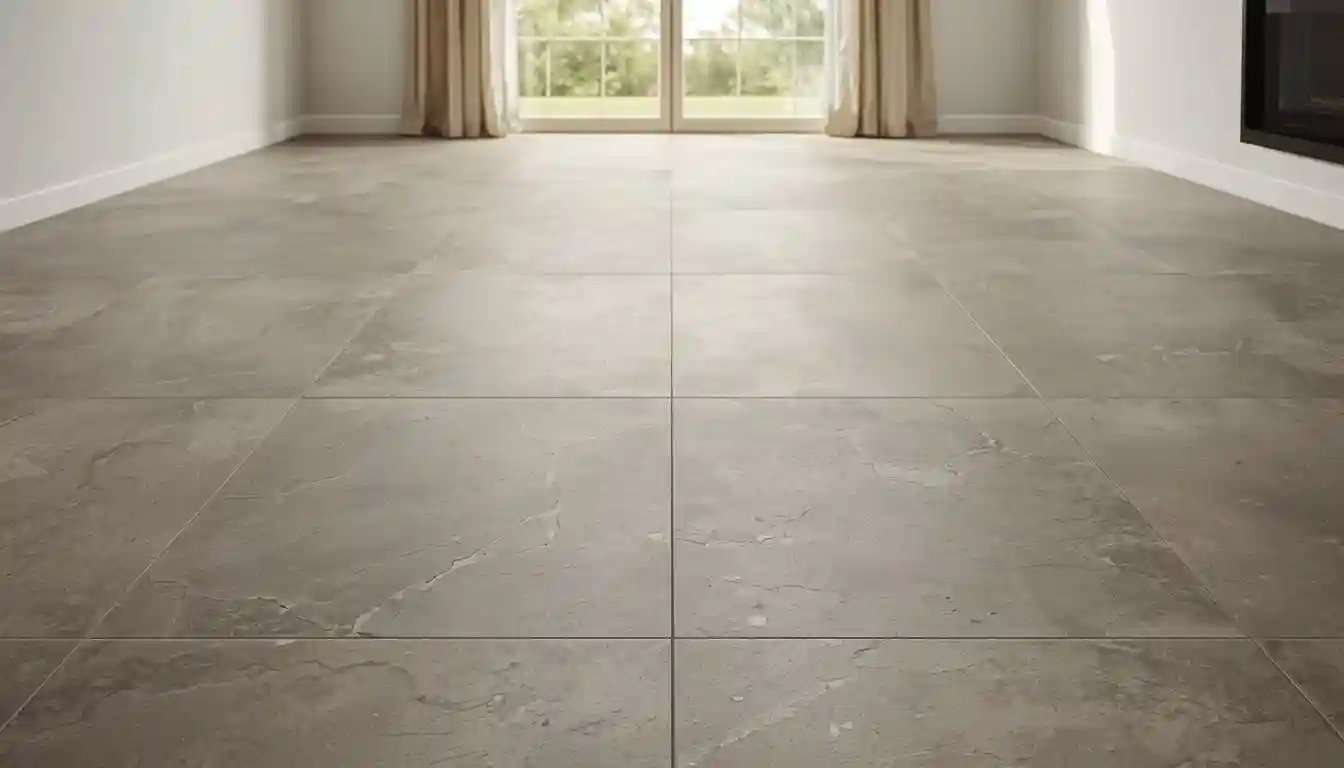
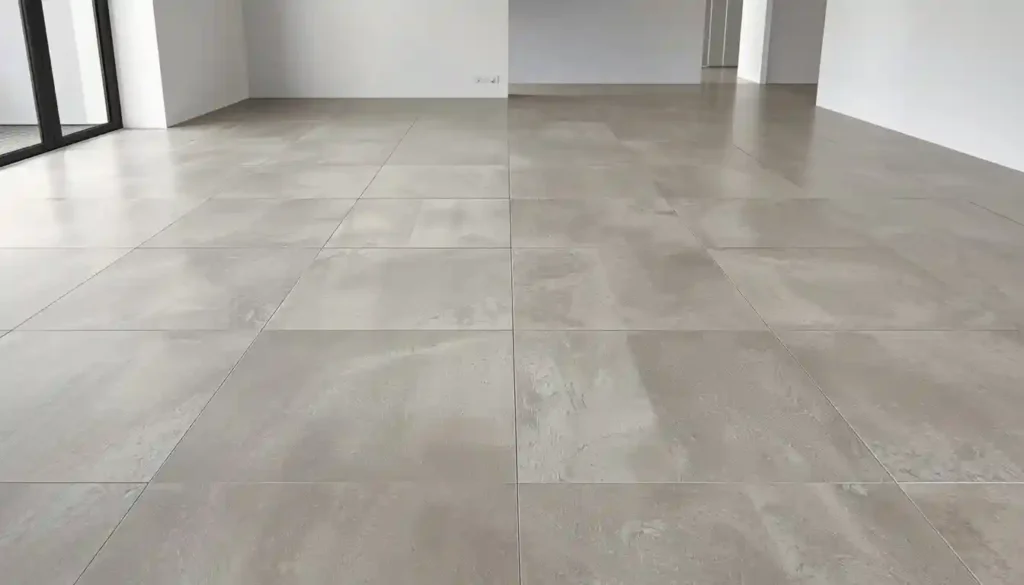
Genuine polished concrete floors cost anywhere from $8 to $15 per square foot installed and require a professional finisher with specialized equipment. Concrete-look porcelain tile delivers an almost identical visual result for $2 to $4 per square foot on materials, and it does not need sealing, does not crack under thermal movement, and is far easier to install on a standard subfloor.
The appeal of the concrete aesthetic is its versatility. It reads as industrial in a loft apartment, minimalist in a Scandinavian-inspired space, and quietly sophisticated in a contemporary open-plan home. The gray tones in good concrete-look tile sit in the middle of the warm-cool spectrum, which means they pair with warm wood tones, cool whites, and earthy terracottas without clashing.
Large format sizes — 24×24 inches or 18×24 inches — reinforce the concrete illusion by minimizing grout lines. Fewer grout lines make the floor read as a continuous surface rather than assembled tiles, which is exactly what concrete looks like. This is where budget concrete-look tile genuinely punches above its price point: the large format format means less grout, which means faster installation and lower labor cost despite the tile size requiring more careful leveling.
Matte finishes perform better on floors than polished finishes in this category. The polished versions show footprints, water spots, and dust in ways that require constant cleaning. A matte or semi-matte concrete-look tile gets scuffs and surface marks significantly less aggressively, which is a real quality-of-life difference in high-traffic hallways, kitchens, and open-plan living areas.
For bathrooms and basement floors, verify that the specific tile you select has an appropriate slip resistance coefficient. Many large-format tiles have smooth faces intended for low-traffic areas. Look for a DCOF (Dynamic Coefficient of Friction) rating above 0.42 for wet floor applications.
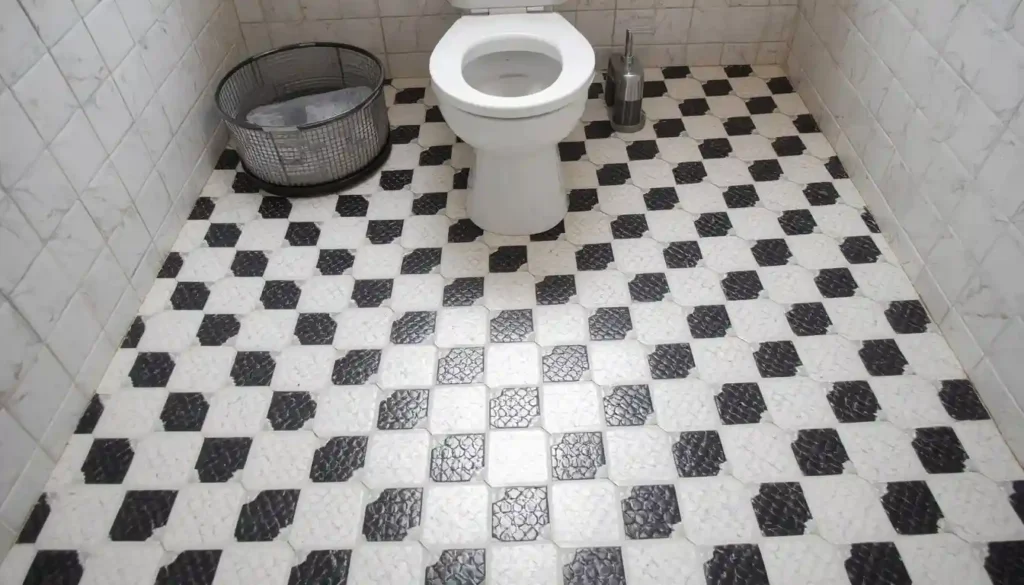
3. Black and White Checkerboard Ceramic
Checkerboard tile flooring is one of those design choices that refuses to go out of fashion because it works across dramatically different aesthetics. It shows up in 1920s farmhouses, 1950s diners, mid-century modern kitchens, and contemporary black-and-white bathrooms with equal conviction. The format is simple: alternating square tiles in two contrasting colors, most commonly black and white but also cream and gray, beige and terracotta, or sage green and cream.
Plain ceramic in two colors is about as cheap as tile gets. Standard 12×12 inch ceramic floor tiles in black and white run between $1 and $2.50 per square foot each, meaning the full material cost for a checkerboard floor typically lands between $1.50 and $3 per square foot for materials alone. That is genuinely budget territory for something that looks this intentional.
Tile size affects the character of the pattern dramatically. Small 4×4 inch tiles on a kitchen floor create a vintage, slightly busy look that reads as retro and charming. Large 18×18 inch tiles in the same colors feel bold and architectural, a statement floor rather than a nostalgic one. The classic 12×12 inch format sits in the middle: recognizable without being overwhelming, works in kitchens, mudrooms, bathroom floors, and laundry rooms.
Diagonal installation of a checkerboard pattern — laying the tiles at 45 degrees to the walls — makes small rooms look larger because diagonal lines draw the eye along the longest dimension of the space. This is a well-documented design technique and it costs nothing extra in materials, only slightly more in cutting and labor.
Grout color matters enormously here. Dark grout between contrasting tiles becomes a visible third element in the pattern and can feel heavy. White or light gray grout between black and white tiles allows the pattern to read cleanly. Some installers use matching grout for each tile color, alternating as they go, which looks sharp but adds installation time.

4. Wood-Look Porcelain Tile
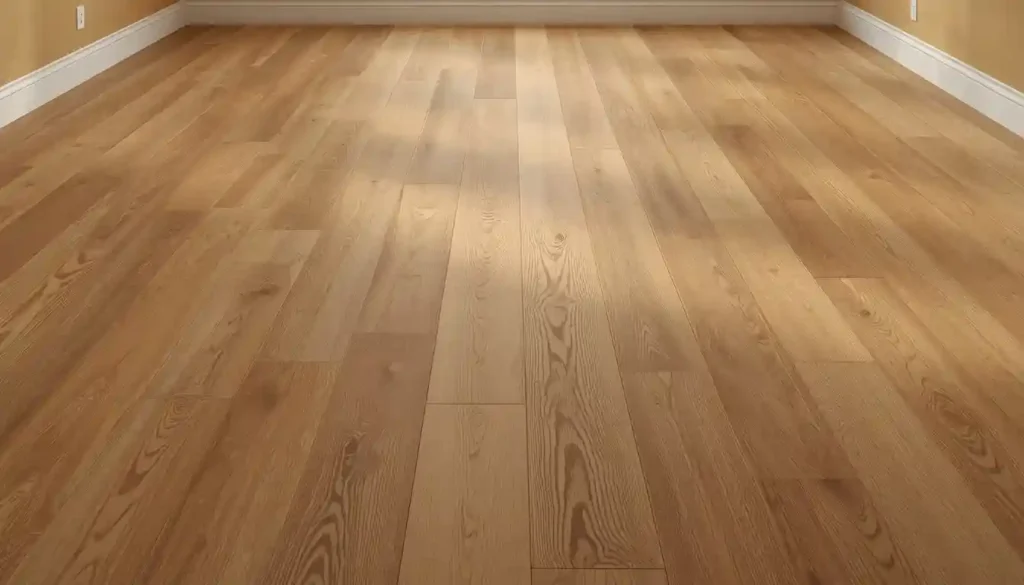
Wood-look porcelain tile is arguably the single most transformative development in affordable flooring of the last fifteen years. Modern inkjet printing technology can reproduce the grain, knot patterns, and color variation of real oak, walnut, pine, or teak on a ceramic or porcelain tile surface with a fidelity that is nearly indistinguishable from the real thing at floor level. The result is a floor that reads visually as wood but is completely waterproof, scratch-resistant, and requires zero refinishing over its lifetime.
Material costs for wood-look porcelain start around $2 per square foot for basic rectangular formats and run to about $5 per square foot for premium versions with more realistic texture and variation. That places entry-level wood-look tile firmly in budget territory, especially when compared to real hardwood which starts at $6 to $8 per square foot for materials alone before installation.
The plank format — typically 6×24 or 6×36 inches — is what makes wood-look tile convincing. Wider and longer planks look more realistic because real hardwood floors are also sold in plank format. Some manufacturers offer 8×48 inch formats that genuinely look like wide-plank hardwood at a fraction of the cost.
Wood-look tile is particularly well suited to spaces where real hardwood is impractical: bathrooms, kitchens, basements, and covered outdoor areas. Because it is completely waterproof, it handles spills, humidity, and temperature fluctuation that would damage genuine wood flooring. This opens up rooms where homeowners previously had to choose between aesthetic warmth and practical durability.
The installation pattern matters here too. Running bond (standard plank offset) is the default. Herringbone with wood-look planks is currently one of the strongest design trends in tile flooring and gives a basic floor an architectural quality that looks far more expensive than the material cost suggests. A herringbone layout does require more precise installation and will add to labor cost, but the visual payoff is significant.
If you are considering real hardwood alternatives alongside tile, the tile flooring versus hardwood comparison covers durability, resale value, and maintenance in each scenario, which helps clarify when the tile version genuinely makes more sense.
5. Hexagon Tile with Minimal Grout
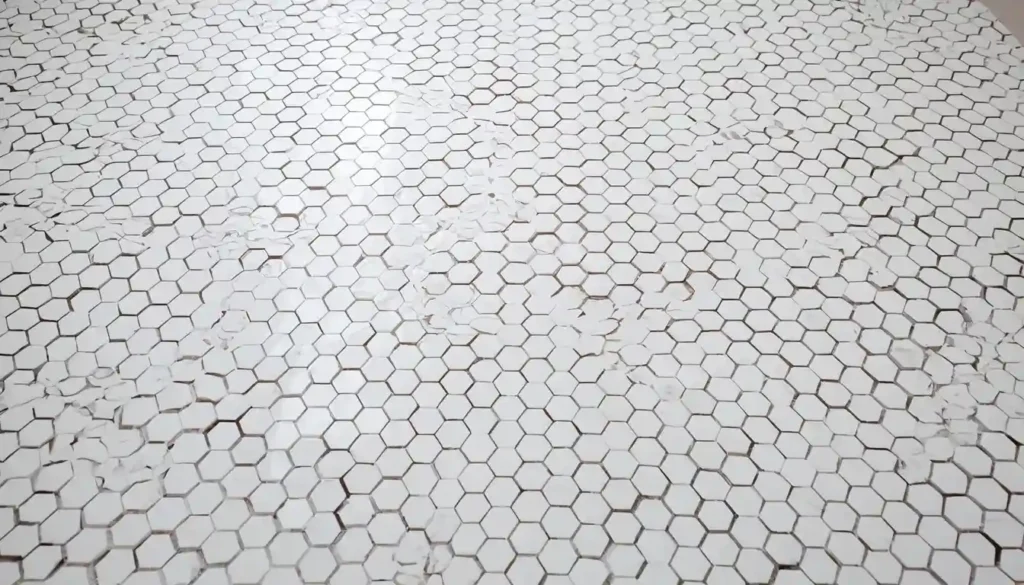
Hexagonal tile is one of the most design-forward options available at a budget price point. A plain white or off-white hex tile in a 2-inch or 4-inch format costs between $2 and $4 per square foot, comes on mesh backing for straightforward installation, and produces a floor that reads as deliberately designed rather than generic.
The geometry of hexagons means they tile a plane with no gaps without any cuts except at the edges, which is mathematically elegant and practically convenient during installation. The mesh backing on most mosaic hex tile means large sheets go down in single placements, which keeps labor time manageable despite the small tile size suggesting complexity.
Color choices for hex tile expand the design possibilities considerably. Pure white on a bathroom floor with white grout creates a clean, almost invisible backdrop. Black hex with white grout is bold and graphic. Mixing two grout colors — white in some joints, gray in others — is not practical, but choosing a mid-tone grout between white and gray tiles creates a softer, more blended look. Some homeowners use a single color of hex tile but alternate between matte and glossy tiles in the same color to create a subtle texture pattern that only becomes visible in raking light.
One important budget consideration: small hex tiles have more grout than almost any other tile format. Grout adds to material cost, and sealing that grout adds to maintenance. If you are installing hex tile in a kitchen or bathroom, budget for a high-quality penetrating grout sealer applied after installation and plan to reapply annually. Hex tiles with wider joints or darker grout will show less staining over time.
For entryways and bathroom floors, a 2-inch or 1-inch penny-round mosaic in the same price range creates a similar effect with even more visual texture. Penny round tile on a bathroom floor with a dark grout is a strong, timeless choice that photographs well and holds up to daily use for decades.
6. Diagonal Ceramic Tile Layout
This is one of the most underused tricks in budget tile design: take a completely ordinary and inexpensive square ceramic tile, rotate it 45 degrees relative to the walls, and the same tile that would look dull laid straight suddenly looks intentional and architecturally considered. The material cost does not change at all. The tile is the same tile. What changes is how the eye reads the floor.
Diagonal tile layouts work particularly well in small rooms and hallways. The angled lines draw the eye along the longest dimension of the space rather than across it, creating a visual expansion effect similar to what mirrors achieve on walls. A long narrow bathroom installed with diagonal tile at 45 degrees feels wider than the same room with the same tile laid straight because the diagonal is running toward the longer dimension and leading the eye outward.
The practical cost consideration for diagonal installation is that it increases waste. Cutting tiles at 45 degrees to fit along straight walls produces triangular offcuts that cannot always be reused. A standard diagonal layout typically adds 10 to 15 percent to material waste compared to a straight lay. Budget for this when ordering: if your room needs 100 square feet of tile installed straight, order 115 square feet for a diagonal layout.
Labor cost increases modestly for diagonal installation because the installer needs to establish diagonal reference lines and make more cuts, but it does not approach the labor premium of more complex patterns like herringbone. For a budget project where you want a higher-end look without the cost of more complex tile, diagonal layout on inexpensive ceramic is one of the highest return-on-investment moves available.
Plain beige, cream, or light gray ceramic tile installed diagonally with a matching or slightly contrasting grout is a classic and cost-effective combination. The same tile in a darker color — slate gray, deep charcoal, or terracotta — installed diagonally makes a stronger statement that works in entryways and kitchen floors where you want the floor to be a deliberate design element.
7. Large Format Tile on a Budget
Counterintuitively, larger tiles can actually reduce the total cost of a tiled floor. Here is why: a 24×24 inch tile covers four times the area of a 12×12 inch tile. Fewer tiles means fewer grout joints. Fewer grout joints means less grout material, less time spent grouting, and less time spent sealing. The installation goes faster with a skilled installer. Material cost for budget large-format porcelain now starts around $2.50 to $3.50 per square foot, which is not dramatically more than small ceramic tiles but delivers a floor that reads as significantly more upscale.
The seamless quality of a large-format tile floor — particularly in a 24×24 or 24×48 inch format — is what makes rooms feel expansive and professionally finished. Design magazines are filled with large-format tile floors precisely because the format photographs well and reads as premium regardless of the actual tile cost. The fewer the grout lines, the more the floor reads as a continuous surface rather than assembled pieces.
The practical challenge with large format tile is the subfloor. Larger tiles are less forgiving of subfloor variation because a single tile spans a larger area where deflection or unevenness becomes visible. Before laying large format tile, the subfloor needs to be flat to within 1/8 inch over a 10-foot span. A skilled installer will use a self-leveling compound to correct minor variations before tiling. This adds some cost upfront but prevents cracked tile and lippage — the condition where the edge of one tile sits higher than the adjacent tile, creating a trip hazard and visible inconsistency.
Large-format tile installed in a bathroom over concrete subfloor is a project with fewer complications than installation over a wood subfloor, which has more flex. Understanding how tile performs over concrete versus wood subfloor helps you choose the right adhesive and installation method for your specific situation before the project begins.
Light gray and cool white large-format tiles in a matte finish are the most versatile budget choices in this category. They read as genuinely neutral, work with warm and cool decor alike, and are the most widely available in budget price ranges at home improvement stores.
8. Terracotta-Look Ceramic Tile
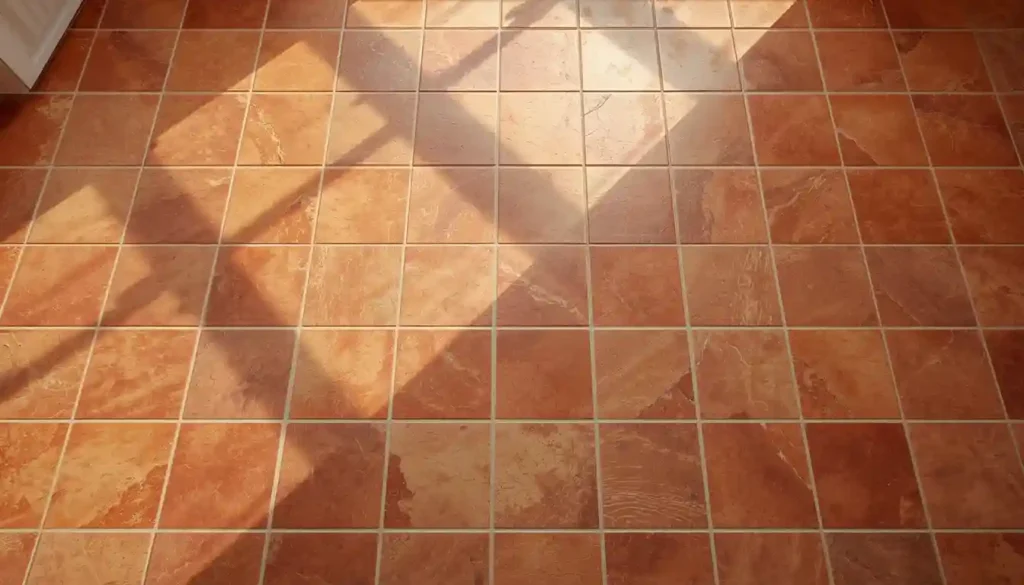
Authentic fired terracotta tile has a warmth and earthiness that no other material replicates exactly. It also comes with real drawbacks: it is porous, requires regular sealing, stains from spills and grease, and costs significantly more than basic ceramic. Porcelain and ceramic tiles that replicate the terracotta look solve most of these problems at a fraction of the cost.
Budget terracotta-look ceramic starts around $1.50 to $3 per square foot and delivers the warm earthy tones, subtle surface texture, and slight color variation that makes genuine terracotta appealing. Because the look is printed or achieved through the clay body of a ceramic tile rather than fired terracotta, the material is glazed, much less porous, and requires no special sealing routine beyond standard grout sealer.
The warm tones in terracotta tile — ochre, rust, burnt sienna, muted clay orange — align with the broader 2025 interior design shift toward warmer naturalistic palettes and away from cool gray and white minimalism. This is a tile choice that is genuinely on trend in a way that is unlikely to feel dated quickly, because terracotta has been in continuous use in Mediterranean, Spanish colonial, and Southwest-influenced architecture for centuries.
Terracotta-look tile works particularly well in kitchens, dining rooms, and covered outdoor patios. In a kitchen, the warm tones pair naturally with wood cabinetry, brass or matte black hardware, and white or cream walls. In a dining room, the earthy quality grounds a space in a way that cool gray tile does not. For a covered patio, a frost-rated terracotta-look porcelain is virtually maintenance-free and adds genuine character to an outdoor living space.
Square formats in 8×8 or 12×12 inches feel authentic and somewhat rustic. Larger 18×18 inch formats in the same terra tones read as more contemporary and are easier and faster to install. A mix of sizes — using a few larger squares with smaller accent squares inset at corners — is a traditional Mediterranean floor pattern that costs almost nothing extra in materials and adds significant visual interest.
9. Encaustic-Look Porcelain Pattern Tile
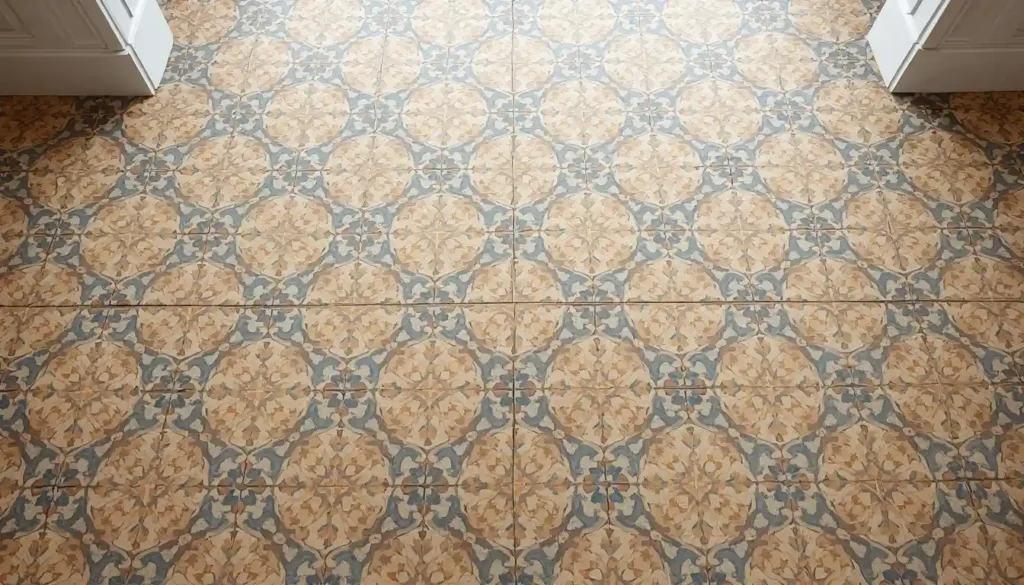
Authentic encaustic cement tiles — the hand-pressed, pigmented cement tiles with geometric or floral patterns associated with Spanish, Portuguese, and North African architecture — are genuinely beautiful and genuinely expensive. Material cost alone for authentic encaustic cement tile runs from $10 to $25 per square foot, before installation and before the mandatory pre- and post-grouting sealing process that prevents the porous cement from permanently staining during installation.
Porcelain tiles printed with encaustic-style patterns are a different product entirely: they are not cement, they are fired porcelain with the pattern printed on the surface under a protective glaze. They cost $2 to $5 per square foot, install like standard tile without special sealing requirements, and deliver 85 to 90 percent of the visual impact of genuine encaustic at a fraction of the price. For a budget project, that trade-off is straightforward.
The design range in encaustic-look porcelain is enormous. Classic eight-pointed stars, Moroccan zellige-inspired geometrics, floral medallion repeats, simple two-tone chevrons, and complex multicolor patterns are all available at budget price points. Because the pattern covers the full tile face, even a small bathroom floor of 40 to 50 square feet creates a significant visual statement.
Patterned tile floors work best when the surrounding walls and furnishings are kept relatively quiet. A busy geometric tile floor paired with complex wallpaper and patterned upholstery reads as chaotic. The tile should be the floor’s statement element, with walls, cabinetry, and textiles staying in neutral territory to let the pattern breathe. This is why encaustic-look tile floors appear so often in bathrooms and entryways: contained spaces where one strong floor is the design decision rather than one element among many competing for attention.
Grout color is critical here. Dark grout outlines each tile individually and makes the pattern read as a collection of separate pieces. Light grout, particularly in a tone that matches the lighter colors in the tile pattern, allows the overall repeat to read as a continuous design rather than assembled tiles. Test your grout color with a tile sample before committing to a full installation.
The relationship between tile pattern and room decor is something worth mapping out before you buy. The guide to matching tile flooring with room decor walks through how to assess whether a pattern will work with your existing walls, cabinetry, and furnishings rather than compete with them.
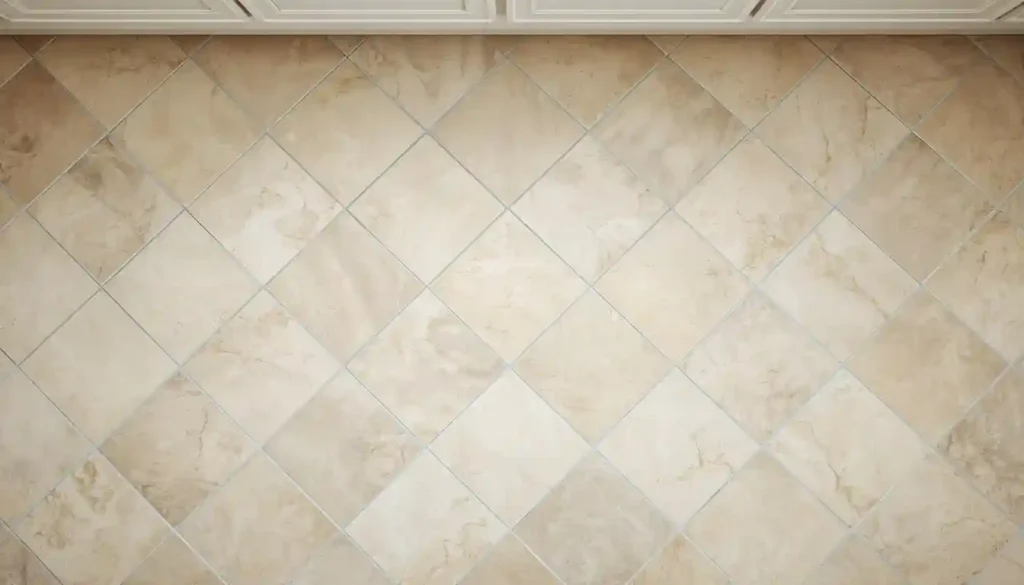
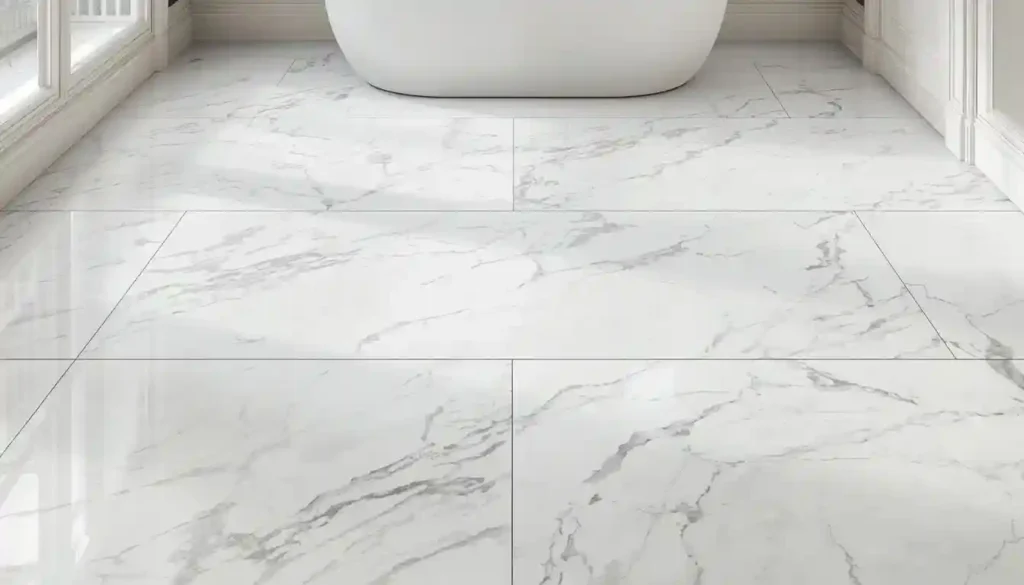
10. Marble-Look Ceramic Tile
Natural marble flooring costs $15 to $40 per square foot for material and requires sealing, careful cleaning, and ongoing maintenance because marble is a porous, reactive natural stone. Ceramic and porcelain tiles printed to replicate marble veining and surface sheen cost $2 to $5 per square foot and require none of marble’s maintenance overhead. Modern printing technology has made the replication surprisingly convincing: the veining patterns, color gradients, and even the subtle translucency of real marble are reproduced with enough fidelity that the distinction is not visible without close inspection.
White Carrara-style marble look tile is the most popular version and the most widely available at budget prices. The characteristic gray-on-white veining reads as classic and refined, pairs with virtually any cabinetry or wall color, and reflects light in a way that makes rooms feel brighter and larger. This makes it a strong choice for small bathrooms, powder rooms, and kitchen areas where a sense of space and light is the goal.
Beyond Carrara white, marble-look tile is available in warmer tones — beige and gold veining on cream, dark forest green with white veining, deep black with gold veining — that read as more dramatic and contemporary. These bolder marble looks are having a significant moment in current interior design, appearing in high-end showrooms at prices that are out of reach for most budgets, but are replicated in porcelain format at very accessible price points.
Polished marble-look porcelain tiles should be specified as floor-rated (PEI 3 or higher) because the polished surface can become slippery when wet. Many budget marble-look tiles are sold for both floor and wall use, but verify the slip resistance specification for your specific installation. Polished tile on a bathroom floor where water is regularly present is a genuine safety issue if the tile does not meet minimum DCOF standards.
Using marble-look tile in a large format — 24×24 inches or 18×36 inches — reinforces the illusion of natural stone because the tile joints are minimized and the continuous surface mimics a stone slab. Smaller marble-look tiles look more like assembled tiles and less like stone, reducing the visual impact of the choice.
11. Peel-and-Stick Vinyl Tile for Rental and Temporary Spaces
Peel-and-stick vinyl tile occupies a specific and useful niche in budget tile flooring: it is the right answer when the subfloor is adequate, the installation needs to be reversible or renter-friendly, the room is a lower-traffic space like a bathroom, laundry room, or basement storage area, and the budget is genuinely tight. Material cost runs from $0.50 to $2 per square foot, and installation requires no tools beyond a utility knife and a straightedge for trimming edges. A typical small bathroom can be done in a single afternoon.
The product has improved substantially in the last several years. Better adhesive formulas mean properly applied peel-and-stick tile stays in place reliably for three to five years on a clean, smooth subfloor. The printing quality on premium peel-and-stick vinyl now reproduces stone looks, concrete looks, and wood looks convincingly enough that the difference is not obvious in photographs. Solid color vinyl tile in black and white for a checkerboard pattern is a particularly strong-looking result given the material cost involved.
What peel-and-stick vinyl tile is not: it is not a permanent flooring solution, it is not suitable for high-traffic areas where heavy furniture or appliances will be dragged across it, it is not appropriate for subfloors with surface variation or adhesive residue from old flooring, and it does not survive the same cleaning chemicals that ceramic or porcelain handles without damage. Understanding its limitations honestly is what separates a successful peel-and-stick installation from a failed one.
Subfloor preparation is the single most important factor in peel-and-stick tile performance. The adhesive requires a clean, smooth, dry surface. Any bumps, gravel, or debris will telegraph through the thin tile and be visible from standing height. Existing vinyl or linoleum in good condition is actually a good substrate. Concrete subfloors need to be swept, vacuumed, and wiped down before application. Installing over old tile is possible if the old tile is flat and firmly adhered with no loose edges.
For renters or homeowners in transitional spaces, peel-and-stick tile is the most affordable way to change the appearance of a dated floor while preserving the option to restore the original surface when needed. When it comes time to remove it, a heat gun softens the adhesive enough that tiles peel away cleanly from most surfaces without damage.
If you are comparing peel-and-stick vinyl tile against standard vinyl tile formats to decide which works for your specific subfloor and room conditions, the overview of vinyl flooring types including LVT, SPC, and sheet vinyl helps clarify where each format performs best and what subfloor conditions each requires.
Getting the Most From a Budget Tile Project
Choosing inexpensive tile is half the battle. What separates a budget tile floor that looks cheap from one that looks intentional is everything that surrounds the tile itself: subfloor preparation, grout choice, grout color, sealing, and the transition details where the tile meets other flooring materials or door thresholds.
Subfloor flatness is the foundation. Tile is rigid. Any subfloor variation greater than 1/8 inch over 10 feet will result in cracked tile, hollow spots, or lippage at tile edges. This is true of $1 ceramic and $10 marble alike. Spending $100 to $200 on a bag of self-leveling compound before tiling is significantly cheaper than repairing cracked tiles after installation.
Grout selection matters almost as much as tile selection. A beautifully chosen tile installed with poor-quality or wrong-colored grout will never look right. Spend time with grout color samples held against your actual tile in your actual room before ordering. Natural light at different times of day changes how grout color reads. Undertones in grout that look neutral in the store can read green or purple in your specific room’s light.
Transitions between tile and adjacent flooring materials — carpet, hardwood, or vinyl — are where budget projects most often reveal themselves. A cheap or poorly installed transition strip at a doorway undermines the entire floor. Good-quality aluminum or solid brass T-molding transitions cost very little relative to the total project but are the detail that a visitor’s eye catches at a room entry.
Sealing grout is not optional in kitchens and bathrooms. Unsealed grout absorbs cooking oils, soap residue, and moisture. Within six months of installation in an unsealed kitchen, white grout will be permanently gray. A quality penetrating grout sealer applied once after installation and once annually keeps grout looking clean and extends the life of the floor by years. This is the most cost-effective maintenance step available for any tile floor.
Understanding what a proper subfloor requires for tile — particularly in concrete versus wood subfloor situations — prevents the most common costly mistakes. The practical considerations around choosing the right subfloor for tile flooring are worth reviewing before installation begins, especially if you are taking a DIY approach where a foundation error could require tearing out finished work.
Finally: buy more tile than your room measurements require. The standard advice is to order 10 percent extra for a straight lay and 15 percent for diagonal or herringbone patterns. This accounts for cuts, breakage, and future repairs. Tile gets discontinued, and the color consistency of new production runs is never perfectly matched to original batches. If a tile cracks in three years and you need to replace one piece, having three spares from the same original order means the repair is invisible. Running short during installation and having to order more from a potentially different production batch is one of the most frustrating and common budget tile project problems, and the solution costs almost nothing if planned for in advance.
Many budget tile projects benefit significantly from understanding the full installation process before starting. The step-by-step guide to installing tile flooring covers substrate preparation, layout planning, adhesive selection, and grouting in the sequence a professional would approach them, which helps DIY installers avoid the sequencing errors that lead to visible problems after the floor is finished.
One often-overlooked budget advantage of tile flooring is longevity. A properly installed ceramic or porcelain tile floor installed on an adequate subfloor with quality adhesive and sealed grout will outlast almost any other flooring material in the same price range. How long tile flooring lasts versus alternatives like vinyl, laminate, or carpet is a critical part of the true cost calculation that per-square-foot material comparisons miss entirely: a $3 per square foot ceramic tile that lasts 30 years has a very different lifetime cost than a $1.50 per square foot vinyl tile that needs replacement in eight to ten years.


