

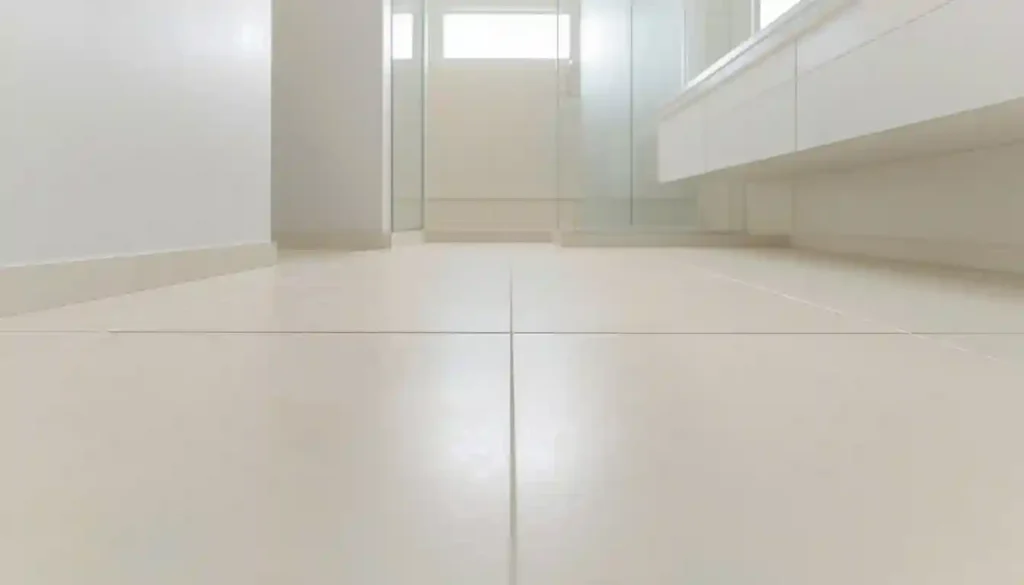
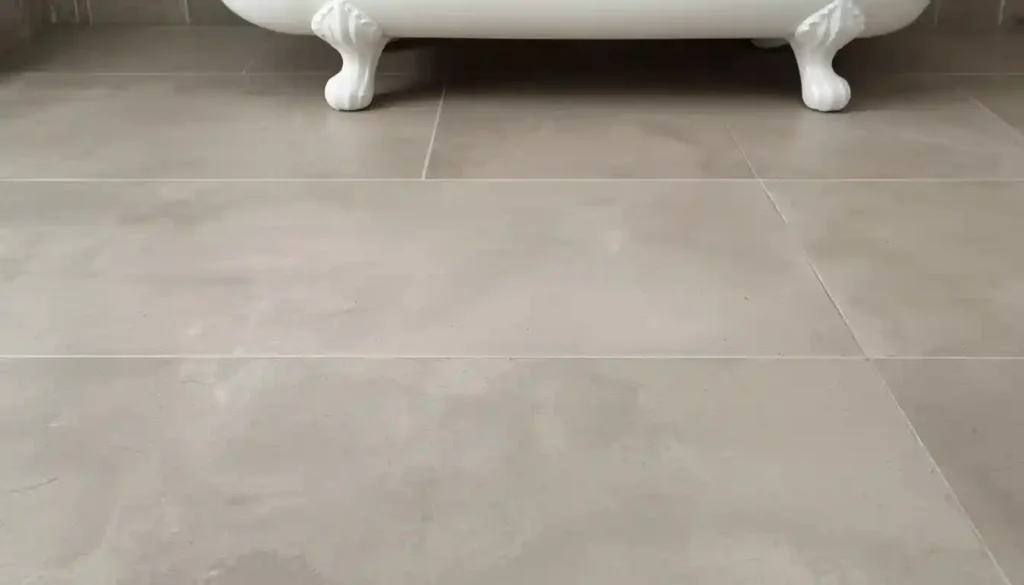
The effect is strongest in light neutral tones: soft ivory, warm cream, cloud gray, or matte white. These shades bounce light around the room rather than absorbing it, which amplifies the sense of openness. A 24×48 or 32×32 tile in a pale porcelain can make a 6×8 bathroom feel closer to a hotel bath than a cramped utility space.
Material choice matters here. Porcelain is the right call for large format bathroom floors. Its low water absorption rate (typically below 0.5%) makes it genuinely suitable for wet environments, and the manufacturing process produces consistent dimensions that allow tight joints. Ceramic can work but tends to have slightly more dimensional variance, which creates layout challenges at larger sizes.
One practical caution: large tiles require a very flat subfloor. Lippage — where one tile edge sits higher than its neighbor — becomes more visible as tile size increases. A deflection tolerance of no more than 3/16 inch over 10 feet is the professional standard before large format tile goes down. If your bathroom subfloor has any flex or unevenness, address it before installation. You can read more about this in our post on best subfloor options for tile flooring.
For grout, go narrow — a 1/16 to 1/8 inch joint with unsanded grout in a tone that matches the tile. The goal is to let the tile surface read uninterrupted. A contrasting grout color will immediately break the seamless effect you paid for.
Large format tiles also pair exceptionally well with wall-mounted vanities and frameless shower enclosures, both of which keep the visual floor plane clear and reinforce the modern, uncluttered aesthetic.
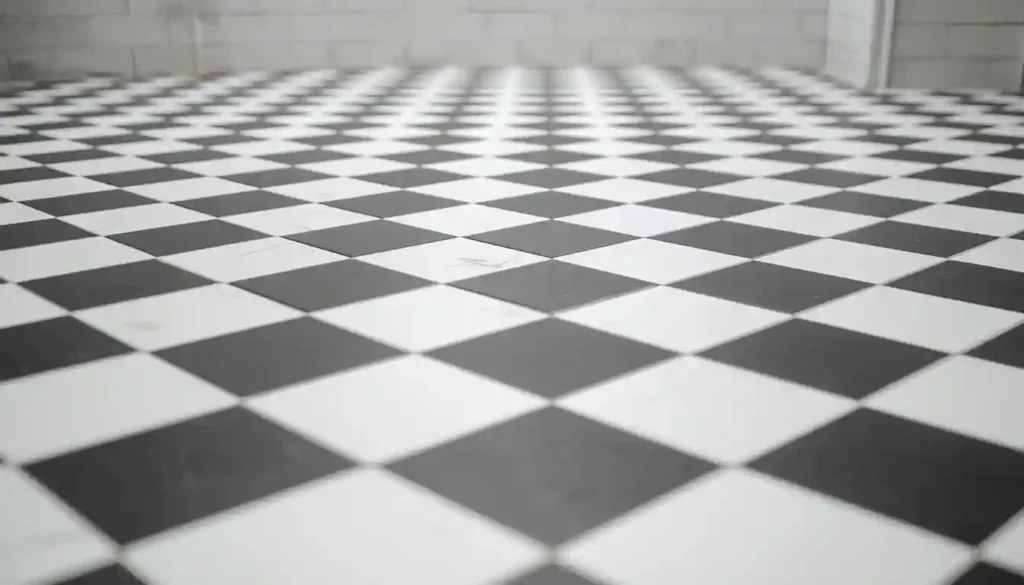
2. Classic Black and White Checkerboard
Few floor patterns carry more staying power than the checkerboard. It was the standard for bathroom and hallway floors throughout the Victorian era, and it has never fully gone away — because it works. The alternating pattern creates visual rhythm and energy without introducing color, which means it harmonizes with almost any wall treatment, vanity finish, or fixture style.
The modern version of this pattern has evolved meaningfully. Traditional checkerboard used 4×4 or 6×6 matte ceramic squares. Today, the most interesting executions use 12×12 porcelain in marble-look finishes — pairing a soft Calacatta white with a deep Nero Marquina black gives the pattern a luxury dimension that plain ceramic can’t match. Matte finishes are generally preferable to glossy in a bathroom context because they provide better traction and hide water spots more effectively.
Scale is the key design variable. Smaller squares (2×2 or 4×4) produce a busier, more retro result — excellent in powder rooms where drama is welcome. Larger squares (12×12) read as more contemporary and architectural, and work well in full master bathrooms where you want the pattern to register without overwhelming. Diagonal layouts — where the squares are rotated 45 degrees — are a classic move that makes a rectangular room appear wider.
Grout color is a meaningful decision with checkerboard. Matching grout to each tile color — white grout between white tiles, dark grout between black tiles — creates a cleaner result but requires precision laying. A medium gray grout across the entire field is a more forgiving option that works well with most contemporary interiors.
Pair a checkerboard floor with white subway tile walls and matte black hardware for a look that reads simultaneously retro and current. Add a natural wood vanity to warm it down if the contrast feels too stark.
3. Penny Round Mosaics for Shower Floors and Small Baths
Penny rounds are small circular tiles — typically 3/4 inch to 1 inch in diameter — that come factory-mounted on mesh-backed sheets for easy installation. They have been used in bathroom floors since the early twentieth century and remain one of the most practical choices available for wet areas specifically.
The reason is the grout. Penny rounds produce an unusually high ratio of grout joints per square foot compared to larger tile formats. Those joints create texture and micro-surface variation that significantly improves grip underfoot. This makes penny rounds one of the best options for shower floors and areas around the tub where water consistently pools. The small individual tiles also conform readily to sloped shower pans, which is a real installation advantage over large format options.
Aesthetically, penny rounds work in multiple design registers. In white or off-white with matching grout, they read as clean and timeless — a quietly elegant choice that doesn’t compete with other design elements. In stark white with black grout, they produce a graphic, retro result with a lot of personality. In terracotta, sage green, or dusty navy, they shift into artisan territory and work beautifully with natural wood vanities and unlacquered brass fixtures.
Material options include porcelain, ceramic, glass, and natural stone. Porcelain penny rounds in matte finishes are the most practical for bathroom floors: durable, water-resistant, and easy to clean. Glass penny rounds are visually stunning — they catch light in a way no other material matches — but require more careful maintenance and can be slippery without texture. Natural marble penny rounds are the most luxurious option but demand regular sealing and more attention to cleaning chemistry.
One maintenance note: penny rounds collect more grout than larger tiles, which means they need more frequent attention to keep looking clean. Light-colored grout shows discoloration over time. If you want the penny round look with easier maintenance, choose a mid-tone grout — warm gray or soft taupe — that doesn’t show every water mineral deposit.

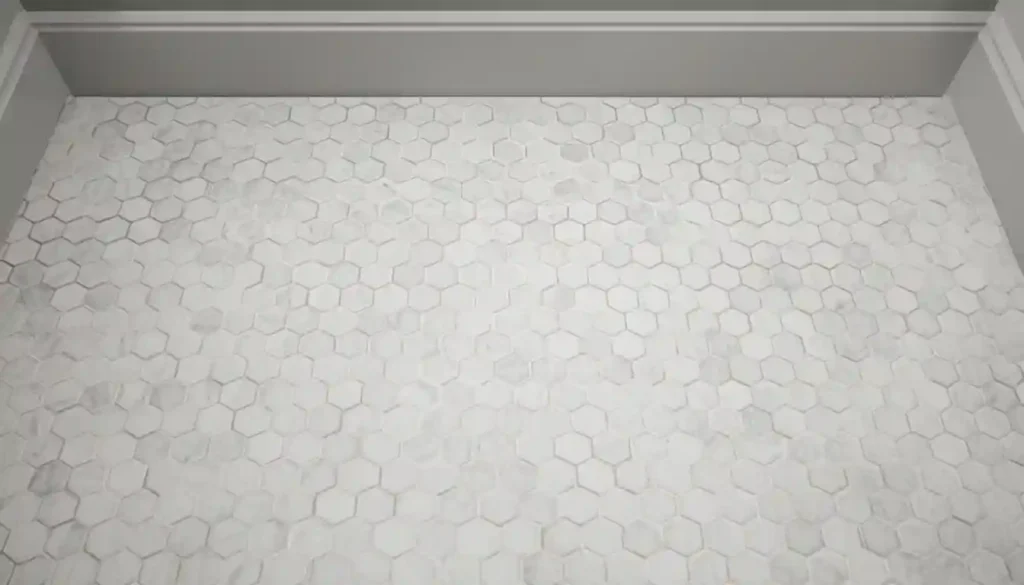
4. Hexagonal Tile in Matte Porcelain
The hexagon is having a sustained moment in bathroom design, and for good reason: the shape is geometrically satisfying, works in formats from small mosaic to oversized statement tile, and bridges the gap between vintage and contemporary in a way few other patterns manage.
Small hexagon tiles — 1 to 2 inches — operate similarly to penny rounds in practical terms. The high grout line ratio gives them good slip resistance, and they work well in shower floors and small bathrooms. They pair naturally with white subway tile walls to create that early twentieth-century American bathroom look that remains deeply appealing.
Medium hexagons — 4 to 6 inches — are the most versatile format. Large enough to show their shape clearly, small enough to use in compact rooms without the layout problems that large hexagons can create at walls and corners. These work beautifully in soft neutrals: warm white, pale sand, honed gray, or a barely-there sage. The geometric pattern provides interest without pattern overload.
Large hexagons — 8 to 12 inches — make a bold graphic statement and are best reserved for larger bathrooms where you have enough continuous floor area for the shape to fully register. In a small bathroom, a very large hexagon tile tends to look like a cut-up mess at every wall where the tiles have to be trimmed.
Color and grout interaction is particularly interesting with hexagons. A classic white hexagon floor with dark charcoal or black grout creates a graphic, tile-and-void pattern where the grout becomes an active part of the design rather than a functional necessity. This is a bold choice — it reads beautifully in editorial photography and works in real bathrooms, but it does show calcium deposits and soap scum more readily, so regular maintenance is required.
Pairing hexagon floors with complementary wall tile is worth the effort. Matching the hexagon color to a larger-format wall tile in the same tonal family creates a layered, considered look. Running a different shape on the wall — vertical subway tile or a large format plank — provides contrast that makes both surfaces more interesting.
Our best tile flooring for bathrooms guide covers additional shape comparisons and format recommendations for wet rooms.
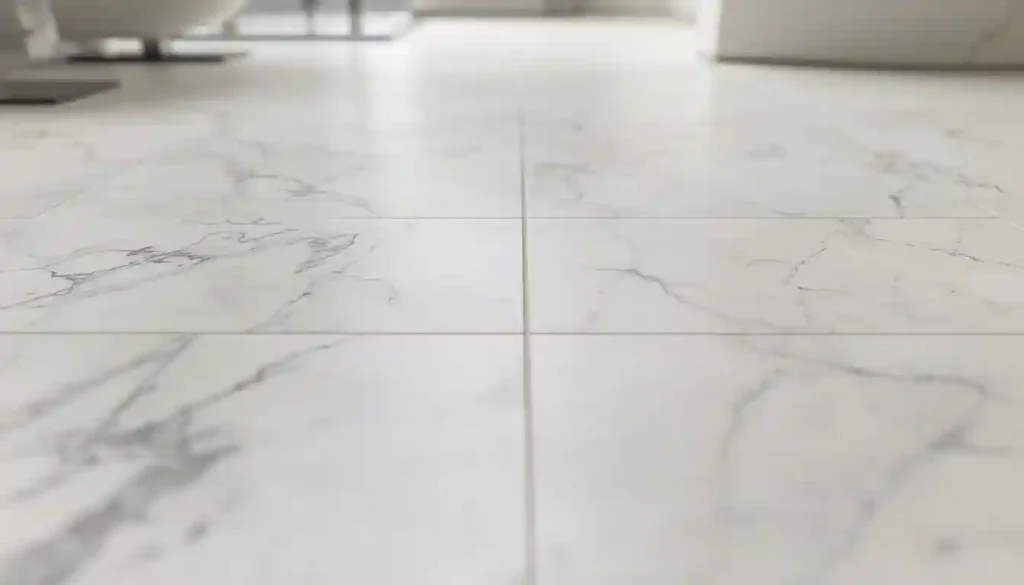
5. Marble-Look Porcelain for Timeless Luxury
Natural marble in a bathroom is one of the most beautiful things in residential design. It is also one of the most demanding — it stains, scratches, requires regular sealing, and reacts badly to acidic cleaning products. Marble-look porcelain tiles have evolved to the point where, at a reasonable viewing distance, the difference is genuinely difficult to detect, and they deliver this visual outcome at a fraction of the maintenance requirement.
The key quality markers in marble-look porcelain are the veining quality and the surface finish. Cheap marble-look tile has repetitive veining that clearly signals it’s printed — you’ll see the same streak pattern repeating across adjoining tiles. Quality marble-look porcelain uses high-definition digital printing across multiple tile variations so that no two tiles look identical. The veining flows naturally across the field, reads as organic, and holds up to close inspection.
Surface finish options include polished, honed, and matte. Polished marble-look porcelain is visually stunning but genuinely slippery when wet — not appropriate for bathroom floors without significant caution. Honed finish gives the cool, stone-like surface of real marble with better traction. Matte or lappato (semi-polished) finishes provide the best practical performance on bathroom floors while still reading as refined and premium.
Carrara-inspired whites and grays are the most popular color families for bathroom floors — they’re fresh, bright, and complement almost every fixture metal. Warmer marble looks — creamy Crema Marfil tones, or deep Emperador browns — create a more enveloping, spa-like atmosphere and work particularly well in bathrooms where you want to dial down the contrast and create visual warmth.
Format is flexible: marble-look porcelain reads convincingly in 12×24, 24×24, and 24×48 sizes. Larger formats show off the veining more dramatically, while medium formats work well when you want the grout grid to be part of the visual rhythm.
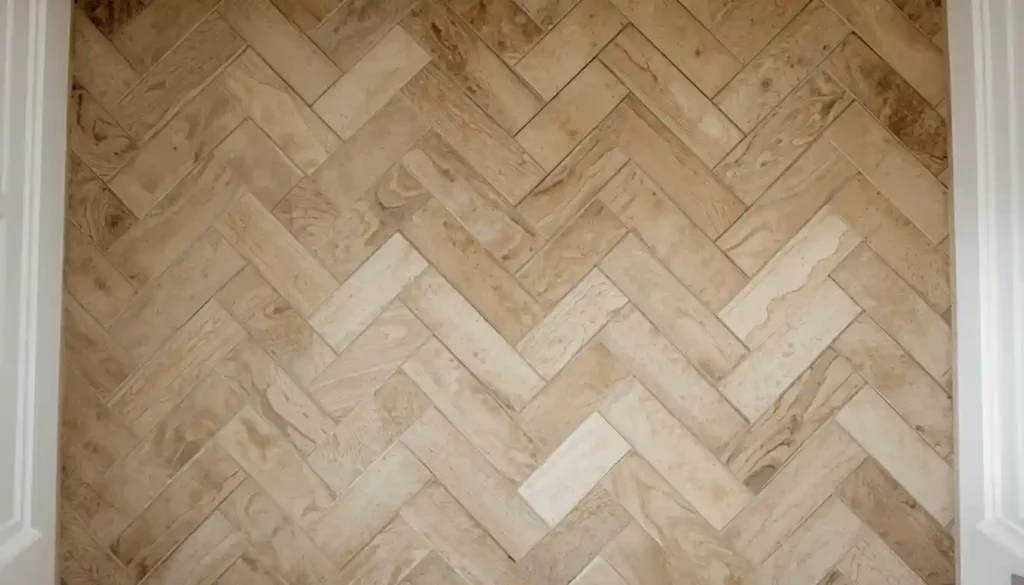
6. Herringbone Pattern for Movement and Elegance
The herringbone layout — rectangular tiles arranged in a V-shaped interlocking pattern — creates a directional visual movement that plain straight-set tile simply can’t produce. It adds rhythm to a bathroom floor without requiring any unusual tile format, just a different arrangement of standard rectangular pieces.
The format works best with elongated tiles: 2×4, 3×6, 4×8, or 4×12 planks. Shorter rectangles produce a tighter, more intricate pattern. Longer planks create a bolder, more dramatic zigzag. The plank proportion should match the scale of the room — small planks in a small bathroom, larger planks in a full master bath.
Material options are broad. Porcelain plank tiles in stone-look finishes are the most popular current choice for bathroom herringbone floors — they give you the visual complexity of natural stone with controlled dimensions that make the precise herringbone pattern easier to execute. Encaustic cement tiles in herringbone create a pattern-within-pattern effect that is very effective in boho and artisan-style bathrooms. Natural travertine in herringbone brings a warmth and organic quality that photographs beautifully and wears well when properly sealed.
Herringbone also makes a bathroom feel taller when the V-points run toward the far wall, or wider when the V-points run toward the side walls. It’s a small directional choice during layout that has a real impact on perception of the space.
One practical note: herringbone creates a significant amount of tile waste compared to straight-set layouts, typically 10 to 15 percent more. Budget for this in your material quantities. The pattern also requires more precise cutting and takes longer to install than a standard grid, so labor costs are somewhat higher.
For the natural stone version of this floor, see our write-up on travertine tile flooring pros and cons — travertine is one of the best materials for herringbone bathroom floors when sealed and maintained correctly.
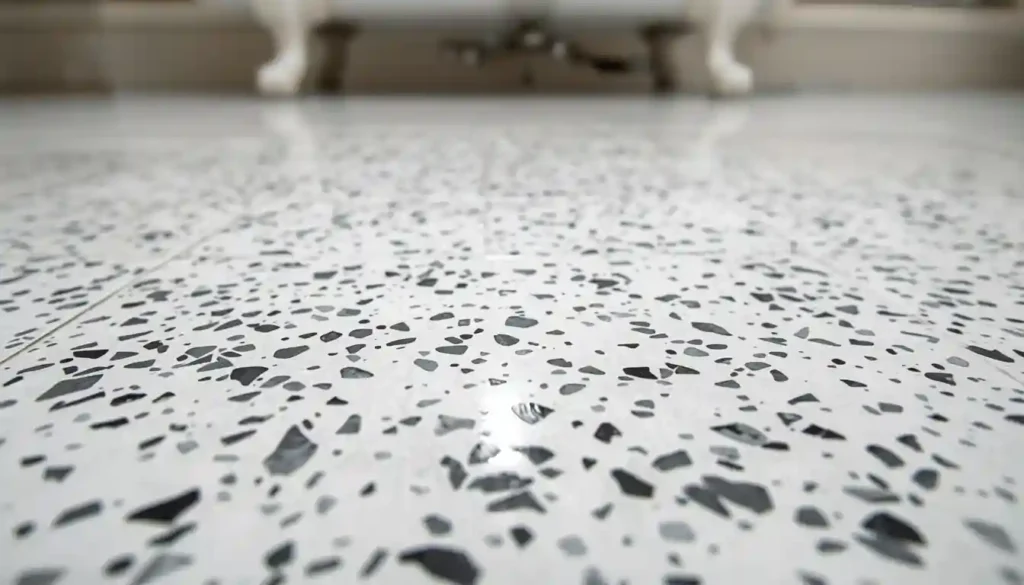
7. Terrazzo-Look Tile for Playful Sophistication
Terrazzo — the composite flooring made from chips of marble, quartz, glass, or shell set in cement — was the defining material of mid-century institutional spaces: schools, airports, lobbies. It has returned in residential design with considerable force, driven by a new generation of porcelain tiles that replicate the speckled, confetti-like appearance at a fraction of the original cost and with far better practical performance.
The appeal of terrazzo-look tile for bathrooms is its peculiar combination of subtle pattern and visual energy. The speckled surface creates movement and texture without committing to a single color or directional pattern. It reads differently at different scales: from a distance, it appears as a solid tone; up close, the chip pattern becomes interesting and complex. This makes it unusually forgiving in terms of maintenance — the pattern naturally camouflages water spots, mineral deposits, and light soiling between cleanings.
Color range is wide. Traditional terrazzo-look tiles come in white or cream bases with gray and black chips. Contemporary versions come in blush pink, sage green, pale blue, or charcoal bases with contrasting chip colors — gold fragments in a white field, white chips on a forest green base, or a warm gray speckle on soft ivory. These color-forward versions are particularly strong in Pinterest-style bathroom aesthetics.
Terrazzo-look porcelain performs excellently on bathroom floors. It’s durable, water-resistant, and the speckled pattern is effective at hiding the small imperfections that any heavily used floor accumulates. Choose matte or honed finishes for floors — polished terrazzo-look tile is visually stunning but too slippery for a wet bathroom floor without significant slip-resistance texture.
Pair terrazzo floors with solid-color walls in a tone pulled from the tile’s chip colors: a blush pink terrazzo floor with dusty rose walls, or a sage base terrazzo with forest green zellige-style wall tile. The pattern-within-pattern approach, done carefully, is one of the most sophisticated looks available in contemporary bathroom design.
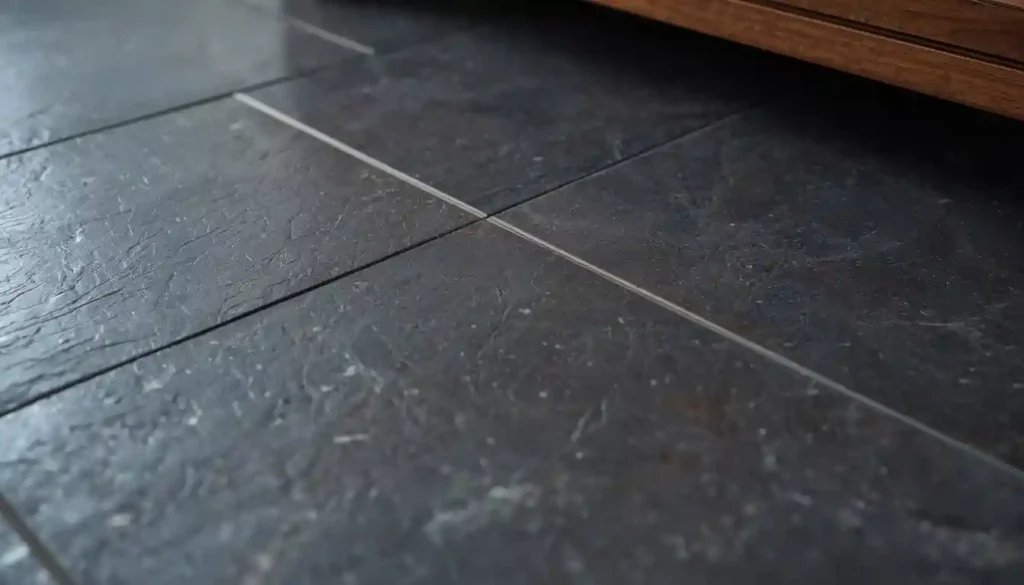
8. Slate and Stone-Look Tile for Natural, Grounded Spaces
Slate is one of the oldest flooring materials used in domestic architecture, and its visual qualities — the layered, fractured surface, the deep charcoal and blue-gray tones, the irregular texture — have never fully gone out of style because they tap into something fundamental about the appeal of natural materials. In a bathroom, slate and slate-look tile create a grounded, earthy atmosphere that contrasts beautifully with the cleanliness and brightness of typical bathroom fixtures.
Natural slate has inherent advantages for bathroom floors: it is naturally slip-resistant due to its cleft surface texture, it handles moisture well without sealing, and its color variation means it hides water marks and minor soiling effectively. The maintenance requirement is lower than marble — slate doesn’t need regular sealing in the way polished stone does, though it benefits from a penetrating sealer applied at installation and refreshed every few years.
Slate-look porcelain tiles capture the textural quality of the stone with even lower maintenance requirements and more consistent dimensions. These tiles are produced with inkjet surface printing that accurately replicates the layered, linear texture of split slate, and many include surface embossing that gives them genuine tactile texture — not just visual texture. The result performs better on bathroom floors than natural slate in some respects because the consistent tile thickness makes installation and grouting more straightforward.
Color palette for slate and slate-look tile runs from pale silver-gray through deep charcoal, with variations in blue-gray, warm gray-brown, and near-black. The deeper tones work particularly well in master bathrooms where you want a cocoon-like, atmospheric quality. Pair with warm wood vanities, unlacquered brass or matte black fixtures, and warm white walls to prevent the space from feeling cold or cave-like.
Format options include traditional squares (12×12 or 18×18) and elongated planks that emphasize the directional grain of the stone. Plank format in a slate-look tile is especially effective — it bridges the worlds of stone tile and wood-look tile and works in both contemporary and transitional bathroom styles.
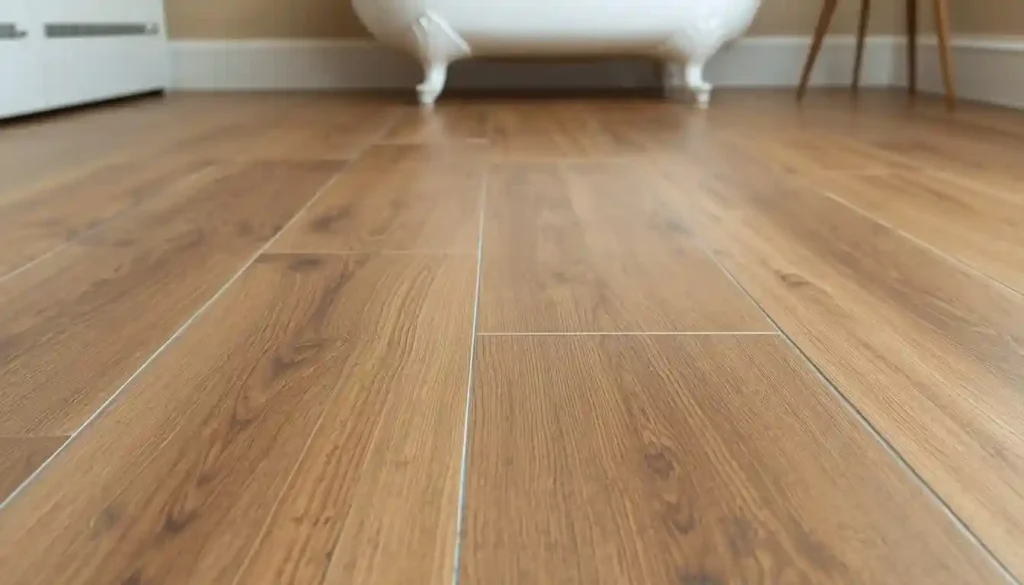
9. Wood-Look Porcelain for Warmth Without the Risk
Wood in a bathroom is a genuinely complicated proposition. Solid hardwood and moisture are fundamentally incompatible — even hardwood floor on concrete slab problems involve moisture as a central concern, and bathroom conditions are far more extreme than a typical slab. Wood-look porcelain tiles resolve this completely: they deliver the warmth and organic quality of a wood floor with zero moisture vulnerability.
The quality of wood-look porcelain has improved dramatically over the past decade. Modern digital printing technology produces tiles with grain patterns, knot variation, and surface texture that reads convincingly as real wood from any normal viewing distance. The best products include subtle surface embossing that replicates the raised grain texture of real wood, making the visual illusion hold up even underfoot.
Format is critical for this look. Wood-look porcelain tiles are produced in plank shapes — typically 6×24, 6×36, 8×48, or even longer — because a plank format is what makes the brain read “wood.” Square or near-square tiles in a wood print look like printed tile. Long planks laid in an offset brick pattern look like hardwood flooring.
Color range spans the full spectrum of real wood: pale ash and white oak finishes for bright, Scandinavian-influenced bathrooms; medium walnut and oak tones for classic American bathroom aesthetics; rich mahogany and espresso tones for dark, dramatic spaces. The most popular current color families track the same preferences seen in actual hardwood floors — light, natural-grain looks with minimal red tones are the dominant trend.
For grout, choose a tone that recedes: match the mid-tone of the tile or go slightly darker. Contrasting grout with wood-look plank tile breaks the visual illusion immediately — the goal is for the grout lines to disappear into the floor.
This look is particularly effective in bathrooms with natural light and warm-toned accessories. It creates a sense of hygge and domestic warmth that all-tile bathrooms sometimes lack, while remaining completely practical in a wet environment.
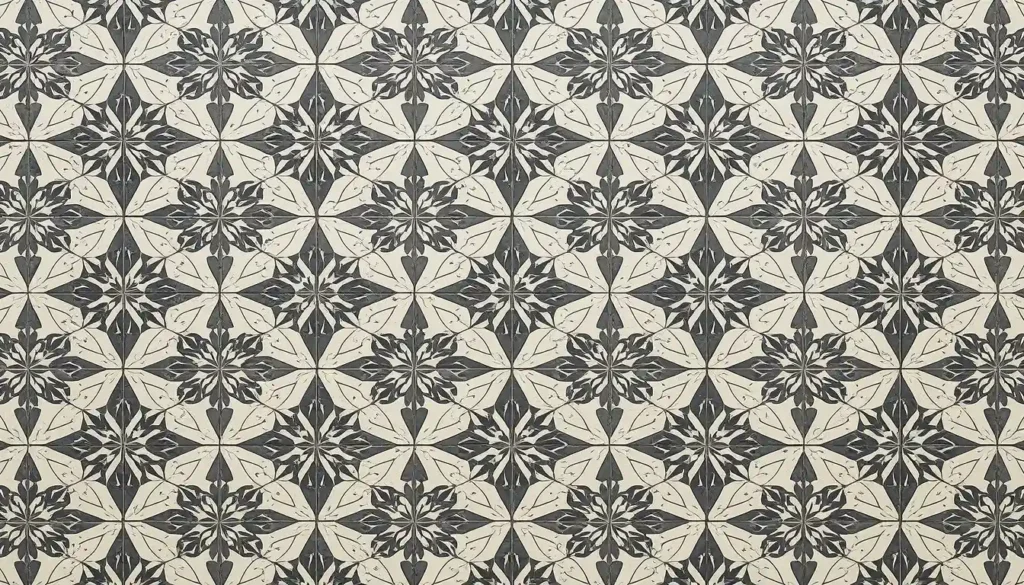
10. Encaustic and Cement-Look Patterned Tile
Encaustic tiles — traditionally made by hand pressing colored cement into molds, creating patterns that run through the full thickness of the tile — are one of the oldest forms of decorative flooring. Their bold geometric and floral patterns have been found in Victorian-era public buildings, Spanish colonial architecture, Moroccan riads, and Portuguese azulejo traditions. Contemporary versions made from porcelain with high-definition printed surfaces deliver the same visual impact at a practical price point and with much better moisture resistance than original cement tiles.
In a bathroom, patterned encaustic-style tiles work best when given space to breathe. They are statement floors that command attention — they work in powder rooms and guest baths where the visual drama is a welcome surprise, and in master bathrooms where the floor is the deliberate focal point of a carefully considered design. Pair them with simple, quiet walls: plain white plaster, solid-colored subway tile, or a large-format neutral tile that lets the floor speak without competition.
Pattern families include geometric interlocking shapes (typically Spanish or Moorish in origin), floral medallion patterns, simple diamond and star combinations, and the Encaustic hex pattern found in Victorian tile work. The most versatile for bathrooms are patterns in a limited color palette — two or three colors maximum — because they create visual interest without approaching visual chaos.
Color combinations worth highlighting: black and white geometric patterns have the widest design range and work from farmhouse to contemporary; terracotta, cream, and deep teal Moroccan patterns create a warm, artisan-inflected atmosphere; dusty blue and warm white patterns lean coastal and fresh; charcoal and warm gold combinations are more dramatic and suit traditional spaces.
Grout color is particularly important with patterned tile. The safest choice is a grout tone that matches the lighter color in the tile — this keeps the attention on the tile pattern rather than the grid of grout lines superimposed on it. Very fine grout joints (1/16 inch) are ideal for showing the pattern clearly.
These also connect well to our encaustic tile flooring overview, which covers the full range of pattern families and material options in more detail.
11. Soft Gray Porcelain for Calm, Transitional Spaces
Gray has dominated bathroom design for most of the past fifteen years, and while some design commentators have periodically declared it over, it continues to be installed in enormous quantities because it genuinely works. Gray porcelain is neutral without being stark, clean without being clinical, and compatible with every fixture metal — chrome, brushed nickel, oil-rubbed bronze, matte black, and brass all look good against a gray floor.
The range within gray is wider than it sounds. Cool blue-grays have a crisp, spa-like quality that suits modern bathrooms with chrome fixtures and clean architectural lines. Warm gray-beiges — sometimes called “greige” — are softer and more transitional, working in bathrooms that blend modern cabinetry with traditional molding profiles. Dark charcoal gray floors create drama and a sense of depth, effectively grounding a bathroom that has lighter walls and vanities.
Surface finish choices: matte gray porcelain reads as understated and sophisticated, and it hides water spots and surface scratches better than polished options. Honed gray porcelain has a cooler, more mineral quality. Both are appropriate for bathroom floors. Avoid polished gray on the floor — it shows every footprint.
This is perhaps the most straightforward tile choice for a bathroom renovation because it eliminates so many downstream decisions. A gray floor accepts almost any wall tile, any vanity finish, any fixture metal, and any accessory color. It’s the neutral foundation that lets other elements in the bathroom take center stage. If you’re renovating on a schedule and don’t want to overthink the floor, soft gray large format porcelain is a reliable, elegant choice.
Our 13 grey tile flooring ideas article expands on color variations, finish options, and pairing recommendations if you want to go deeper on this direction.
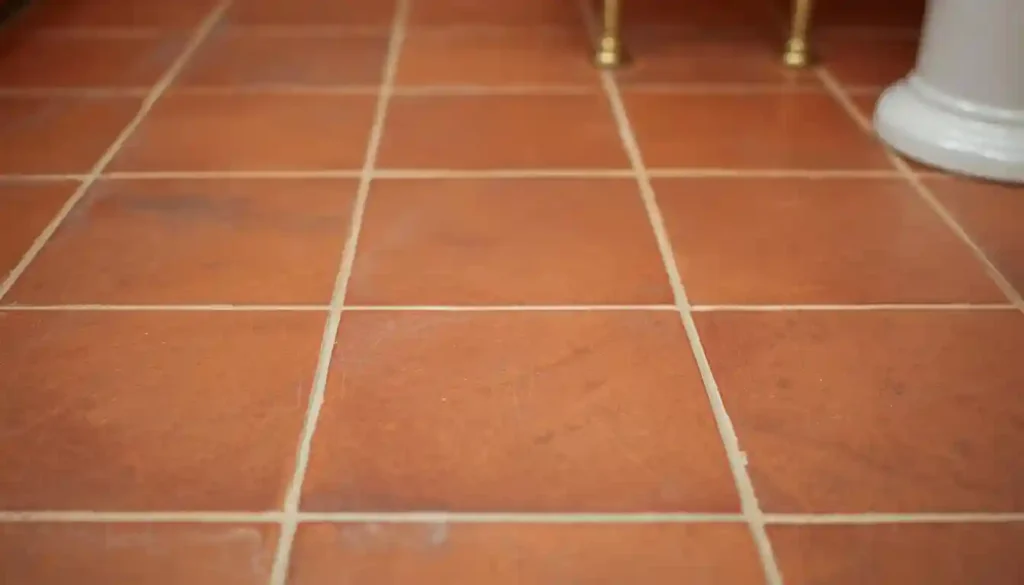
12. Terracotta and Warm-Toned Tile for a Biophilic Feel
Terracotta has re-entered bathroom design as part of the broader biophilic interior trend — the movement toward materials and colors that reference the natural world and create an organic, earthy warmth in built spaces. Traditional terracotta tile is clay-fired at lower temperatures than porcelain, which gives it its characteristic warm orange-red-brown tone and slightly porous surface. It has been used in Mediterranean, Spanish colonial, and Southwestern architectural traditions for centuries.
In a bathroom, true terracotta requires sealing before installation and regular resealing thereafter, because its porosity makes it vulnerable to water absorption and staining. Unsealed terracotta in a bathroom environment will absorb moisture, darken over time, and potentially support mold growth in grout joints. Properly sealed, however, it performs well and develops a beautiful patina over years of use.
Terracotta-look porcelain tiles offer the same warm tone and slightly irregular surface character without the maintenance requirement. Quality versions include subtle color variation across tile faces — some lighter, some deeper — that replicates the natural kiln variation of real fired clay. This variation is what makes the look warm and handmade rather than industrial.
Design direction: terracotta floors work best with warm, earthy wall colors — ochre, warm white, sandy beige, or deep rust — and with natural materials elsewhere in the room. Woven baskets, aged brass fixtures, raw linen towels, and plants complete the aesthetic. The effect is warm, organic, and completely contemporary despite being rooted in ancient material tradition.
Format and finish matter here. Square tiles (6×6 or 8×8) in a standard grid or offset layout reference traditional terracotta tile installation most directly. Matte or satin finishes are more appropriate than polished — the warmth of the material comes from its organic, non-reflective surface. Keep grout joints at a traditional width (3/16 inch) and use a grout in warm beige or sand.
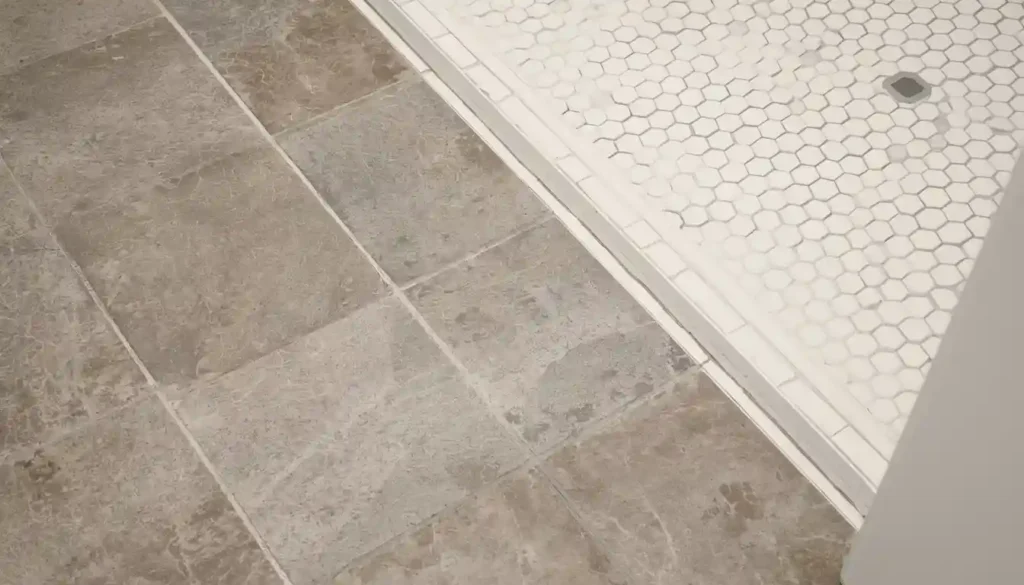
13. Mixed-Tile Layout: Large Field + Mosaic Accent
The most custom-feeling bathroom floors don’t always use a single tile type throughout. Combining a large format field tile with a smaller mosaic accent — whether as a border, a shower floor inset, or a decorative band running through the space — creates the kind of considered, layered detail that separates a professionally designed bathroom from a standard renovation.
The most effective combinations follow a few principles. First, the field tile and accent tile should share a tonal family — they don’t need to match, but they should be in conversation. A warm gray large format field tile works with a warm white penny round accent; a cool white marble-look field tile works with a gray herringbone mosaic border. Second, the transition between tile types should be clean and intentional — a straight line, a border course, or a threshold that corresponds to a physical change in the space (the shower curb, a step, a doorway).
Practical applications are numerous. A 24×24 neutral field tile throughout the bathroom with a 1×1 mosaic insert at the shower floor provides both slip resistance where it’s needed and visual delineation of the wet zone. A large format porcelain field with a mosaic border running the perimeter of the room — a few inches of pattern at the baseboard — adds architectural detail that would otherwise require expensive custom tilework. A herringbone mosaic used only in the niche or behind the vanity creates a focal point within an otherwise simple tile scheme.
From a specification standpoint, the challenge in mixed-tile layouts is coordinating thickness and grout joint sizing so that both tile types sit at the same finished height. Most mosaic tiles on mesh backing are slightly thinner than standard field tile, so a setting bed adjustment is sometimes needed. Discuss this with your installer before purchase to confirm compatibility.
Our porcelain and ceramic tile product ranges across the Timber Falls, Riverbank, Equilibrium, Stone Haven, Solace, and Mercer collections — see the full shop — include multiple sizes and surface formats that can be combined in mixed-tile layouts. Many of the collections are designed to coordinate across sizes for exactly this purpose.
How to Choose the Right Bathroom Tile Floor for Your Space
After looking at thirteen distinct directions, the choice still has to come back to your specific bathroom: its size, its light, its existing fixtures, and how you use it. A few organizing principles help narrow the field.
Room size and tile scale should correspond. Large format tiles (24 inches and up) work best in bathrooms with enough floor area that the tiles can read complete — at least one or two full tiles across the shortest dimension. In a 5×8 bathroom, a 24×48 tile will involve significant cutting at every wall and won’t read the way it does in a large master bath. Mosaic-scale tiles and medium formats (12×12 to 12×24) are more appropriate in smaller spaces.
Wet area placement requires genuine attention to slip resistance. The floor around the shower, the tub, and the toilet sees the most water and the highest slip risk. Textured matte finishes, small format tiles (which create more grout joint texture), and tiles with a verified coefficient of friction (COF) rating above 0.42 for wet areas are the right choices for these zones. Our guide to is tile flooring slippery goes into the rating systems in detail.
Maintenance reality matters as much as aesthetics. A dark polished floor looks incredible in a showroom and shows every water drop and soap film in a real bathroom. A white penny round floor with dark grout looks dramatic and requires frequent cleaning to keep the grout from discoloring. Choose the version of the look you’re willing to maintain, not the version you find most beautiful on Pinterest.
Finally, tile the floor and walls as a system, not as separate decisions. The most successful bathroom tile schemes treat the floor and wall tiles as a deliberate pairing — they share a color family, they respond to each other in terms of scale and finish, and together they create a coherent room rather than a collection of separate material choices.
For broader context on tile performance across different rooms and installation conditions, our how to install tile flooring article covers substrate requirements, layout planning, and the tools and materials needed for a professional result — whether you’re working with a contractor or tackling the installation yourself.


