A 3mm lump under a floating vinyl floor does not stay a 3mm lump. Over months of foot traffic and the flex that comes from walking, it becomes a stress point. The locking joint above it cracks. The wear layer above that delaminates. The floor fails at exactly the spot that was never properly prepared.
What you put under vinyl flooring solves for four distinct problems. Moisture intrusion from below. Subfloor imperfections that telegraph through a thin material. Sound transmission, both impact and airborne. And thermal comfort, which matters more on concrete slabs in colder climates than most installation guides admit.
None of these problems are solved by the vinyl itself. The vinyl is the surface. The system beneath it is the infrastructure.
The Subfloor Comes First — Always
Before any discussion of underlayment or moisture barrier, the subfloor must be assessed and prepared. This is where most DIY installations fail. A beautiful underlayment laid over a damaged, soft, or uneven subfloor is money spent on concealing a problem rather than solving it.
The flatness standard for vinyl flooring is 3/16 of an inch over a 10-foot span, or 1/8 of an inch over a 6-foot span. That is the industry threshold. Some vinyl manufacturers, particularly those making thinner LVT products, tighten this to 3/16 over 6 feet. Check the specific manufacturer spec before installation begins, because a warranty claim denied due to subfloor deviation is not uncommon.
High spots are ground down. Low spots are filled with a Portland cement-based floor leveling compound — not wood filler, not caulk, not patching plaster. The compound must cure fully before installation proceeds, which typically means 24 hours minimum, though some self-leveling products can accept foot traffic in 4 to 6 hours. Read the product spec.
Subfloor fasteners that have popped — nails working up through OSB or plywood — are driven back below the surface or replaced with screws. Every squeaking board is addressed. A squeak under vinyl is a loose subfloor panel moving under load, and that movement will eventually damage the locking joints above it.
If the subfloor is concrete, the prep work is different in character but equally non-negotiable. Concrete requires a pH test, a moisture test, and a visual inspection for cracks, spalling, and existing adhesive residue. We address concrete specifically in the moisture barrier section below.
Does Vinyl With an Attached Pad Need More Underlayment?
No — but the answer requires precision. Many SPC (stone plastic composite) and WPC (wood plastic composite) vinyl planks come with an attached underlayment already factory-bonded to the back of the plank. Adding a second layer of underlayment beneath a product that already has one is not a free upgrade. It creates excessive flex in the locking joint system, voids most manufacturer warranties, and can cause the floor to feel spongy underfoot.
If your vinyl plank has a pre-attached pad, you skip the separate underlayment. If it does not, you need one. Standard LVT, sheet vinyl, and many thinner LVP products do not come with attached underlayment. These need a separate layer.
The question of whether you need underlayment is different from the question of what type you need, which is entirely determined by the subfloor beneath and the conditions of the space.
The Main Materials That Go Under Vinyl Flooring
Foam Underlayment
Standard foam underlayment — typically 2mm to 3mm closed-cell polyethylene foam — is the most common material placed under vinyl flooring. It is inexpensive, easy to install, and provides a small but meaningful degree of cushioning that makes the floor more comfortable underfoot on hard subfloors.
Closed-cell foam is important here. Open-cell foam absorbs moisture. On a concrete subfloor, that is a direct invitation to mold growth and adhesive failure. Closed-cell foam resists moisture transmission to a degree, though it is not a true vapor barrier.
Foam underlayment compresses under load. A product rated at 2mm does not stay 2mm under heavy furniture or appliances. This compression is typically permanent. For floating vinyl, this matters because the locking joints depend on the floor plane remaining stable. Excessive compression in one area relative to another creates a differential that stresses the joints over time.
For residential applications on above-grade wood subfloors, standard foam underlayment is appropriate when the subfloor is flat and dry and the vinyl product does not include an attached pad.
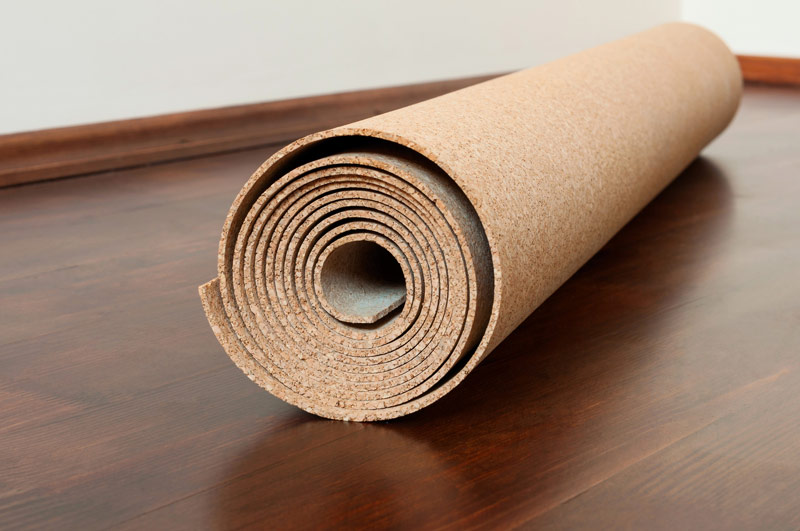
Cork Underlayment
Cork underlayment sits above foam in performance and price. It offers better acoustic properties than foam — both for impact sound transmission (footfall noise heard in the room below) and for the hollow, resonant quality of walking on a floating floor. Cork compresses less permanently than foam and recovers better under cyclic loading.
Cork has natural antimicrobial properties and modest thermal insulation value, which improves floor comfort in cold seasons. On a concrete slab in a basement or ground-floor space, the difference between cork and foam underlayment in terms of perceived warmth underfoot is noticeable.
Cork is not a vapor barrier. On concrete subfloors, cork underlayment must be paired with a separate moisture barrier unless the cork product is specifically rated for use on concrete without an additional barrier, which requires checking the product documentation.
Thickness for cork underlayment under vinyl typically runs from 2mm to 6mm. Thicker is not always better — verify the vinyl manufacturer’s maximum underlayment thickness tolerance before selecting a 6mm product.
Rubber Underlayment
Rubber underlayment is the highest-performing acoustic option available for residential flooring. Recycled rubber products in the 3mm to 5mm range provide IIC (Impact Insulation Class) and STC (Sound Transmission Class) ratings that foam and cork cannot match at equivalent thicknesses.
For multi-story homes, condominiums, or any space where footfall noise transmitted to the floor below is a concern, rubber underlayment is worth the additional cost. The acoustic performance difference between a standard foam underlayment and a quality rubber product is significant — often 10 to 15 IIC points, which is the difference between a floor that sounds solid and one that sounds hollow and intrusive from below.
Rubber underlayment is denser and heavier than foam or cork, which makes it more resistant to compression under heavy loads. It is also more expensive and, depending on the product, may have a rubber odor that dissipates over time.
As with cork, rubber underlayment is not inherently a vapor barrier and should be paired with one on concrete subfloors unless the product documentation states otherwise.
Combination (Foam + Film) Underlayment
Many underlayment products sold for vinyl flooring are composite systems: a layer of closed-cell foam laminated to a polyethylene film on the concrete-facing side. The film functions as an integrated moisture barrier, which simplifies installation on concrete subfloors by combining two required layers into one product.
The effectiveness of the integrated vapor barrier depends entirely on how the seams and edges are handled. The film must be overlapped at seams by at least 8 inches and taped with moisture-barrier tape. Edges must run up the wall behind the baseboard. A poorly installed combination product provides less protection than a separately installed barrier installed correctly.
These products are a reasonable choice for on-grade concrete installations where the moisture readings fall within the acceptable range (typically under 75% RH when tested with an in-situ probe, or under 8 lbs per 1,000 sq ft per 24 hours with a calcium chloride test). For high-moisture environments or below-grade installations, a separate heavy-gauge vapor barrier is a more reliable choice.
IXPE Foam Underlayment
IXPE (irradiation cross-linked polyethylene) foam is the standard recommendation for most floating vinyl plank installations. It is closed-cell, so it does not absorb water even if a vapor barrier seam is compromised, and it recovers its thickness after load is removed instead of compressing permanently like standard foam. It is also the material used in most factory-attached pads on mid-range and premium vinyl plank.
Felt Underlayment
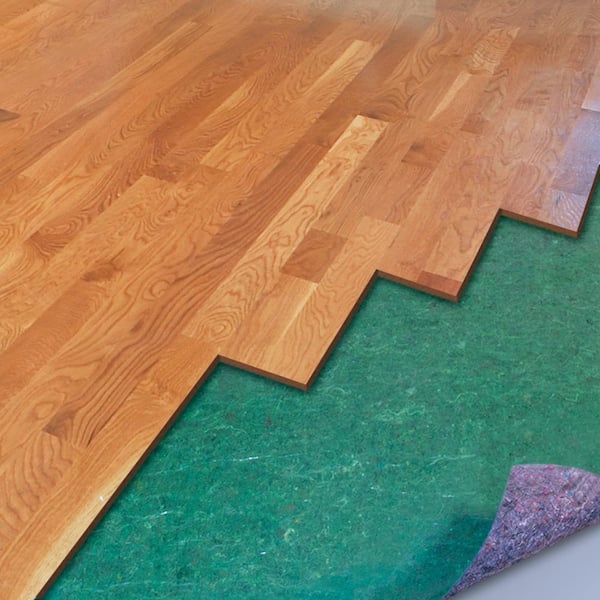
Dense felt underlayment buffers minor subfloor imperfections and compresses far less than foam under heavy furniture, which makes it a better long-term choice for furnished, high-traffic rooms. Felt with an attached vapor barrier film is a legitimate option over concrete and is often specified by name by vinyl manufacturers; on a cold slab it also provides a better thermal break than standard polyethylene foam.
What does underlayment for vinyl cost per square foot?
Underlayment type
Material cost per square foot
Standard PE or EVA foam, 2mm to 3mm
$0.15 to $0.30
Combination or hybrid (foam or cork core plus vapor barrier film)
$0.35 to $0.70
Recycled rubber
$0.50 to $1.20
Rubber costs three to four times as much as standard foam, which is justified mainly in multi-story homes and condominiums where impact sound must be controlled.
Moisture Barriers and Vapor Barriers: What Goes Under Vinyl on Concrete
Concrete is a porous material. Water vapor migrates through it continuously, from areas of higher moisture content to areas of lower moisture content. In most residential slabs, the direction of travel is upward — toward the living space above. Vinyl flooring, particularly glued-down applications, is highly sensitive to moisture beneath it. Adhesive bond fails. The floor bubbles, lifts, and warps. Mold colonizes the space between the slab and the flooring.
On concrete subfloors, a moisture barrier is not optional. The question is what type.
A standard 6-mil polyethylene film is the minimum acceptable barrier for on-grade concrete installations in moderate-humidity environments. Rolls are laid with 8-inch overlaps at seams, taped, and run up the wall 2 to 3 inches at the perimeter. This is the most affordable approach and is appropriate when concrete moisture testing shows levels within acceptable range.
For high-moisture readings, below-grade installations (basements), or any slab with a history of water intrusion, a 10-mil to 15-mil poly film is more appropriate. The thicker material is more resistant to puncture during installation and provides a more durable long-term barrier.
Liquid-applied moisture barriers represent the highest level of protection. These are rolled or squeegeed directly onto the concrete surface and cure to form a seamless membrane. They are more labor-intensive and expensive but eliminate the seam vulnerabilities of sheet barriers. For glue-down vinyl installations where adhesive bond is critical, liquid-applied barriers are the professional-grade choice.
An important distinction: moisture barriers and vapor barriers are not the same product, even though the terms are often used interchangeably in retail flooring contexts. True vapor barriers have a rated perm rating of 0.1 perms or below. Many products marketed as “moisture barriers” for flooring have perm ratings of 1 or higher. For concrete slab applications, the perm rating matters — lower is better. Read the product spec.
What to Put Under Vinyl Flooring on Specific Subfloor Types
Concrete Subfloor
Concrete subfloors require the most preparation and the most complete underlayment system. The installation sequence is: flatten and repair the concrete → allow it to cure → test for moisture → install a moisture/vapor barrier → install underlayment (if the vinyl does not have an attached pad) → install vinyl.
If the moisture test readings exceed the vinyl manufacturer’s threshold, the installation should not proceed until the moisture issue is addressed at the source. A dehumidifier in the space, improved perimeter drainage, or a professionally applied waterproofing membrane beneath the slab are the durable solutions. Installing over a high-moisture slab and hoping the barrier holds is a risk that almost always resolves in failure.
For floating LVP on concrete, a 2mm to 3mm closed-cell foam with integrated vapor retarder film handles most on-grade residential situations. For below-grade concrete in basements, step up to a heavier-gauge barrier and consider a cork or rubber underlayment for its thermal comfort benefit on what is often a cold surface.
Plywood or OSB Subfloor
Above-grade wood subfloors in good condition are the most forgiving base for vinyl flooring. Moisture is less of a primary concern than on concrete, though it is never entirely irrelevant in humid climates or in kitchens and bathrooms.
On a plywood or OSB subfloor, a standard foam underlayment without an integrated moisture barrier is often appropriate for main-level and above-grade installations. In bathrooms, kitchens, or laundry areas, adding a moisture-resistant underlayment or a thin polyethylene barrier beneath the foam layer is reasonable insurance against the inevitable spill or appliance leak.
The subfloor flatness tolerance is the same regardless of material: 3/16 inch over 10 feet. OSB subfloors are more prone to fastener pop and panel edge telegraphing than plywood. Check all panel edges with a straightedge and use a feathered skim coat of floor leveling compound to eliminate any lip greater than 1/16 inch between panels.
Existing Tile Subfloor
Installing vinyl flooring over existing ceramic or porcelain tile is common and generally acceptable, provided the existing tile is firmly bonded, with no loose, cracked, or hollow-sounding tiles. Any tile that moves underfoot must be removed and the substrate repaired before vinyl is installed above it.
The grout joints in the tile below are the critical issue. Grout joints deeper than 1/16 inch will telegraph through vinyl flooring over time, particularly thinner LVT products. These joints should be skim-coated with floor leveling compound and allowed to cure fully. In practice, this means checking every grout line with a straightedge and filling any that exceed the tolerance.
Over tile, a foam underlayment handles the remaining minor surface variation and provides the standard acoustic and comfort benefits. A moisture barrier is generally not needed between tile and vinyl in above-grade applications.
Existing Hardwood or Engineered Wood Subfloor
Vinyl installed over existing hardwood requires addressing the individual board gaps and any cupping or crowning that has developed in the wood over time. Cupped boards should be investigated for moisture source before vinyl is installed — installing over cupped hardwood without solving the moisture issue simply traps the problem beneath two layers of flooring.
Gaps between hardwood boards wider than 1/16 inch should be skim-coated. Squeaking boards are addressed at the source. A standard foam underlayment is appropriate for above-grade hardwood installations in good condition.
Do You Need Underlayment for Vinyl Plank on Plywood?
Vinyl plank on above-grade plywood needs underlayment only for sound and comfort, not for moisture, unless the plywood sits over a crawl space. Over an unconditioned or damp crawl space, moisture moves upward through the wood, so use a combination underlayment with a vapor barrier and treat the installation like a slab. Plywood panels under vinyl plank should be at least 5/8 inch thick, re-secured with screws where they squeak, and any panel gaps wider than 1/8 inch filled; thinner panels flex and telegraph movement into the locking joints.
When Existing Hardwood Needs No Underlayment
Existing hardwood that is glued or nailed down, structurally sound and flat acts as the underlayment itself, and adding foam or cork on top stacks compressibility under the vinyl’s click joints. Never install floating vinyl plank over hardwood that is itself a floating floor: two floating layers create a compound movement system that fails at both sets of locking connections. Confirm the existing floor is mechanically attached before proceeding.
Glue-Down and Loose-Lay Vinyl
Glue-down vinyl takes no underlayment, because pressure-sensitive or hard-set adhesive needs direct contact with the subfloor; any layer between them prevents the bond and lets the plank move. When moisture control is needed under glue-down vinyl on concrete, a liquid-applied moisture mitigation membrane is applied to the slab and allowed to cure before the adhesive is spread. Loose-lay vinyl relies on plank weight and friction, and underlayment makes that surface unstable.
When Vinyl Flooring Comes With Pre-Attached Underlayment
Most WPC and many SPC products include a factory-attached underlayment pad, typically 1mm to 2mm IXPE (irradiation cross-linked polyethylene) foam or sometimes cork. This pre-attached layer provides acoustic and comfort benefits and simplifies installation by eliminating a separate material and an installation step.
When a vinyl product has pre-attached underlayment, the only material that may still be needed beneath it is a moisture barrier on concrete subfloors. The foam or cork pad goes against the subfloor; the vapor retarder film, if required, goes beneath the pad. Do not add an additional separate underlayment on top of the barrier beneath a product with pre-attached padding — the total stack height becomes problematic for the locking system.
Some manufacturers of pre-attached underlayment products explicitly permit installation directly over concrete without a separate vapor barrier, claiming the pre-attached layer provides sufficient protection. This claim should be scrutinized carefully. The moisture permeability of a factory-bonded 1.5mm IXPE pad is not the same as a 6-mil polyethylene vapor barrier. For concrete subfloors with any moisture concern at all, adding a vapor barrier regardless of what the vinyl product spec says is conservative but defensible practice.
Acoustic Performance: What the Numbers Mean
If sound transmission between floors is a concern — relevant in multi-story homes, condominiums, and any space with occupants above and below — the underlayment choice has measurable consequences. The two relevant rating systems are IIC (Impact Insulation Class, which measures impact sound like footfall) and STC (Sound Transmission Class, which measures airborne sound like voices and music).
Building codes in many jurisdictions require a minimum IIC of 50 and STC of 50 for flooring assemblies in multi-family residential buildings. Standard 2mm foam underlayment typically contributes 5 to 10 IIC points to the assembly. Cork contributes more. Rubber contributes the most, often 15 to 25 IIC points depending on thickness and density.
The subfloor assembly, the concrete slab, and the ceiling construction below all factor into the final IIC and STC ratings as well. The underlayment alone does not determine the assembly rating — but it is one of the few variables the flooring installer controls, and selecting a higher-performing product is a relatively low-cost way to meaningfully improve the acoustic performance of the finished floor.
For a detailed breakdown of how vinyl flooring compares acoustically to other flooring types, the IIC and STC ratings for vinyl flooring resource covers the rating system and what real-world assembly values look like across different product categories.
Thermal Comfort and Insulation Under Vinyl
On above-grade wood subfloors, thermal comfort under vinyl is rarely a significant concern — the wood subfloor itself provides meaningful insulation from below. On concrete slabs, particularly in below-grade or ground-floor spaces in cooler climates, the thermal mass of the concrete conducts heat away from bare feet efficiently. The floor feels cold. It always feels cold, regardless of how much you heat the room.
Underlayment with higher thermal resistance (R-value) mitigates this. Cork underlayment has better thermal resistance than foam of equivalent thickness. Thicker underlayment provides more resistance than thin underlayment. For a basement or slab-on-grade installation in a climate with cold winters, choosing a 3mm cork or composite underlayment over a 2mm foam underlayment meaningfully changes how the floor feels in January.
If radiant heating is present in the concrete slab, underlayment selection becomes more nuanced. The thermal resistance that makes underlayment comfortable in a cold room also impedes heat transfer from the radiant system to the floor surface above. Thinner, more thermally conductive underlayment allows the radiant heat to reach the floor surface more efficiently. Many radiant floor system manufacturers specify maximum total R-value for flooring and underlayment combined — typically 1.5 to 2.0 — and exceeding this limit reduces the system’s ability to achieve set-point temperatures efficiently.
Self-Leveling Compound: When It Belongs in the System
Self-leveling compound is not exactly “underlayment” in the traditional sense, but it belongs in any honest discussion of what goes under vinyl flooring because it is a material that routinely needs to go down before anything else does.
Portland cement-based self-leveling compounds — pourable, high-flow products that find their own level — are used to flatten concrete subfloors with depressions, dips, and low spots that exceed the 3/16-inch tolerance. They are also used over existing tile to fill grout joints before vinyl installation and to feather out transitions between subfloor sections of different heights.
The important technical point: self-leveling compound is not a vapor barrier. It does not stop moisture transmission through a concrete slab. The moisture barrier still goes above it. The sequence is: repair and flatten the concrete with leveling compound → cure → moisture barrier → underlayment → vinyl.
For thin-film applications, like filling grout joints, a trowel-applied patching compound is more appropriate than a pourable self-leveler. The right product depends on the depth and area being filled.
What Not to Put Under Vinyl Flooring
The question of what to put under vinyl flooring implies an equal and opposite question about what to avoid. Several materials are commonly placed under vinyl that should not be.
Carpet or carpet padding beneath vinyl flooring is the most consequential mistake in this category. Vinyl is a hard surface flooring product. Its locking joint systems are engineered to transfer load through a rigid or semi-rigid plane. Carpet padding compresses non-uniformly, creates a surface that moves differently at every point, and absolutely destroys the structural integrity of a click-lock installation over time. Some manufacturers explicitly void warranties for installations over carpet. The floor will fail.
Open-cell foam is inappropriate on concrete subfloors for the moisture absorption reasons discussed earlier. If you find open-cell foam underlayment in a flooring product at a very low price point, it is almost certainly intended for above-grade wood subfloor applications only.
Old adhesive residue from a previous floor installation is not a suitable surface for vinyl underlayment. Adhesive residue that is firmly bonded, flat, and without raised ridges can sometimes remain in place — but lumpy, crumbling, or uneven adhesive residue must be removed or skim-coated before installation proceeds.
Asbestos-containing resilient flooring is a special case. Many resilient flooring products installed before 1980 — vinyl sheet, vinyl composition tile, the adhesives used to bond them — contain asbestos. Installing new flooring over suspected ACM (asbestos-containing material) without having it tested first is inadvisable. Disturbing ACM without proper abatement procedures is a health and legal issue. If the existing floor is original to a pre-1980 home, test it before proceeding.
Subfloor Preparation Sequence: Putting It All Together
The correct installation sequence for what goes under vinyl flooring, assembled from everything covered above, looks like this depending on subfloor type.
On concrete: test for moisture → flatten and repair the slab → cure → install vapor/moisture barrier with taped seams → install underlayment (if vinyl lacks pre-attached pad) → install vinyl. If the vinyl has a pre-attached pad, the underlayment step is skipped but the moisture barrier remains.
On plywood or OSB above grade: inspect and repair subfloor → flatten high and low spots → install foam underlayment (with or without integrated vapor retarder depending on room type) → install vinyl. If vinyl has pre-attached pad, skip the separate underlayment but retain moisture-resistant film in wet areas.
On existing tile: inspect and secure all tiles → skim-coat grout joints exceeding 1/16 inch with leveling compound → cure → install foam underlayment → install vinyl.
Choosing the right underlayment for the specific subfloor type is addressed in detail in the guide to underlayment for SPC vinyl plank flooring, which covers the rigid-core case; the quick-reference table at the top of this guide covers every other subfloor scenario.
Choosing the Right Underlayment: A Framework
After covering every material, every subfloor type, and every scenario, the decision framework reduces to five questions.
Does the vinyl product already have attached underlayment? If yes, you need a moisture barrier on concrete and nothing else underneath. If no, you need underlayment and, on concrete, a moisture barrier.
What is the subfloor material? Concrete requires a moisture barrier. Wood above grade in dry rooms does not. Wet areas — bathrooms, kitchens, laundry — add moisture protection even over wood.
What are the moisture conditions? Test on concrete. High moisture means a thicker, lower-perm barrier. Acceptable moisture on grade means a standard combination product is sufficient.
Is acoustic performance a priority? If yes, cork or rubber underlayment replaces foam. The cost difference is real and worth it for multi-family buildings or households where footfall noise is a friction point.
What does the vinyl manufacturer specify? Maximum underlayment thickness, approved underlayment types, and warranty conditions vary by brand and product line. The manufacturer spec is the document that matters most, because it is the document that determines whether your warranty is valid if the floor fails.
Decisions about vinyl installation type — whether click-lock or glue-down — also affect what goes beneath the floor. Glue-down vinyl, which bonds directly to the subfloor, takes no underlayment: the adhesive needs direct contact with the subfloor, and the adhesive bed itself fills minor imperfections. The comparison between click-lock and glue-down vinyl flooring covers how the installation method changes the entire underlayment strategy.
Common Mistakes That Start Beneath the Floor
Most vinyl flooring failures that appear at the surface — buckling, gapping, joint failure, hollow-sounding areas, visible subfloor imperfections — originate in decisions made before the first plank was installed. Understanding why buckling happens, for example, often traces back to inadequate moisture management beneath the floor rather than anything wrong with the vinyl itself. If you are troubleshooting an existing installation, why vinyl flooring buckles and how to stop it covers the diagnostic process from subfloor conditions up.
Skipping the moisture test on concrete is the single most common decision that leads to expensive flooring failures. The test costs almost nothing. The calcium chloride test kit runs under $30. The in-situ RH probe test is more accurate and costs more but is worth it for larger projects or any space with a known moisture history. Neither cost is significant relative to the flooring installation itself.
Using the wrong underlayment thickness is the second most common error. Adding a thick, soft underlayment beneath a thin, rigid LVT product creates excessive joint flex under load. The joints fail. This is entirely preventable by reading the installation instructions before purchasing underlayment.
Not taping underlayment seams on concrete is the third. Underlayment laid without taped seams has gaps. Moisture migrates through gaps. The barrier is only as good as its least-sealed point.
The Right Way to Think About the Whole System
What goes under vinyl flooring is a system, not a product. The subfloor preparation, the moisture management layer, and the underlayment pad all work together. Any one of them failing degrades the performance of the others and, ultimately, of the vinyl itself.
Good underlayment under a poorly prepared subfloor fails. A correctly prepared subfloor with inadequate moisture management fails in wet conditions. A perfect subfloor and moisture barrier system with the wrong underlayment — too thick, too soft, or the wrong type for the installation method — fails from mechanical stress on the locking joints.
The vinyl flooring you see is the last layer installed and the first thing people notice. What you put under it is the part no one ever sees — which is precisely why it is the part that determines whether everything above it lasts.
For a comprehensive overview of how vinyl flooring types differ in their underlayment and subfloor requirements, the types of vinyl flooring explained resource covers LVP, LVT, SPC, WPC, and sheet vinyl side by side — including how each product category’s construction affects what it needs beneath it.
If you are comparing total installed costs across flooring categories and trying to understand whether the underlayment adds significant expense to a vinyl installation relative to alternatives, the vinyl flooring installation cost guide breaks down materials, labor, and preparation costs in a way that accounts for underlayment and subfloor prep as line items rather than afterthoughts.
The system beneath the floor is not glamorous. It is not photographed for product listings. It does not appear in design inspiration posts. It does not get credit when the floor looks great five years after installation. But it is the reason the floor looks great five years after installation. That is worth understanding before the first roll of underlayment is unboxed.
James Miller is a seasoned flooring contractor with years of hands-on experience transforming homes and businesses with high-quality flooring solutions. As the owner of Flooring Contractors San Diego, James specializes in everything from hardwood and laminate to carpet and vinyl installations. Known for his craftsmanship and attention to detail, he takes pride in helping clients choose the right flooring that balances beauty, durability, and budget. When he’s not on the job, James enjoys sharing his expertise through articles and guides that make flooring projects easier for homeowners.
DIY laminate flooring removal is the manual process of detaching laminate planks from a subfloor without hiring a contractor. The procedure separates the wear layer, decorative layer, HDF core, and backing layer from the underlayment using a pry bar, chisel, utility knife, and floor scraper. Homeowners perform laminate flooring removal to replace damaged planks, eliminate…
Most people approaching this decision immediately ask the wrong question. They ask which carpet looks best in a dining room. The right question is: which carpet survives a dining room — and still looks good doing it. Dining rooms are structurally different from every other space in a home. Chairs are pulled out and pushed…
Most carpet conversations collapse into a single question: which fiber lasts longest? But that framing misses the actual decision. Triexta and nylon are built around different molecular priorities, and the one that performs better in your home depends entirely on what “perform” means to your household. A family with two dogs and a toddler has…
Disposing of old carpet is not as simple as dragging it to the curb. The City of San Diego explicitly lists carpets under construction and building debris — a category that cannot go into standard refuse containers. That single rule changes the entire process for homeowners and contractors who assume curbside pickup handles everything. This…
Before you pick up a utility knife or reach for a circular saw, there is one thing most guides skip entirely: vinyl plank flooring is not a single material. It is a layered system, and the core type determines almost every cutting decision you will make on the job. Most planks share the same four-layer…
The best thermal insulation under laminate flooring is extruded polystyrene (XPS) foam board, ranked first for thermal resistance per millimetre of thickness. The full ranking, from highest to lowest thermal performance per millimetre, is XPS foam, dense wood fibreboard, natural cork, premium combination foam, rubber crumb, and standard polyethylene foam. XPS reaches a TOG rating…