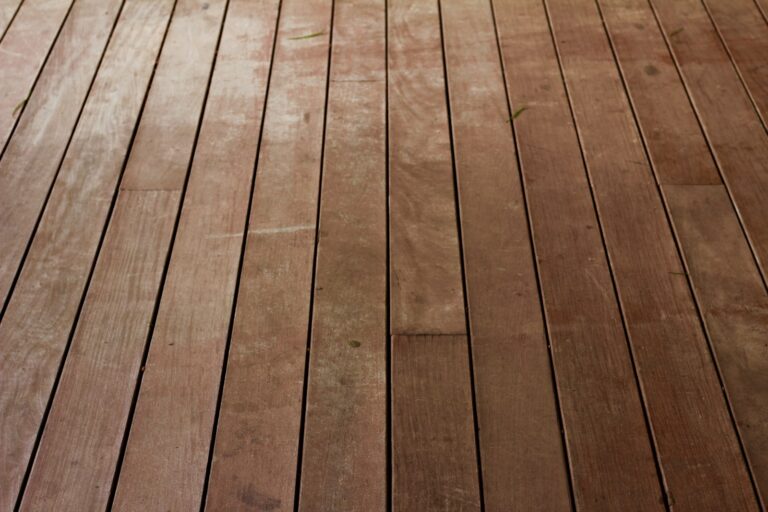
The surface you end up with is wood-based, hard, and relatively flat — three properties that laminate needs from whatever it sits on. Where engineered hardwood fails as a laminate base is when it’s a floating floor itself, when it’s damaged, or when it has active moisture problems.
The core question before any installation is this: Is your existing engineered floor glued down, nailed down, or floating? The answer determines whether you proceed or remove first.
The Floating-Over-Floating Problem
This is the single most important concept in this entire article.
Laminate flooring is a floating floor. Its planks click together and move as a single unit across the surface beneath them. That movement — the seasonal expansion and contraction — is controlled expansion. The floor shifts as a whole, which is why expansion gaps at walls exist.
When you float a laminate floor on top of another floating floor, you now have two independent movement systems stacked on each other. The engineered floor below expands and contracts on its own schedule. The laminate above does the same. They don’t move together. The friction and opposing movement between them causes:
Click-lock joints separating at the seams
End gaps opening between planks
Peaking and buckling along long runs
A hollow, unstable feel underfoot
Squeaking from the two layers rubbing against each other
This is not a risk — it is a near certainty over time, particularly in San Diego where interior climate conditions shift between seasons.
Rule: Never float laminate over a floating engineered hardwood floor. If the engineered floor beneath is floating, you have two choices — remove it, or glue it down to the subfloor before proceeding.
When You Can Install Laminate Over Engineered Hardwood
The conditions that make this installation viable are specific and verifiable.
The Engineered Floor Must Be Glued or Nailed Down
A glued-down engineered hardwood floor is firmly bonded to the concrete slab or plywood subfloor beneath it. It has no independent movement. It behaves, structurally, like a hard subfloor surface. Laminate floating over it will only have one movement system — itself — which is the correct configuration.
Nail-down engineered installations work similarly. The floor is mechanically fastened. It doesn’t float. The laminate above can move freely without fighting a second independent layer.
The Surface Must Be Flat
Laminate flooring requires a flat surface within 3/16″ over a 10-foot span — this is the industry standard tolerance for floating floor installations. Engineered hardwood floors that are properly installed typically meet this requirement, but you still need to check.
Use a long straightedge or a 10-foot floor level and sweep it across the entire room. Mark any high spots and low spots. High spots — a raised board edge, a nail head, a warped plank — must be sanded flush. Low spots deeper than 3/16″ need a floor-leveling compound before you lay anything over them.
An uneven base is the primary cause of click-lock failure and joint separation. Skipping this step will create problems that become visible within weeks. If you need to level a wood-based subfloor before installing, the same preparation principles apply here — the process is documented in detail at leveling a wood subfloor for laminate flooring.
The Surface Must Be Structurally Sound
Walk the entire engineered floor before you commit. Press firmly at the edges of planks and in the field. Any board that moves, rocks, deflects, or feels soft has a bonding failure underneath. Hollow spots under a glued floor indicate the adhesive has released from the slab.
Any loose, damaged, or delaminating boards must be re-bonded or replaced. Laying laminate over a structurally compromised floor transfers those defects upward — you’ll feel soft spots, hear hollow sounds, and the click joints above will eventually fail at those locations.
There Must Be No Active Moisture Problem
Moisture is the most consequential variable in this installation. Engineered hardwood that has swollen, cupped, or shows dark staining at the seams has been exposed to moisture. Installing laminate over a moisture-damaged engineered floor traps the problem. The laminate acts as a vapor barrier in the wrong direction — it seals moisture in rather than letting the floor dry.
If the engineered floor is in a room that has had water intrusion, a plumbing leak, or sits over a concrete slab with no moisture barrier, test before you install. Moisture meters are inexpensive and give you measurable data. The reading you need from a wood-based surface is below 12% moisture content. Anything above that is a disqualifying condition.
The Height Consequence
This is the practical problem that most homeowners underestimate until it’s too late.
When you install laminate over existing engineered hardwood, you’re adding height to the floor. A typical laminate plank runs between 8mm and 12mm thick. Add an underlayment layer of 2–3mm and you’re raising the finished floor by 10–15mm (roughly 3/8″ to just over 1/2″).
That height increase creates real problems:
Door clearance: Interior doors that previously had standard clearance from the floor may no longer open or close. The door bottom may drag or jam entirely. Every door in the installation area needs to be measured and potentially trimmed.
Transition heights: Where the new floor meets an adjacent room that wasn’t renovated, you’ll have a height difference at the threshold. Transition strips can manage this, but a 15mm height difference is significant and creates a tripping hazard without a proper reducer.
Appliance and cabinet toe-kicks: In kitchens or utility rooms, raised floor height can affect how appliances fit under counters or whether dishwashers slide in and out properly.
Stair nosings: If the installation continues to a staircase, the raised height affects the first step riser height, which must remain consistent for safety compliance.
Measure every door, every transition point, and every fixed appliance before committing to this approach. Choosing a thinner laminate — an 8mm product rather than 12mm — reduces the height penalty while still giving you a functional floor. The thickness question and what it means for performance is covered in detail at best thickness for laminate flooring.
Underlayment: What You Need and What You Don’t
The underlayment question changes when you’re installing over engineered hardwood rather than a hard mineral surface like concrete.
Do You Need Underlayment?
Yes — but its role is different here than it would be over concrete.
Over a concrete slab, underlayment serves primarily as a moisture barrier and secondarily as a cushion. Over an engineered hardwood floor, moisture migration from below is typically not the primary concern (the engineered floor itself acts as a buffer). What underlayment provides here is:
Sound dampening: Without underlayment, laminate over a wood surface produces a hollow, clacking sound underfoot. A thin underlayment absorbs impact noise significantly.
Minor leveling tolerance: A foam or cork underlayment bridges very minor surface irregularities and prevents the click-lock system from being stressed by micro-variations in the surface.
Slip plane: Underlayment allows the laminate above to move as a floating unit without bonding to the engineered surface below.
What Thickness and Type
Keep the underlayment thin — 2mm to 3mm. A thicker underlayment (5mm or more) over a wood-based surface creates too much give. When the laminate is walked on, it compresses the underlayment unevenly, stressing the click joints at the edges of planks. Over time, this causes joint separation and creaking.
If your laminate has a pre-attached underlayment on the back of each plank, you typically do not need to add a separate layer. Check the manufacturer’s installation instructions — adding a second underlayment layer when the planks already have one attached is one of the most common installation mistakes, and it voids most warranties.
Use a standard foam or cork underlayment at 2–3mm. Avoid rubber underlayments in this application — they’re too thick and too dense, and they can cause the floor to feel spongy in ways that stress click-lock systems.
Direction of Installation
The direction question matters here for structural reasons, not just aesthetic ones.
If you run the laminate planks in the same direction as the engineered hardwood planks below, the seams of the two floors may align or run close together. Aligned seams create a weak axis — both floors flex along the same line, concentrating stress on the laminate joints above the engineered joints below.
The preferred approach is to run the laminate perpendicular to the engineered hardwood planks below. This cross-direction orientation distributes the load more evenly and keeps the click seams of the new floor over the field (flat, solid area) of the planks below rather than over the joins.
If the room geometry makes perpendicular installation impractical, running at a 45-degree diagonal is the second-best option. Running parallel is possible but not preferred.
Step-by-Step Installation Process
With the conditions verified and the materials selected, the installation sequence for laminate over engineered hardwood is as follows.
Step 1: Inspect and Repair the Engineered Floor
Walk every square foot. Press at plank edges. Listen for hollow sounds under glued boards. Mark any problem areas. Re-bond loose planks with construction adhesive and weighted clamps, allowing full cure time before proceeding. Pull any protruding nails or staples flush with the surface.
Step 2: Clean the Surface Thoroughly
Vacuum and sweep the entire floor. Remove every trace of debris, dust, and adhesive residue. Even small particles under the underlayment create stress points on the click-lock system when walked on.
Step 3: Check and Correct Flatness
Sweep a 10-foot straightedge across the floor in multiple directions. Mark high spots with chalk. Sand high board edges flush with a belt sander or hand sander. Fill low spots with floor-leveling compound and allow it to cure fully according to the manufacturer’s specification — typically 24 hours before foot traffic, longer before flooring installation.
Step 4: Acclimate the Laminate
Leave the laminate boxes in the installation room for a minimum of 48 hours, ideally 72 hours. Stack them flat, not upright. The laminate must reach equilibrium with the room’s temperature and humidity before installation — failure to acclimate is one of the primary causes of post-installation gapping and expansion problems. This applies equally whether you’re installing over engineered hardwood or any other surface.
Step 5: Lay the Underlayment
Roll out the underlayment perpendicular to your planned plank direction. Butt edges together — do not overlap. Tape the seams with underlayment tape. Do not allow the underlayment to run up the walls; trim it flush at the baseboard line. If your laminate has pre-attached underlayment, skip this step.
Step 6: Install the Laminate
Start from the straightest wall in the room, which is typically the wall opposite the main entrance. Leave a 1/4″ expansion gap at all walls, columns, and fixed vertical surfaces. Use spacers to maintain this gap consistently. Click-lock each plank using the angle-and-press method specific to your flooring brand — tongue-and-groove and drop-lock systems have different engagement sequences, so read the installation guide for your specific product before beginning. The available installation methods and how each one performs is covered at 3 methods to install laminate flooring.
Stagger end joints by at least 12 inches between adjacent rows. A minimum stagger of 1/3 the plank length is the standard — closer end joints create a weak visual pattern and a structurally weaker floor.
Step 7: Handle Doorways
Doorways are the most technically demanding part of any laminate installation over existing flooring, particularly when the combined height has already changed the clearance situation. The laminate must pass under door casings, around the door frame, and through the threshold without a visible gap or an abrupt edge. The correct approach to each doorway type is different — how to handle them properly is covered at 7 steps to lay laminate in doorways.
Step 8: Install Transitions and Replace Baseboards
Where the new floor meets an adjacent room or a different flooring surface, install the appropriate transition strip — a T-molding for same-height surfaces, a reducer for different-height surfaces. Remove and reattach baseboards after installation rather than nailing them before, so the floor can expand freely underneath without the baseboard holding it fixed.
When to Remove the Engineered Hardwood Instead
Installing laminate over engineered hardwood is a practical solution in the right conditions. But there are situations where removing the engineered floor and starting on the structural subfloor is the better path.
Remove the engineered hardwood and start fresh if:
The engineered floor is floating and cannot be glued down (some click-lock engineered products cannot be bonded)
The existing floor has moisture damage, cupping, or active delamination
The height increase from adding laminate will cause door or appliance conflicts that are expensive or impractical to fix
The engineered floor has significant areas of hollow bonding that cannot be repaired
The structural subfloor beneath has issues that need to be addressed directly
In San Diego homes, the most common scenario where removal makes more sense than overlay is when the engineered floor was installed as a floating product. Glued-down engineered floors — common in concrete-slab construction throughout San Diego County — are far better candidates for laminate overlay.
Moisture Considerations in San Diego
San Diego’s climate is often described as mild and dry, which leads many homeowners to skip moisture testing entirely. This is a mistake.
While ambient humidity is lower than in coastal regions further north, concrete-slab homes in San Diego still have measurable vapor transmission through the slab. Ground moisture moves upward through concrete in vapor form regardless of how dry the surface appears. If the engineered hardwood was installed on a slab without a proper vapor barrier between the concrete and the flooring, that moisture has been moving into the wood since installation.
Before installing laminate over any engineered floor on a concrete slab, test the moisture content of the engineered surface itself. If the reading is elevated, investigate why before proceeding. The relationship between moisture barriers and concrete-slab flooring installations — and how to correctly address the moisture question — is explained at moisture barriers for concrete floors.
Expansion and What Happens If You Skip It
The expansion gap is not a detail — it is a structural requirement of any floating floor installation.
Laminate expands when humidity rises and contracts when it drops. The total expansion movement across a full room can be several millimeters. The expansion gap at the wall provides the space for that movement to happen without the floor running into a fixed object. When a floating floor has nowhere to expand, it buckles upward at the seams — this is called peaking or crowning, and it is one of the most common and most preventable laminate failures.
When installing over existing engineered hardwood, the expansion gap requirement does not change. The fact that there’s another floor underneath doesn’t constrain the movement of the laminate above — the laminate still needs room to breathe at every wall, door frame, and fixed vertical surface. The mechanics of why laminate expands and what triggers the most problematic expansion events are covered at why does laminate flooring expand.
Click-Lock Compatibility Over Engineered Hardwood
Most modern laminate uses click-lock technology — either an angle-press system or a drop-lock (Uniclic-type) system. Both are designed to be installed as floating floors on a flat, stable, and firm surface.
The click-lock joint is precision-engineered. When the surface below it is uneven, or when there’s too much flex in the base, the joint tolerances are exceeded — the tongue-and-groove contact area becomes uneven, and the connection loosens. Over an engineered hardwood surface that is flat and firmly bonded, this is not an issue. Over a surface that has soft spots, bonding failures, or a floating layer beneath it, click failure becomes likely over time.
This is why the surface inspection step is not optional. A click-lock system is only as reliable as the base it sits on. If you’re choosing between click-lock and tongue-and-groove for this installation, the comparison of how each system performs under different base conditions is covered at click-lock or tongue-and-groove laminate flooring.
What Laminate Specifications Work Best in This Scenario
Not all laminate products perform equally in an overlay installation. The characteristics that matter most when going over engineered hardwood are thickness, core density, and whether the product includes pre-attached underlayment.
Thickness: An 8mm laminate is the practical sweet spot for overlay installations. It adds less height than a 12mm product while still providing adequate core rigidity. Thinner laminates (6mm and below) flex too easily and require a more perfectly flat surface to perform well.
Core density: Higher-density HDF cores resist indentation and flex better than lower-density cores. Look for products with an HDF core density above 850 kg/m³ for an overlay installation.
AC rating: The AC rating of the laminate determines its wear layer durability. For residential overlay installations, AC3 is the minimum. AC4 is appropriate for high-traffic areas. The rating system and what each level means for performance longevity is explained at AC ratings of laminate flooring.
Pre-attached underlayment: Laminate with pre-attached underlayment simplifies installation and ensures the underlayment specification is correct for the product. Over engineered hardwood, where you want a thin slip layer rather than a thick cushion, pre-attached underlayment is often a better choice than adding a separate product.
Summary: The Decision Framework
The question “can I install laminate flooring over engineered hardwood” has a conditional answer. The conditions are not complicated, but they must all be met before proceeding.
The engineered hardwood underneath must be glued or nailed — not floating. The surface must be flat to within 3/16″ over 10 feet. The floor must be structurally sound with no bonding failures, soft spots, or damaged planks. There must be no active moisture problem in the existing floor. The height increase must be compatible with the room’s doors, transitions, and fixed elements.
When those conditions are met, laminate over engineered hardwood is a legitimate and practical installation that saves the cost and labor of removing the existing floor. When they’re not, the right answer is to remove the engineered hardwood and install the laminate on the structural subfloor directly.
If you’re working through this decision for a specific room in your San Diego home and want to know which scenario you’re dealing with, the fastest path to a correct answer is a site assessment with someone who can physically evaluate the existing floor — because the variables that determine the outcome of this installation are ones that a camera can’t fully capture.
James Miller is a seasoned flooring contractor with years of hands-on experience transforming homes and businesses with high-quality flooring solutions. As the owner of Flooring Contractors San Diego, James specializes in everything from hardwood and laminate to carpet and vinyl installations. Known for his craftsmanship and attention to detail, he takes pride in helping clients choose the right flooring that balances beauty, durability, and budget. When he’s not on the job, James enjoys sharing his expertise through articles and guides that make flooring projects easier for homeowners.
Concrete is one of the most common subfloor types in modern homes, and bamboo is one of the most misunderstood materials you can install over it. The combination works — but only when you treat the concrete for what it actually is: a porous, moisture-emitting surface that never truly stops moving vapor upward. Get that…
The best type of vapor barrier depends on the subfloor beneath your laminate, the moisture levels in that subfloor, and whether your underlay already includes a built-in membrane. For concrete subfloors with moderate to high moisture, a 6-mil polyethylene film or a foil-faced barrier is what most professional installers reach for. For wood subfloors with…
The bedroom is the one room in your home where you never have to justify comfort. Unlike kitchens and entryways — where durability trumps everything else — bedrooms let you prioritize softness, warmth, and the very particular pleasure of stepping onto something forgiving first thing in the morning. Carpet delivers all of that and more,…
Quick Answer: To level a wood subfloor for laminate flooring, the surface must be flat to within 3/16 inch over any 10-foot span. Sand down high spots. Fill low spots with floor patch compound (dips under ¼ inch), self-leveling compound (larger areas), or a plywood overlay (widespread unevenness). Fix all squeaks with screws before applying…
Can You Use Vinyl for Gym Flooring? The Honest Answer Depends on Which Gym Zone You’re Talking About Vinyl flooring works in a gym. But that answer is only useful if you understand what “works” actually means in a gym context — because a cardio studio, a free-weight floor, and an Olympic lifting platform have…
Solid wood flooring on concrete is one of the more demanding installation scenarios in the residential flooring world. The combination creates a structural conflict from day one: concrete is a porous, moisture-emitting material that breathes constantly, while solid wood is hygroscopic and reacts to every fluctuation in relative humidity and vapor pressure. The underlay sitting…