Bathrooms also present thermal cycling that other rooms don’t. Radiant floor heat, if present, combined with cold ambient temperatures between showers, contracts and expands vinyl repeatedly. Floating floors that lack adequate expansion gaps or that were installed over an imperfectly flat subfloor develop peak stress at seams, leading to lipping — where adjacent plank edges rise slightly relative to each other — which then catches standing water and channels it exactly where you don’t want it to go.
Then there is the slip resistance question. A highly polished, high-gloss vinyl tile looks striking in a bathroom but becomes a genuinely dangerous surface when wet. R-value slip ratings for flooring (the German ramp test scale) become relevant in bathrooms in a way they aren’t in living rooms. Products rated R10 or above — or those with a coefficient of dynamic friction (DCOF) of at least 0.42 — are the minimum worth considering for bathroom floors used by children or older adults.
The Four Vinyl Formats and How Each Performs in Bathroom Conditions
Vinyl comes in four main construction formats, and the bathroom performance differences between them are substantial enough to drive the selection decision before brand or aesthetics even enter the picture.
Sheet Vinyl
Sheet vinyl remains the most technically sound choice for bathrooms from a pure moisture-management standpoint. Installed correctly with heat-welded seams or full-spread adhesive, a sheet vinyl floor has essentially zero seams through which water can reach the subfloor. The continuous surface eliminates the primary failure mode that haunts click-lock plank installations in wet areas.
Modern sheet vinyl has shed the fiberglass-reinforced constructions of decades past that were stiff and prone to cracking. Contemporary sheet products use PVC backing with embossed surface textures that are softer underfoot and offer genuine slip resistance. Thickness ranges from 2mm to 4mm for residential sheet products, with the thicker gauge providing better resilience over minor subfloor imperfections.
The limitation of sheet vinyl in bathrooms is installation complexity. Full bathroom removal — vanities, toilets, trim — is essentially required to install sheet correctly without producing a seam in a high-traffic zone. Custom cutting around toilets, vanity bases, and tub surrounds requires skill to avoid gaps at penetrations, which ironically become water infiltration points if done poorly. For a small powder room or a simple rectangular bathroom, sheet vinyl is the gold standard. For a complex master bath with multiple fixtures, angles, and alcoves, the seam-management advantage becomes harder to execute.
LVT (Luxury Vinyl Tile)
LVT in smaller tile formats — 12×12, 12×24, or 18×18 — is the format most commonly specified for bathroom applications by flooring contractors, and for good reason. Smaller tiles mean more seams in aggregate, but those seams are shorter individually, easier to seal at grout lines if a groutable LVT product is used, and the tile format allows precise fitting around bathroom fixtures without requiring large continuous cuts.
Groutable LVT — thin-set or pressure-sensitive adhesive installed with 1/16″ to 1/8″ grout joints using unsanded or epoxy grout — creates a floor that is visually indistinguishable from ceramic tile but warmer underfoot, more comfortable on bare feet, and significantly more forgiving if a ceramic item is dropped. The grout lines, when properly grouted with a waterproof epoxy product, seal the seams and prevent moisture migration to the subfloor.
Glue-down LVT also eliminates the floating floor movement problem entirely. A full-spread adhesive application bonds tile directly to the subfloor, removing any possibility of plank-shift, seam gapping, or lipping from expansion and contraction. This is particularly important in bathrooms with radiant heat, where thermal cycling is pronounced.
SPC (Stone Plastic Composite)
SPC vinyl is the construction format that changed the performance conversation for click-lock vinyl in demanding environments. The core of an SPC plank or tile is made from a mixture of limestone powder and PVC, extruded under heat and pressure into a dense, rigid core. This core has essentially zero expansion coefficient when exposed to moisture — it does not swell, contract, or warp when subfloor humidity fluctuates.
For bathrooms, that dimensional stability matters in two specific ways. First, SPC flooring tolerates occasional subfloor moisture events — a slow leak, a grout failure behind the tub surround, humidity migration through a concrete slab — without the core delaminating or cupping the way WPC (wood-plastic composite) products can. Second, the rigidity of the SPC core means seams remain tighter over time. Floating floors move slightly with temperature; rigid SPC cores move less, keeping locking joints engaged and reducing the gap development that allows water infiltration.
Understanding the full technical differences between these formats matters before installation day. The differences between SPC and LVT vinyl flooring go beyond core construction and affect how each responds to the specific conditions a bathroom creates over years of use.
WPC (Wood Plastic Composite)
WPC uses a foamed core of wood fiber and PVC, making it softer and warmer underfoot than SPC. The wood fiber component gives WPC a lower density core that feels comfortable in bare feet — valuable in a bathroom where you’re standing on cold tile every morning. However, that same wood fiber content introduces a degree of moisture sensitivity that SPC eliminates. WPC cores can absorb moisture over extended periods, particularly if subfloor moisture infiltrates from below. In a ground-floor or slab-on-grade bathroom, WPC above a concrete subfloor with marginal moisture vapor emission rates is a riskier choice than SPC.
WPC is a reasonable bathroom choice in above-grade applications — second-floor bathrooms over conditioned space — where subfloor moisture from below is not a factor. In that context, the comfort advantage over SPC becomes meaningful without the moisture risk materializing.
Wear Layer Thickness: The Number That Actually Governs Durability
Wear layer thickness is the single most important specification number on a vinyl flooring product, and it is consistently underweighted in buying decisions because it sounds technical and the marketing emphasis is on visuals, feel, and price per square foot.
The wear layer is the clear, protective PVC layer on top of the print film. It determines how the floor resists scratching, scuffing, staining, and surface degradation. In bathrooms specifically, the wear layer also determines how the floor responds to repeated wet-cleaning with mops and cleaning solutions, which are mildly abrasive over thousands of cycles.
Wear layers are measured in mils (thousandths of an inch). The practical breakdown for bathroom use:
6 mil: Entry-level residential. Adequate for a low-traffic guest bathroom that sees limited use. Not appropriate for a primary bathroom with daily traffic, children, or pets.
12 mil: Standard residential. Appropriate for most residential primary bathrooms with moderate traffic. The minimum worth installing in a bathroom that sees daily use by a family.
20 mil: Heavy residential / light commercial. The appropriate spec for primary bathrooms with heavy traffic, pets, or young children. The additional wear layer depth provides meaningful resistance to the micro-abrasion of daily wet-mopping and grit tracked in from outside.
28 mil and above: Commercial specification. Rarely necessary in residential bathrooms but available from most major manufacturers for master baths in luxury builds or rental properties where durability matters more than cost.
The relationship between wear layer thickness and long-term durability is not linear — the jump from 6 mil to 12 mil produces a larger real-world improvement than the jump from 20 mil to 28 mil. Most residential bathroom flooring decisions should land at 12 mil minimum, with 20 mil as the specification for any bathroom that will see regular family use. Understanding wear layer thickness for LVP flooring in full detail helps contextualize why this spec matters more than total plank thickness for actual performance.
Installation Method Selection for Bathrooms
The installation method determines moisture management performance more than the vinyl product specification does. A 20 mil SPC click-lock plank installed as a floating floor in a bathroom will fail from subfloor moisture infiltration before a 12 mil glue-down LVT in the same bathroom. The installation architecture is the water barrier; the vinyl itself is not.
Glue-Down Installation
Full-spread adhesive installation is the technically superior method for bathroom vinyl. Adhesive bonds the vinyl directly to the subfloor, eliminating the air gap beneath floating floors where moisture can accumulate. It prevents plank movement, eliminates seam gapping, and allows the floor to be installed hard against wall bases and fixture penetrations without the expansion gap requirement that creates water infiltration opportunities around tub surrounds.
The correct adhesive selection matters as much as the method. Pressure-sensitive adhesives (PSA), commonly used for LVT, allow for repositioning but do not provide a full moisture barrier. Epoxy-modified adhesives create a more complete bond with better moisture-resistance properties. In below-grade bathrooms or those over concrete slabs with known moisture vapor emission, a moisture-mitigation adhesive — products rated for use over concrete with MVER up to 8–10 lbs/1000 sq ft/24 hours — provides an additional layer of protection. Choosing the right adhesive for vinyl flooring on concrete and wood subfloors directly determines whether a glue-down installation achieves its moisture-management potential.
Click-Lock Floating Installation
Click-lock installation is DIY-friendly, faster, and allows for easier future removal. It is also the installation method most commonly used in bathroom renovations where fixture removal is impractical. A click-lock floating floor in a bathroom is not inherently wrong, but it requires specific management decisions that are often skipped:
The expansion gap — typically 1/4″ around all vertical surfaces — must be present but sealed at penetrations. Around toilet flanges, tub surrounds, and shower thresholds, the expansion gap creates a direct water infiltration path that must be sealed with a 100% silicone caulk rated for wet areas. Standard latex caulk is inadequate; it will crack with the micro-movement of a floating floor and open the gap within 12–18 months. The transition strip at the bathroom doorway must use a reducer or T-mold profile that does not trap water at the seam where the bathroom floor meets the adjacent hallway floor.
Underlayment selection for click-lock bathroom vinyl also requires attention. Many SPC and WPC planks come with pre-attached underlayment, which is convenient but leaves no opportunity to select an underlayment with better moisture barrier properties. In bathrooms, a separate 6 mil polyethylene vapor barrier under the floating floor adds meaningful protection against subfloor moisture. Products with built-in underlayment that includes a vapor barrier film — some manufacturers laminate a foil-faced barrier to the pre-attached pad — provide this benefit without requiring a separate layer.
Subfloor Requirements: What Gets Skipped and Why It Causes Failures
Vinyl flooring tolerates subfloor imperfections better than hardwood or ceramic tile, but “tolerates better” does not mean “tolerates anything.” The most common bathroom vinyl installation failure — seam lipping, joint separation, and buckling — traces back to subfloor problems that were present before installation and never addressed.
Flatness is the first requirement. Most vinyl manufacturers specify a maximum subfloor variation of 3/16″ over 10 feet for click-lock products and 1/8″ over 10 feet for glue-down LVT. Bathroom subfloors are often out of flat in specific ways: around toilet flanges where the floor has been reinforced or patched, at the perimeter where tile or cement board was previously installed and creates a ridge, and in doorway transitions where thresholds introduce abrupt elevation changes. Each of these irregularities needs to be ground down or filled with a floor-leveling compound before any vinyl installation begins.
Moisture vapor emission from concrete subfloors — the most common subfloor in bathroom renovations on slab foundations — is the second critical factor. Concrete releases water vapor continuously, and in bathrooms where the concrete also receives moisture from above through grout failures or fixture leaks, the MVER can be substantial. A calcium chloride test (ASTM F1869) or relative humidity probe test (ASTM F2170) should be performed before vinyl installation in any slab-on-grade bathroom. Most click-lock vinyl manufacturers warrant their products only to specific MVER limits; exceeding those limits while skipping the test voids the warranty and sets up a floor that will fail. Preparing a concrete subfloor for vinyl flooring correctly is a ten-step process that most DIY installations condense into one: sweep and install.
Specific Product Specifications Worth Seeking in Bathroom Vinyl
Moving from format and installation method to actual product specifications, the attributes that most consistently predict bathroom performance are:
Waterproof Core Certification vs. Claim
Many products claim to be “100% waterproof” without independent certification. For bathroom use, look for products that have passed NALFA (North American Laminate Flooring Association) or FloorScore certification, or that explicitly list ASTM F2956 (Standard Specification for Solid Vinyl Tile) compliance. The GREENGUARD Gold certification, while primarily an indoor air quality standard, also requires rigorous product testing that tends to correlate with more consistently manufactured products.
Embossed-in-Register (EIR) Texture
Embossed-in-register texture means the surface texture is aligned with the print layer — the low spots in the embossing correspond to the grout lines or wood grain in the image. This creates a surface where water collects in the recessed areas rather than pooling on a flat surface. In a bathroom, EIR texture contributes to slip resistance because it breaks up the continuous water film that forms on smooth surfaces when wet. It also conceals minor scuffs and wear marks more effectively than flat or randomly embossed surfaces.
Antimicrobial Treatment
Some manufacturers apply antimicrobial treatments to the wear layer surface or to the backing material. For bathroom applications, an antimicrobial backing is more valuable than a surface treatment, because the surface is cleaned regularly. The backing sits against the subfloor in conditions — dark, occasionally moist, warm — that favor mold growth. Products with antimicrobial backing compounds (commonly silver ion-based treatments marketed under names like Microban) provide meaningful protection against mold colonization beneath the floor.
Slip Resistance Ratings
The Americans with Disabilities Act and most commercial building codes require a DCOF (Dynamic Coefficient of Friction) of 0.42 or higher for wet areas. Residential building codes do not mandate specific ratings, but the physical risk in a bathroom — particularly for older adults, children, and anyone stepping out of a wet shower — makes this specification worth checking. Products marketed explicitly for bathroom use should list their DCOF wet rating. A rating below 0.42 in a shower anteroom or beside a tub is a design choice worth reconsidering regardless of how attractive the product looks.
Vinyl Tile vs. Vinyl Plank in Bathrooms: Resolving the Direction Question
The choice between tile-format vinyl and plank-format vinyl in a bathroom is partly aesthetic and partly practical. Tile format — whether 12×12, 12×24, or hexagonal — reads as tile in a bathroom context, which aligns with traditional bathroom aesthetics and with the visual language of the wet area surround (if it is tiled). Plank format reads as wood, which creates a warmer, more residential aesthetic but introduces a directional layout question.
Plank orientation in a bathroom matters for moisture management in a specific way that is rarely discussed. When planks run perpendicular to the direction of water flow — perpendicular to the path from the shower to the vanity, or perpendicular to the direction drainage flows on a sloped floor — long seams run across the path water travels. Water reaching these seams is more likely to infiltrate. Running planks parallel to the primary water-flow direction, or in a diagonal pattern, reduces the likelihood of water finding a seam it can track along.
The plank vs. tile decision also intersects with grout line aesthetics. Comparing vinyl flooring to tile in bathroom applications reveals where each material has genuine advantages in performance, not just appearance — including the weight, thermal mass, and grout maintenance differences that make vinyl tile attractive even to buyers who prefer the look of ceramic.
The Underlayment Question for Bathroom Vinyl
Underlayment for bathroom vinyl requires a different calculus than underlayment for living room or bedroom vinyl. The primary function shifts from acoustic comfort to moisture management.
Standard foam underlayment — whether polyethylene foam, cross-linked polyethylene, or rubber — provides some acoustic benefit and cushioning but offers minimal moisture barrier capability. In bathrooms where moisture management is the primary concern, the underlayment specification should shift to include a vapor barrier. A 6 mil polyethylene film used as an underlayment (or a combination product that bonds a vapor barrier film to a foam pad) creates a capillary break between the subfloor and the flooring system.
For glue-down installations, underlayment is generally not used — the adhesive contacts the subfloor directly, and adding a foam layer between adhesive and subfloor compromises bond integrity. The moisture management in glue-down installs comes from adhesive selection and subfloor preparation, not underlayment.
For click-lock floating installations in bathrooms, pre-attached underlayment products marketed as having a moisture barrier (look for a silver or black film laminated to the bottom of the pre-attached pad) are preferable to standard foam-only pre-attached pads. If the product does not include a moisture barrier film, installing a separate 6 mil polyethylene sheet before the click-lock planks adds this protection with minimal added cost or complexity. Understanding underlayment options for vinyl plank flooring on concrete and other subfloors clarifies which products include moisture management properties and which are acoustic-only.
How Bathroom Size and Layout Affect Product Selection
Small bathrooms — powder rooms under 50 square feet, three-quarter baths with a single vanity and shower — favor larger format tile or short plank products. In a small space, long planks create a visual rhythm that dominates the room. Tile format in 12×12 or 12×24 with a slight grout joint gives a small bathroom more visual weight and a cleaner connection to the wall tile aesthetic.
Large master bathrooms — those over 100 square feet with double vanities, walk-in showers, and soaking tubs — have the floor area to support long plank formats (48″ to 60″ length, 6″ to 9″ width) without the proportion feeling wrong. In these rooms, wide-plank LVP in an SPC construction reads as upscale rather than utilitarian, and the larger floor area means fewer planks are required in the most vulnerable zones around the shower and tub.
Walk-in showers present a specific question: should the bathroom vinyl extend into the shower itself, or terminate at the shower threshold with a transition to a separate shower floor material? Most LVP and LVT manufacturers explicitly exclude shower floor application from their product warranties — continuous water immersion, even with an SPC core, is categorically different from bathroom-ambient moisture. The shower floor should be a dedicated wet-area product: porcelain or ceramic tile with appropriate waterproof membrane behind it, or a purpose-designed shower floor vinyl with sealed seams and a sloped drain system. The bathroom vinyl terminates at the shower threshold with a waterproof transition strip and a silicone caulk bead.
Long-Term Maintenance Realities
Vinyl flooring’s maintenance advantage over ceramic tile is genuine but comes with its own requirements. The absence of grout lines means no grout cleaning, no grout sealing, and no grout cracking — significant maintenance work in tiled bathrooms is simply eliminated. But vinyl’s wear layer, particularly in the 6–12 mil range, can be dulled by abrasive cleaners, scratched by grit, and permanently damaged by certain solvent-based cleaning products.
In bathroom applications, the cleaning chemistry matters. Most vinyl manufacturers prohibit bleach-based cleaners (they degrade the plasticizers in PVC over time), oil-based soaps (which leave residue that attracts soil and dulls the surface), and abrasive scouring pads. A pH-neutral vinyl floor cleaner diluted in warm water, applied with a well-wrung microfiber mop, is the correct maintenance protocol. The floor should not be steam-mopped — sustained high heat from steam cleaners damages the wear layer bonding and, in floating floors, can cause expansion that breaks locking joints. Cleaning vinyl plank flooring correctly preserves the wear layer and ensures the floor reaches its rated lifespan rather than failing prematurely due to maintenance errors.
Bathroom rugs and bath mats introduce a separate maintenance consideration. Rubber-backed bath mats can react with vinyl wear layers over time, particularly with certain synthetic rubber compounds used in cheaper bath mat products. This reaction produces permanent yellowing or staining of the vinyl that no cleaning removes. Natural rubber or non-staining synthetic rubber backing should be verified before placing any bath mat on vinyl. Removing and washing bath mats regularly also prevents moisture accumulation beneath them, which is the primary condition that promotes mold growth under bathroom vinyl flooring.
What Separates Bathroom-Grade Vinyl from General Residential Vinyl
The flooring industry does not enforce a formal “bathroom grade” designation the way it enforces AC ratings for laminate or Janka hardness ratings for wood. Bathroom suitability is assessed by combining three independent specifications: wear layer thickness (12 mil minimum), installation method (glue-down preferred, click-lock with vapor barrier acceptable), and subfloor moisture preparation (tested and mitigated).
A product that checks all three boxes — 12 mil or greater wear layer, installed with appropriate moisture management, over a properly prepared and moisture-tested subfloor — will perform in a bathroom regardless of whether it is marketed as “bathroom vinyl.” A product that misses any of these three criteria will eventually fail in a bathroom regardless of what its marketing says.
The vinyl flooring category as a whole has matured significantly. The full range of vinyl flooring types — LVP, LVT, SPC, WPC, and sheet vinyl — gives bathroom renovators genuinely good options at every price point and aesthetic preference. The challenge is no longer finding a vinyl product that can work in a bathroom. The challenge is understanding which format, spec, and installation combination is appropriate for the specific bathroom’s conditions — subfloor type, moisture exposure level, traffic pattern, and existing fixture layout — and executing that combination correctly.
The bathrooms that produce vinyl flooring failure stories on contractor forums are almost never cases of defective product. They are cases of the wrong product for the conditions, or the right product installed without moisture management. Address those two variables and vinyl bathroom flooring performs as well as any surface in the house — warmer and quieter than ceramic tile, far more moisture-resistant than hardwood or laminate, and durable enough to reach a decade of daily use before showing meaningful wear.
James Miller is a seasoned flooring contractor with years of hands-on experience transforming homes and businesses with high-quality flooring solutions. As the owner of Flooring Contractors San Diego, James specializes in everything from hardwood and laminate to carpet and vinyl installations. Known for his craftsmanship and attention to detail, he takes pride in helping clients choose the right flooring that balances beauty, durability, and budget. When he’s not on the job, James enjoys sharing his expertise through articles and guides that make flooring projects easier for homeowners.
Before a single hardwood plank ever touches your floor, there is a layer doing the most important structural work in the entire installation — the subfloor. Get it right, and your hardwood floors will stay flat, tight, and quiet for decades. Get it wrong, and you will be dealing with squeaks, cupping, gaps, and failed…
The bathroom is the one room where flooring decisions carry real consequences. Get it wrong and you are not just looking at cosmetic damage — you are dealing with swollen cores, subfloor rot, mold colonies, and a floor that fails in under five years. Laminate flooring in the bathroom sits right at the center of…
Bamboo flooring does not forgive a careless substrate setup. The underlay you choose is not a minor accessory — it is the functional layer that determines whether moisture rises into your planks, whether footsteps echo through the room, and whether the floor feels solid or springy underfoot. Get it wrong and even a premium strand-woven…
Pet stains on carpet are not simply a surface problem. When a dog or cat has an accident on carpet, the liquid does not sit on top of the fibers — it travels downward under the force of gravity, passing through the pile, soaking into the backing, saturating the padding beneath, and in cases of…
Loose lay vinyl flooring is a type of luxury vinyl plank (LVP) that relies entirely on friction and weight — not adhesive, nails, staples, or interlocking click-lock tabs — to stay in position on the subfloor. Each plank sits directly on the subfloor surface, held in place by a specialized rubber or fiberglass backing combined…
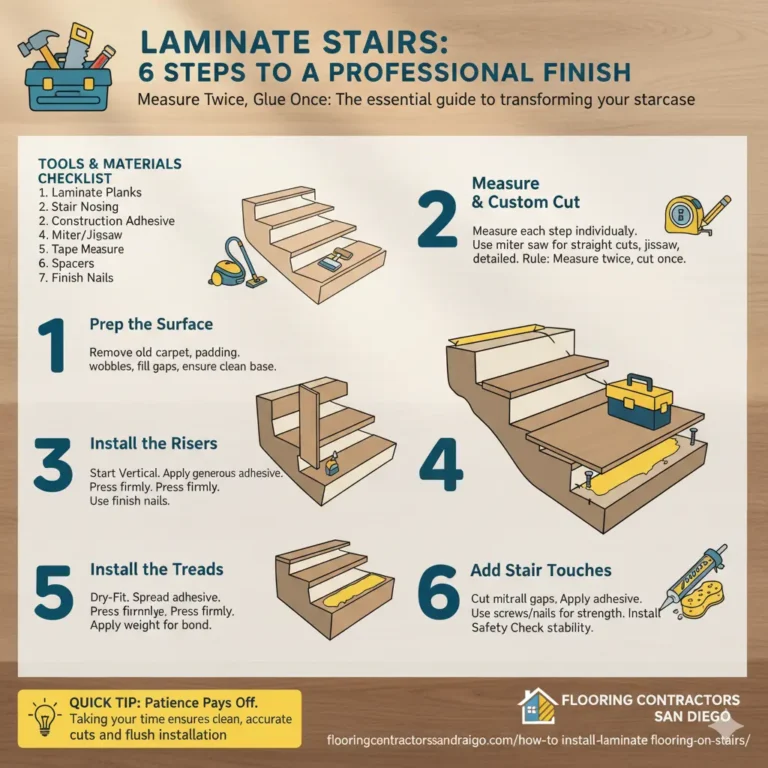
Stairs are the hardest surface in your house to floor. They take more weight per square inch than any other surface, they get used more often than the kitchen, and one loose plank turns into a slip hazard before the week is out. Laminate works on stairs, but only if you stop treating it like…