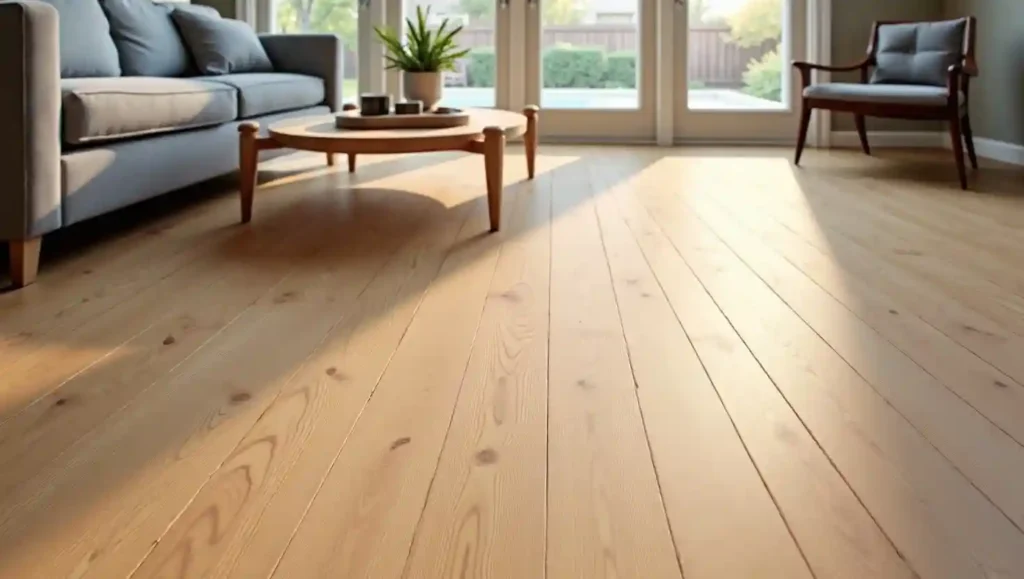
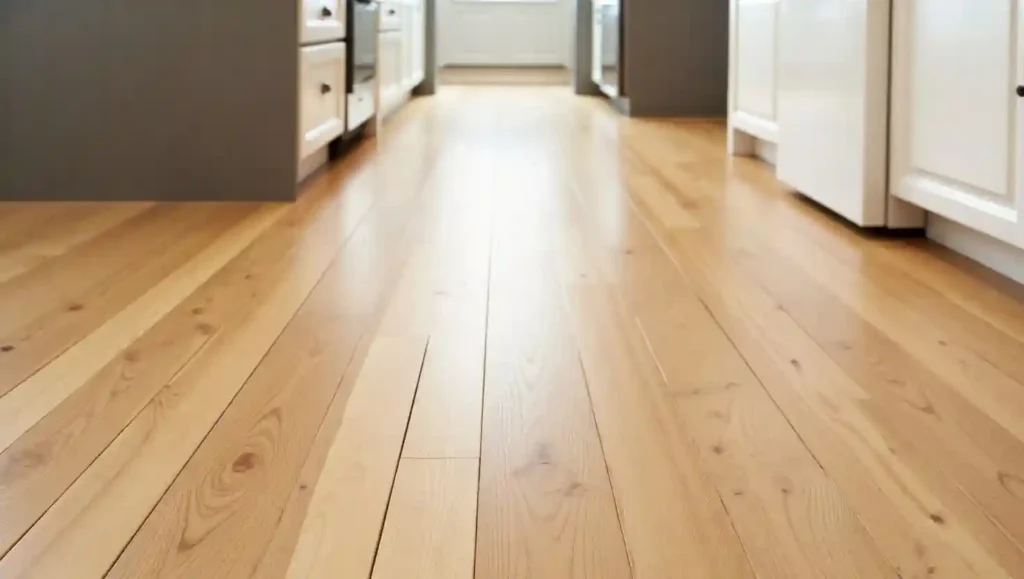
Budget range: $2.50 to $4.50 per square foot for materials. A 300-square-foot living room comes in at $750 to $1,350 in flooring alone before installation. If you DIY, you save the $2 to $5 per square foot labor cost entirely.
Design tip: Run the planks parallel to the longest wall in the room, or follow the direction of incoming natural light. Both approaches visually lengthen the space. Avoid running planks perpendicular to the longest wall — it creates a chopped, narrower effect that works against the wide-plank format.
Idea 2: Peel-and-Stick Vinyl Tile for a Budget Kitchen Refresh
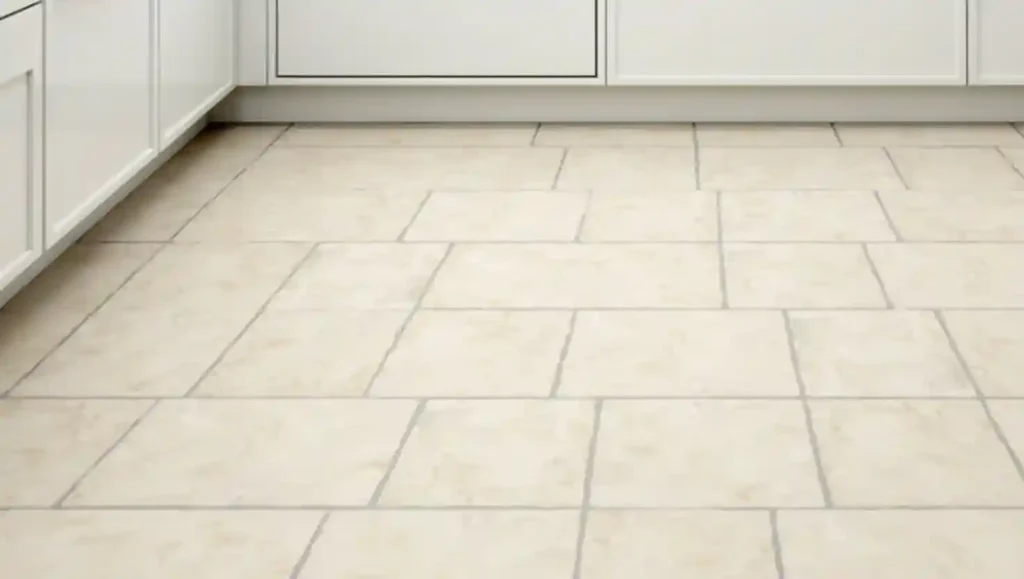
The kitchen is the most renovated room in any home, but full kitchen flooring replacement can feel paralyzing when you’re working with a tight budget. Peel-and-stick vinyl tile is the legitimate, practical answer. It costs as little as $0.50 to $2 per square foot, installs without any special tools, and goes directly over many existing hard floors that are clean, smooth, and firmly bonded to the subfloor.
The key is subfloor preparation — this is where most peel-and-stick failures originate. The adhesive requires a perfectly clean, smooth, flat surface. Any texture, dust, grease, or wax coating will cause tiles to lift at the edges within weeks, especially in the warmth and humidity of a kitchen. Take the time to clean thoroughly, fill low spots with floor leveler, and sand down any high points before laying a single tile. Roll the finished floor with a heavy roller or rolling pin to ensure full contact adhesion.
For kitchen use, select a groutable peel-and-stick vinyl tile. The grout lines elevate the look considerably — it becomes much harder to identify the product as a budget option — and the grouted seams also prevent moisture from working its way under the tiles, which is the main vulnerability of this format in cooking spaces. Stone-look and large-format patterns like travertine or slate work especially well because they fill more visual space with fewer seams.
Budget range: $0.50 to $2 per square foot for the tiles plus $5 to $15 for a tube of unsanded grout. For a 150-square-foot kitchen, total material cost often comes in under $400.
Idea 3: Sheet Vinyl in High-Moisture Bathrooms
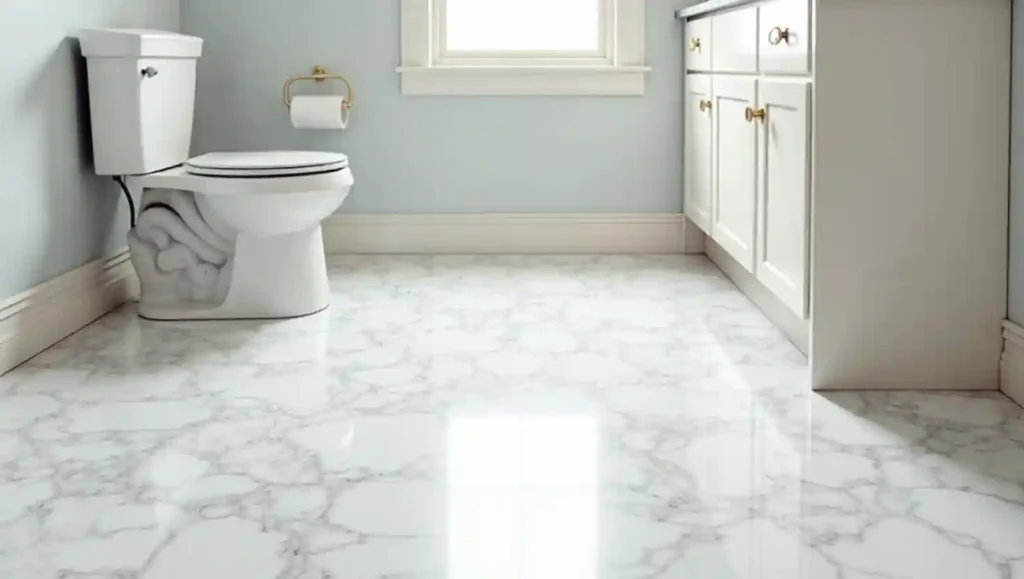
Bathrooms are where sheet vinyl makes its strongest case. A single continuous sheet eliminates seams entirely, creating what is essentially an impenetrable moisture barrier across the entire floor. There are no joints for water to work into, no grout to stain or deteriorate, and no individual tiles to lift in a room that gets daily exposure to humidity, steam, and direct splashing.
Sheet vinyl costs $1 to $4 per square foot for materials — roughly $50 to $200 for a standard bathroom under 100 square feet. The low material cost matters, but the bigger savings comes from the ease of installation in a small, enclosed space. Most homeowners can complete a bathroom sheet vinyl installation in a single afternoon with a utility knife, straightedge, and a can of vinyl adhesive for the perimeter edges.
Modern sheet vinyl has moved well past the outdated single-pattern rolls of previous decades. Current collections include convincing marble looks, wood looks, concrete-effect patterns, and stone designs printed with digital technology that produces genuine variation across the surface rather than a repeated tile pattern. The seamless nature of sheet vinyl actually makes these patterns more convincing — without grout lines interrupting the image, a marble-look sheet vinyl can read as the real thing in a small bathroom from normal viewing distances.
One practical consideration: because the sheet is cut to fit, bathroom installations require careful measurement and a single clean cut around fixtures and the toilet base. A paper template traced from the room outline makes this manageable for first-time installers.
Idea 4: Grey Vinyl Plank for a Modern Basement
Basements present a specific flooring challenge that vinyl solves better than almost any other material: moisture from below. Concrete subfloors in basements emit moisture vapor even when they appear perfectly dry to the eye. Hardwood absorbs this moisture and swells, buckles, or cups. Laminate delaminates. Carpet grows mold in the backing. Vinyl simply doesn’t absorb moisture at all — the waterproof construction extends through every layer of the plank.
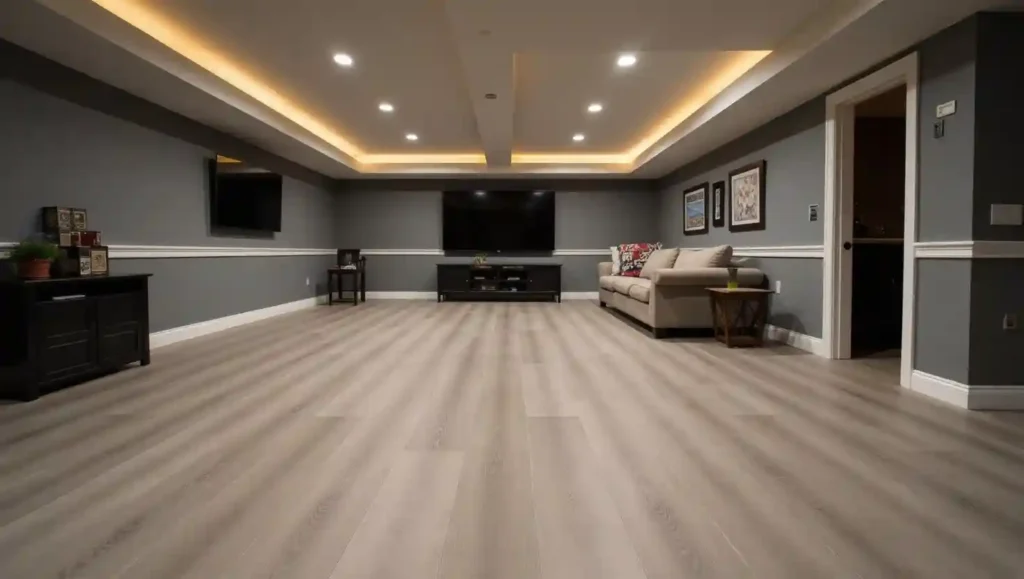
Grey vinyl plank in matte finish suits a basement transformation particularly well. The cool tone reads as deliberate and modern rather than as a compromise, coordinates with the industrial quality of poured concrete walls or exposed mechanicals that many basements feature, and hides the fine dust that basements tend to accumulate between cleanings.
For basement installation specifically, choose rigid core SPC (Stone Plastic Composite) over standard LVP. SPC flooring has a dense limestone composite core that provides dimensional stability in the temperature fluctuations typical of below-grade spaces. Standard LVP with a flexible core can gap or buckle in a basement that heats and cools seasonally. SPC maintains its dimensions through those cycles.
Most SPC products also include an attached underlayment foam layer, which serves a second basement-specific function: it provides a slight thermal and acoustic barrier between the cold concrete slab and the finished floor above. The basement feels warmer and sounds noticeably less hollow underfoot.
Budget range: SPC in the 4mm to 6mm range typically runs $2.50 to $4 per square foot — a modest premium over standard LVP that is absolutely worth paying for below-grade applications.
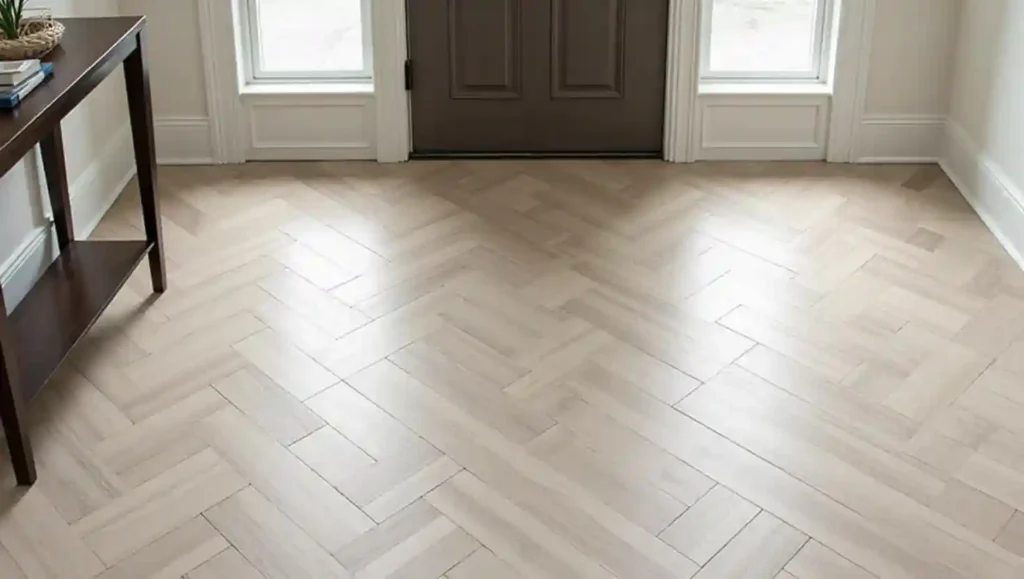
Idea 5: Herringbone Pattern Vinyl Tile for Entryways
The herringbone pattern is experiencing a full revival, and vinyl tile is the most accessible way to pull it off. True herringbone in ceramic tile or hardwood requires precise cutting, specialized tools, and significant installation skill. In vinyl tile — particularly peel-and-stick or click-lock formats cut to rectangular plank dimensions — the same visual result is achievable at a fraction of the material cost and without professional installation.
Entryways are the ideal location for this approach. The space is small enough that the extra cutting time doesn’t become overwhelming, and the herringbone layout creates an immediate visual impact the moment someone walks through the door. It signals intentional design rather than budget flooring, and the busier surface pattern does a better job of hiding the dirt, grit, and tracked-in debris that entryways accumulate than any straight-run pattern could.
Light greige and warm beige vinyl planks in the 3-inch to 4-inch width format work best for small herringbone installations — narrower planks at 45-degree angles create a tighter, more traditional weave that reads as deliberate and refined. Wider planks in herringbone can look clunky in a small entryway.
Budget range: Vinyl plank tiles suitable for herringbone runs $1.50 to $3 per square foot. The cuts required will increase material waste by approximately 10 to 15 percent, so buy accordingly.
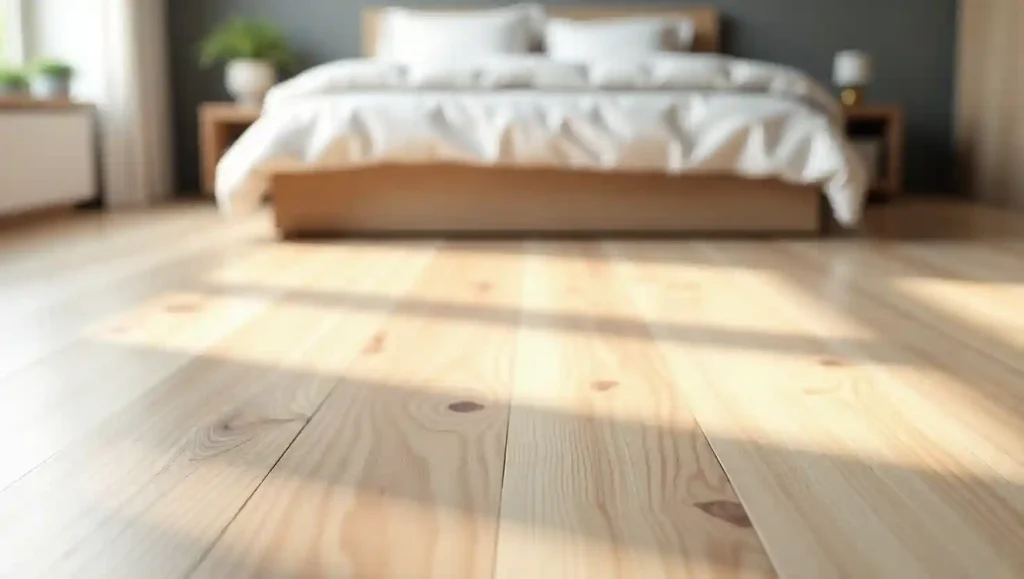
Idea 6: Wood-Look LVP in a Neutral Bedroom
Bedrooms don’t need waterproof flooring the way kitchens and bathrooms do, which opens up the full range of standard LVP options — including some of the thinner, more affordable 4mm to 6mm products that perform well in low-traffic sleeping spaces. In a bedroom, the priority shifts from pure durability to warmth, quiet, and how the floor feels on bare feet first thing in the morning.
Light oak and creamy neutral wood-look LVP creates exactly the soft, airy quality that works in bedrooms. The lighter tones reflect more natural light, making a bedroom feel more spacious, and the wood-look surface reads as warm without the maintenance anxiety of real hardwood. You don’t worry about water from a humidifier, scratches from dragged furniture, or spills from a glass of water on the nightstand.
For extra comfort underfoot, select LVP with a pre-attached foam underlayment rather than a bare-backed plank. The foam layer adds meaningful softness and provides a degree of acoustic insulation that keeps footstep noise from transmitting to rooms below — relevant in multi-story homes. If the product you’ve selected doesn’t include pre-attached underlayment, a separate thin foam underlayment installed below the planks achieves the same result for $0.20 to $0.50 per square foot.
Budget range: 4mm to 6mm click-lock LVP with pre-attached underlayment runs $1.50 to $3.50 per square foot in light wood tones — genuinely affordable for a room that typically runs 150 to 250 square feet.
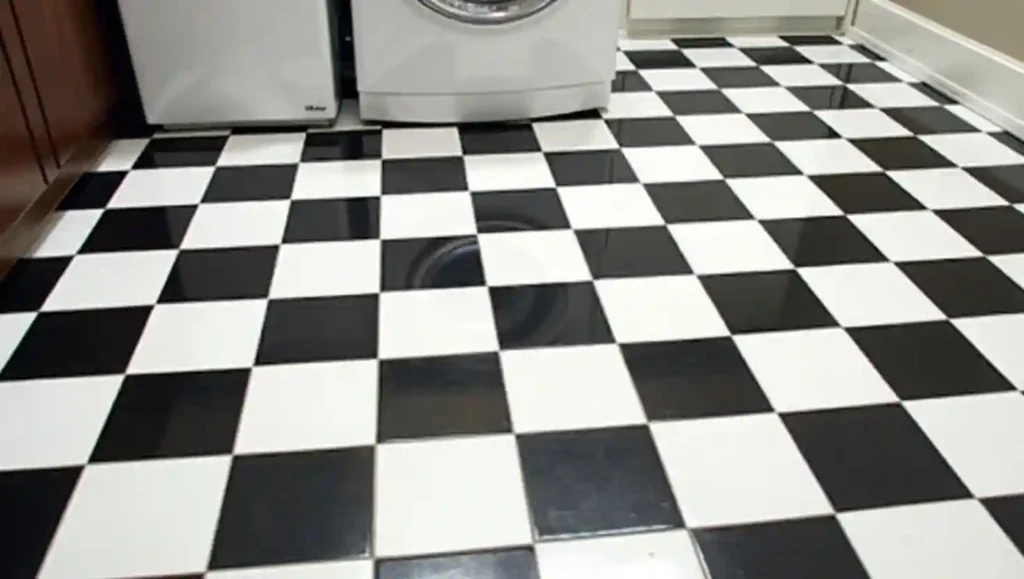
Idea 7: Checkerboard Vinyl Tile in a Laundry Room or Mudroom
The checkerboard floor is having a genuine moment — it appears in high-end kitchen renovations, spa-style bathrooms, and farmhouse utility spaces alike. The version most people aspire to involves black-and-white marble or ceramic tile installed in a diamond or square orientation. The version that costs under $1.50 per square foot is vinyl.
Peel-and-stick vinyl tile in 12-inch squares makes checkerboard installation extremely straightforward. The square format eliminates the angled cuts that complicate checkerboard in other materials — you simply alternate colors in a grid pattern, working outward from the center of the room. Total installation time for a laundry room is typically two to three hours including floor prep.
The laundry room and mudroom are ideal applications for this look. Both spaces are functional rather than formal, which means the high-contrast pattern suits the no-nonsense character of the room without looking out of place. Both also see spills, mud, and tracked-in dirt — the dark tiles in the alternating pattern absorb visual noise that would show starkly on a solid white floor.
For a more elevated version of this idea, choose groutable vinyl tiles and apply white grout between the black-and-white squares. The grout lines transform the appearance from clearly vinyl to genuinely tile-like, and the modest additional time investment is worth it in a space where you want a more finished result.
Budget range: $0.75 to $1.50 per square foot for peel-and-stick vinyl tile in alternating colors. A laundry room at 60 to 80 square feet totals $45 to $120 in materials.
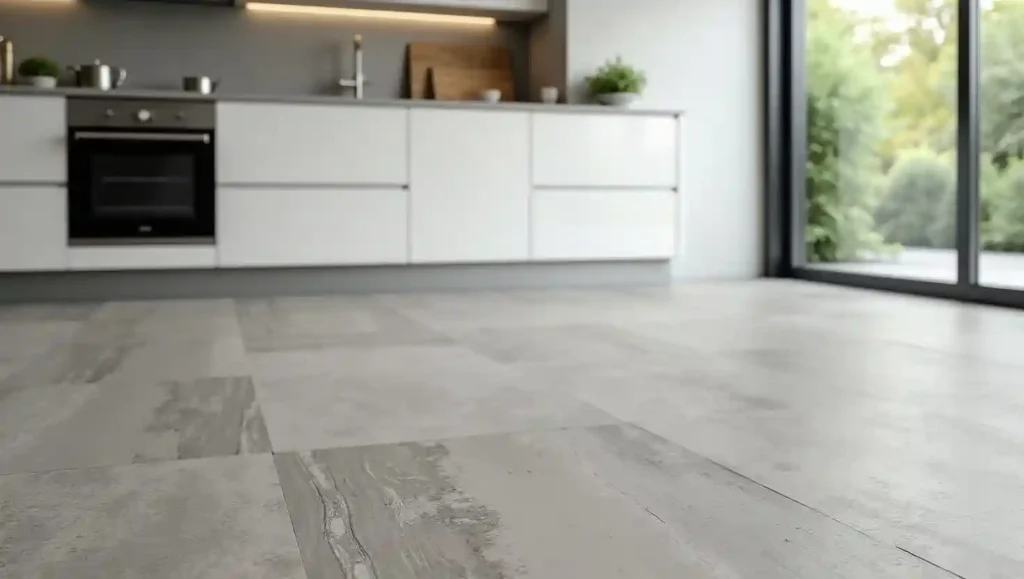
Idea 8: Stone-Look Vinyl Plank for Kitchens and Bathrooms
Not every kitchen or bathroom calls for a wood look. Stone and tile aesthetics — slate, travertine, concrete grey, and matte marble — create a cleaner, more contemporary result in many modern interiors. The challenge with real stone tile is the cost: material alone for marble or travertine runs $5 to $25 per square foot before installation, grout, and sealing. The total installed cost frequently exceeds $15 to $30 per square foot for premium natural stone.
Stone-look luxury vinyl tile (LVT) replicates this aesthetic at $1.50 to $4 per square foot. Advanced printing and registered embossing technology — where the surface texture physically matches the printed pattern — creates a visual convincingness that earlier vinyl generations couldn’t approach. The matte finish that most stone-look LVT uses also reduces the “plasticky” sheen that dated vinyl products suffered from, leaning much closer to the flat surface quality of real honed stone.
In a kitchen, large-format stone-look LVT in 12×24-inch or 18×18-inch sizes creates fewer grout lines and a more expansive, expensive feel. In a bathroom, the same material in a smaller scale mosaic format adds pattern interest around a shower entry or at the foot of a freestanding tub. Both applications benefit from the fact that vinyl flooring performs exceptionally well in wet zones that would require sealing, maintenance, and careful moisture management if using actual stone.
Budget range: Stone-look LVT runs $1.50 to $4 per square foot. Large-format tiles in the 12×24-inch range occasionally require professional installation to achieve consistent layout and grout lines, which adds $2 to $4 per square foot — still far below the cost of real stone tile installed.
Idea 9: Click-Lock LVP Over Existing Tile — The No-Demo Budget Install
One of the most underused cost-saving strategies in flooring renovation is installing new click-lock LVP directly over existing, sound ceramic or porcelain tile. Tile demolition alone costs $1 to $3 per square foot in labor plus disposal fees — on a 500-square-foot open floor plan, that’s $500 to $1,500 removed from your budget before you’ve purchased a single plank of new flooring. If the existing tile is firmly bonded, flat, and in reasonably good condition, going over it is often both a practical and economically smarter choice.
The considerations are specific: the existing tile surface must be smooth, without raised edges from chipped or uneven tiles, and the floor height gain must not create a significant step-up issue at doorways or transitions. Click-lock LVP at 5mm to 8mm thickness adds approximately 3/16 to 5/16 of an inch to the floor height — manageable with transition strips in most doorways and not enough to create problems with appliances or interior door clearances in the vast majority of homes.
This approach is particularly powerful in kitchens and bathrooms where existing ceramic tile is in good structural shape but visually outdated. Installing new vinyl over existing tile transforms the look completely while skipping the mess, noise, and waste of demo. The result is a fully modern floor at a cost that often runs 30 to 50 percent less than a tear-out-and-replace approach.
Budget range: Click-lock LVP installed over existing tile: $2.50 to $5 per square foot for materials. Savings versus demo and tile removal: $1,000 to $2,000 on a typical 500-square-foot floor.
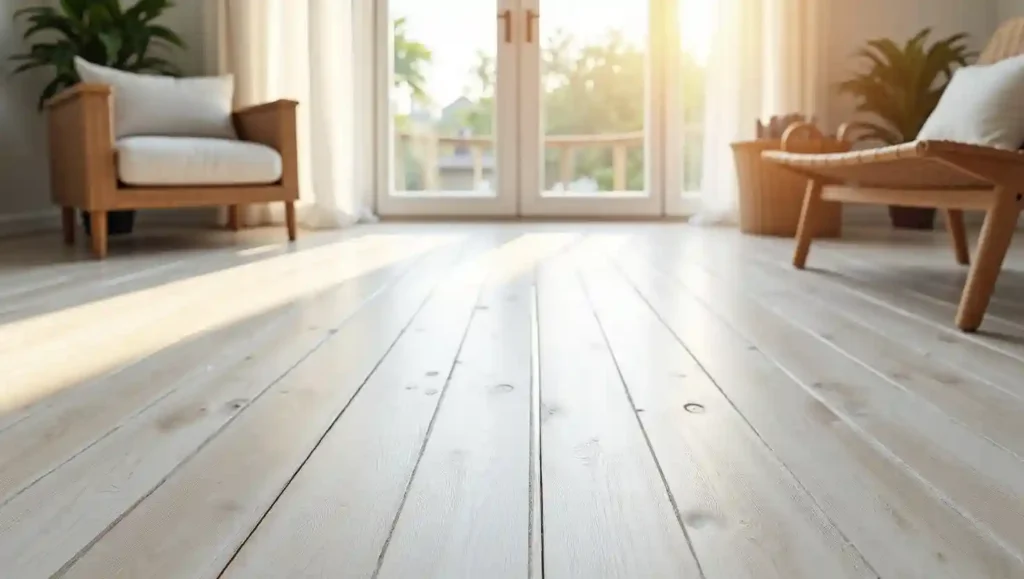
Idea 10: Coastal Whitewashed Vinyl Plank for Beach-House Vibes
Coastal and beach-influenced interior design is one of the most consistently strong aesthetics in residential renovation, particularly in warm-climate regions. Whitewashed and weathered driftwood-grey vinyl planks are the budget-appropriate way to achieve this look without importing reclaimed beach wood or paying premium prices for character-grade hardwood with bleached finishes.
The aesthetic works through a combination of plank color and finish: pale, washed-out white-to-grey tones with visible but soft grain variation, a flat matte finish that reads as naturally weathered rather than newly manufactured, and slight color variation between individual planks that mimics the organic inconsistency of reclaimed wood. Modern digital printing makes all of these qualities achievable in vinyl at entry-level price points.
This flooring approach works in living rooms, bedrooms, and sun-filled family rooms throughout a beach home. The light tone makes spaces feel airy and naturally lit even on overcast days. It pairs directly with light linen, natural jute, whitewashed furniture, and the relaxed, unpretentious furniture choices that define coastal interiors. Beach homes have specific flooring requirements around salt air, humidity, and sand abrasion — vinyl’s inherent moisture resistance and scratch-resistant wear layer address both concerns simultaneously.
Budget range: Whitewashed or coastal-tone LVP runs $2 to $4 per square foot in most collections, placing it firmly in the budget category while delivering one of the most visually distinctive results on this list.
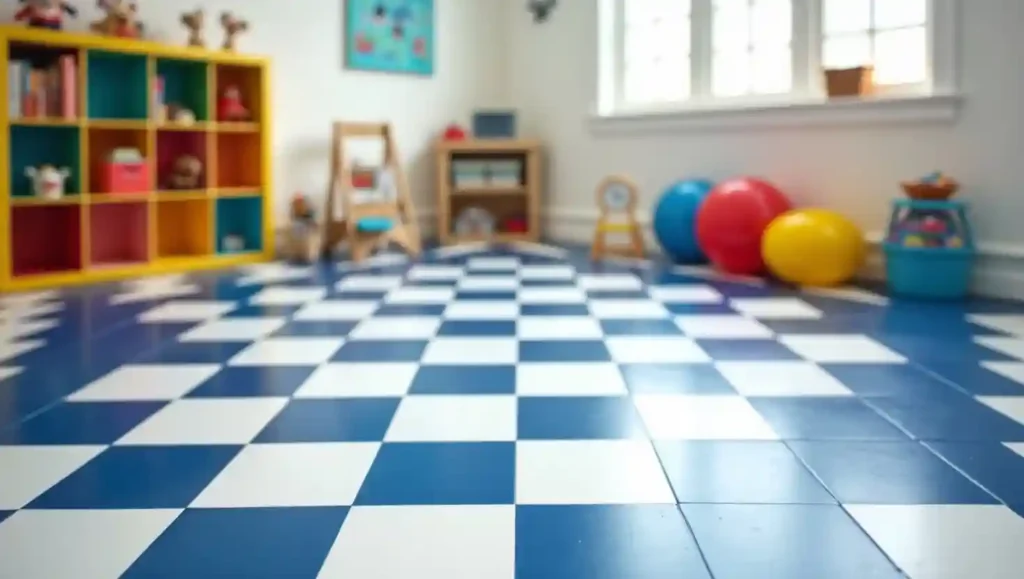
Idea 11: Mix-and-Match Vinyl Tile Patterns in a Kids’ Room or Playroom
Children’s spaces offer more design freedom than any other room in the house, and budget vinyl tile takes full advantage of that. Unlike adult living spaces where consistency and cohesion drive most design decisions, a kids’ room or playroom rewards color, pattern, and playful variation. Vinyl tile in multiple colors can be mixed to create custom checkerboard, striped, or random patchwork patterns that would cost a small fortune to achieve in ceramic or hardwood.
Peel-and-stick vinyl tiles in 12-inch squares at $0.50 to $1.50 per square foot make this kind of custom pattern layout genuinely affordable. A 150-square-foot playroom using four different colors in a rotational pattern can be done for under $200 in materials. The tiles are also individually replaceable — when a section sustains heavy damage from rolling toys or craft projects, you pull the affected tiles and replace only those squares rather than the entire floor.
For playrooms specifically, vinyl tile with a cushioned backing adds meaningful impact absorption — not a substitute for play mats under climbing structures, but a significant improvement over hard ceramic or concrete beneath the ambient play area. The softer surface also reduces noise transmission from the inevitable jumping and running that defines how kids use these spaces.
Color selection tip: Two-color combinations (navy and white, forest green and cream, terracotta and sand) typically read more intentional and less chaotic than five or six colors. Let the pattern create the energy rather than the color count.
What Actually Separates Budget Vinyl That Holds Up from Budget Vinyl That Doesn’t
Getting the ideas right matters less than buying the right product for each idea. Budget vinyl flooring ranges from $0.50 per square foot products that will degrade in eighteen months to $4 to $5 products that legitimately last fifteen to twenty years. The difference isn’t primarily price — it’s a few specific technical specifications that anyone can check before purchasing.
Wear layer thickness is the single most important durability factor. The wear layer is the transparent protective coating over the print layer — it’s the only thing standing between daily foot traffic and the printed image below. For residential bedrooms and low-traffic spaces, a 6-mil wear layer is acceptable. For kitchens, hallways, and living rooms, 12 mil is the minimum worth buying. For homes with large dogs, heavy furniture movement, or genuinely high foot traffic, 20 mil is worth the modest price premium it commands.
Core type and thickness determines dimensional stability. Standard LVP with a flexible vinyl core expands and contracts with temperature changes. For below-grade installations, spaces without climate control, or rooms that heat and cool significantly through the seasons, rigid core SPC or WPC construction eliminates this movement. The differences between SPC and WPC cores come down to density and flexibility — SPC is harder and more dimensionally stable, WPC is slightly softer underfoot. Both outperform standard flexible-core LVP in temperature-variable spaces.
Locking system quality affects both installation ease and long-term floor integrity. Cheap click-lock systems produce joints that don’t engage firmly, creating gaps that widen over time and catch debris. When evaluating products, read reviews specifically for mentions of clicking difficulty, joint gaps, or planks that don’t stay locked — these are the indicators of a poorly engineered locking system regardless of what the product description claims.
Finally, always buy ten to fifteen percent more material than your square footage measurement. This accounts for edge cuts, the occasional damaged plank, and — critically — the fact that matching discontinued products years later when you need a repair is often impossible. The extra material stored in a closet is cheap insurance against that problem.
Installation Methods and What Each One Costs on a Budget
Budget vinyl flooring spans three installation methods, and the choice significantly affects both total project cost and long-term performance.
Click-lock floating installation is the dominant method for budget LVP and SPC. The planks lock together without adhesive, creating a floor that moves as a single unit over the subfloor. It’s DIY-friendly, requires only a saw, tapping block, and pull bar, and can be completed by most homeowners in a weekend for a standard-sized room. The full installation process for vinyl plank follows a consistent sequence regardless of the specific product you choose.
Peel-and-stick self-adhesive tile is the lowest-barrier entry point — no special tools, no acclimation period, and the fastest possible installation. The tradeoff is that the adhesive bond depends entirely on subfloor quality and preparation. Rushed or poorly prepared peel-and-stick installations fail at the edges within months. Done properly over a perfectly clean, smooth subfloor, peel-and-stick vinyl tile lasts five to ten years in low-traffic spaces.
Glue-down sheet vinyl requires the most skill but delivers the most durable result for moisture-prone spaces. The continuous sheet with perimeter adhesive creates the impermeable moisture barrier that makes sheet vinyl the preferred choice for bathrooms and laundry rooms. Choosing the right adhesive for your specific subfloor type — concrete, wood, or plywood — is a critical step that affects both the bond strength and the long-term performance of the installation.
Final Thoughts: Getting the Most from a Vinyl Flooring Budget
Vinyl flooring’s evolution from utilitarian budget option to a legitimate design material has been one of the more remarkable developments in residential renovation over the past decade. The products available now — the realistic wood grain printing, the rigid core engineering, the matte stone-look finishes — were genuinely not achievable at these price points even five years ago. A $2.50 per square foot LVP product today would have cost $6 to $8 per square foot to approximate in 2018.
The eleven ideas in this guide span the full range of what’s achievable with vinyl flooring on a constrained budget: a living room transformation, a kitchen that looks tiled without the tile cost, a bathroom with seamless waterproof coverage, a basement that finally feels finished, and a playroom that’s actually designed for how kids use it. None of them require premium products or professional installation to execute successfully.
What they do require is honest assessment of your subfloor, accurate measurement, the right product specification for the application, and enough patience to prepare the surface properly before the first plank goes down. The preparation work is where budget vinyl installations succeed or fail — the actual laying of the floor is almost always the easier half of the project.
For homeowners weighing vinyl against competing options at similar price points, it’s worth understanding the full cost picture of vinyl flooring including installation, underlayment, and transition strips before finalizing a budget. The material cost is only one component of what you’ll actually spend to get floors that look and perform the way the ideas above describe.
James Miller is a seasoned flooring contractor with years of hands-on experience transforming homes and businesses with high-quality flooring solutions. As the owner of Flooring Contractors San Diego, James specializes in everything from hardwood and laminate to carpet and vinyl installations. Known for his craftsmanship and attention to detail, he takes pride in helping clients choose the right flooring that balances beauty, durability, and budget. When he’s not on the job, James enjoys sharing his expertise through articles and guides that make flooring projects easier for homeowners.
Loose lay vinyl flooring is a type of luxury vinyl plank (LVP) that relies entirely on friction and weight — not adhesive, nails, staples, or interlocking click-lock tabs — to stay in position on the subfloor. Each plank sits directly on the subfloor surface, held in place by a specialized rubber or fiberglass backing combined…
The installation method you choose for vinyl flooring determines more than just how long the job takes. It shapes how the floor performs under temperature swings, how it behaves when moisture enters the picture, whether you can fix a damaged plank three years from now without tearing up the whole room, and what happens to…
The short answer is yes — but the longer answer is that not every vinyl flooring product is built for what a deck actually puts it through. A deck is a fundamentally different environment than anything inside your house. It faces direct UV exposure, pooling rainwater, freeze-thaw cycling, insects, mold pressure, and subfloor movement that…
The subfloor is the decision that determines everything that follows. It decides whether your laminate clicks together cleanly or fights you on every row. It decides whether your floor develops gaps in winter and bubbles in summer. It decides, ultimately, whether the money you spent on laminate was an investment or an expense. Most guides…
What Actually Happens When You Lay Vinyl Over Carpet The question sounds simple: can you lay vinyl flooring directly over existing carpet? The answer that most flooring guides give you is a flat “no” — and they move on. That answer is technically defensible, but it misses the entire conversation that happens in the real…
A carpet snag is a fiber or loop that has been pulled above the surface of the carpet pile, creating a raised strand that sits visibly higher than the surrounding tufts. The term covers two structurally different events: a pulled fiber in a cut-pile carpet, where an individual strand lifts and separates from the weave,…